Useful Misc Functions
Add User While Inside A Ticket
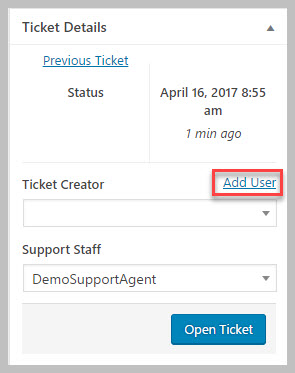
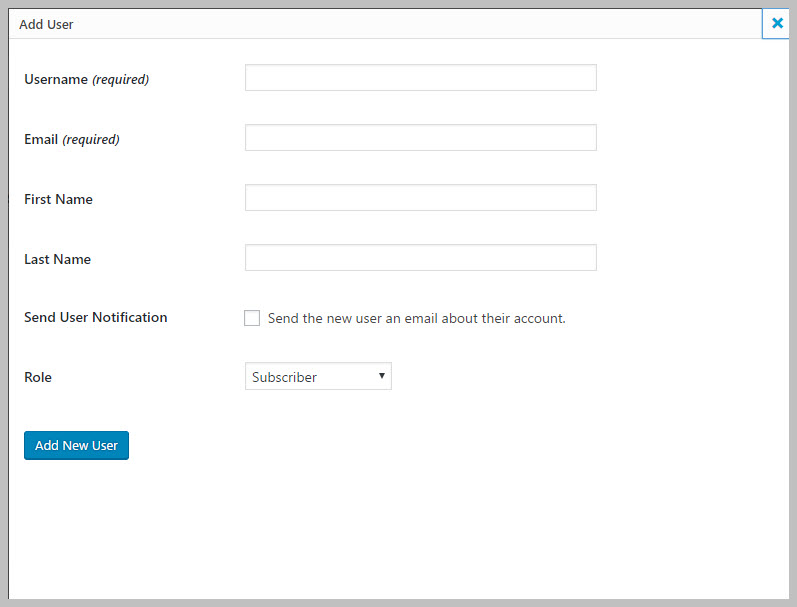
An agent can now add a user directly from the ticket screen. Lets say that an agent is taking a phone call from a customer and needs to open a new ticket for that customer. Instead of navigating away from the ticket screen, the agent can simply add the new user directly from the new ticket screen. The Add User link is located in the Ticket Details metabox (usually located on the right hand side of the ticket screen).
Ticket List In User Profile Screen
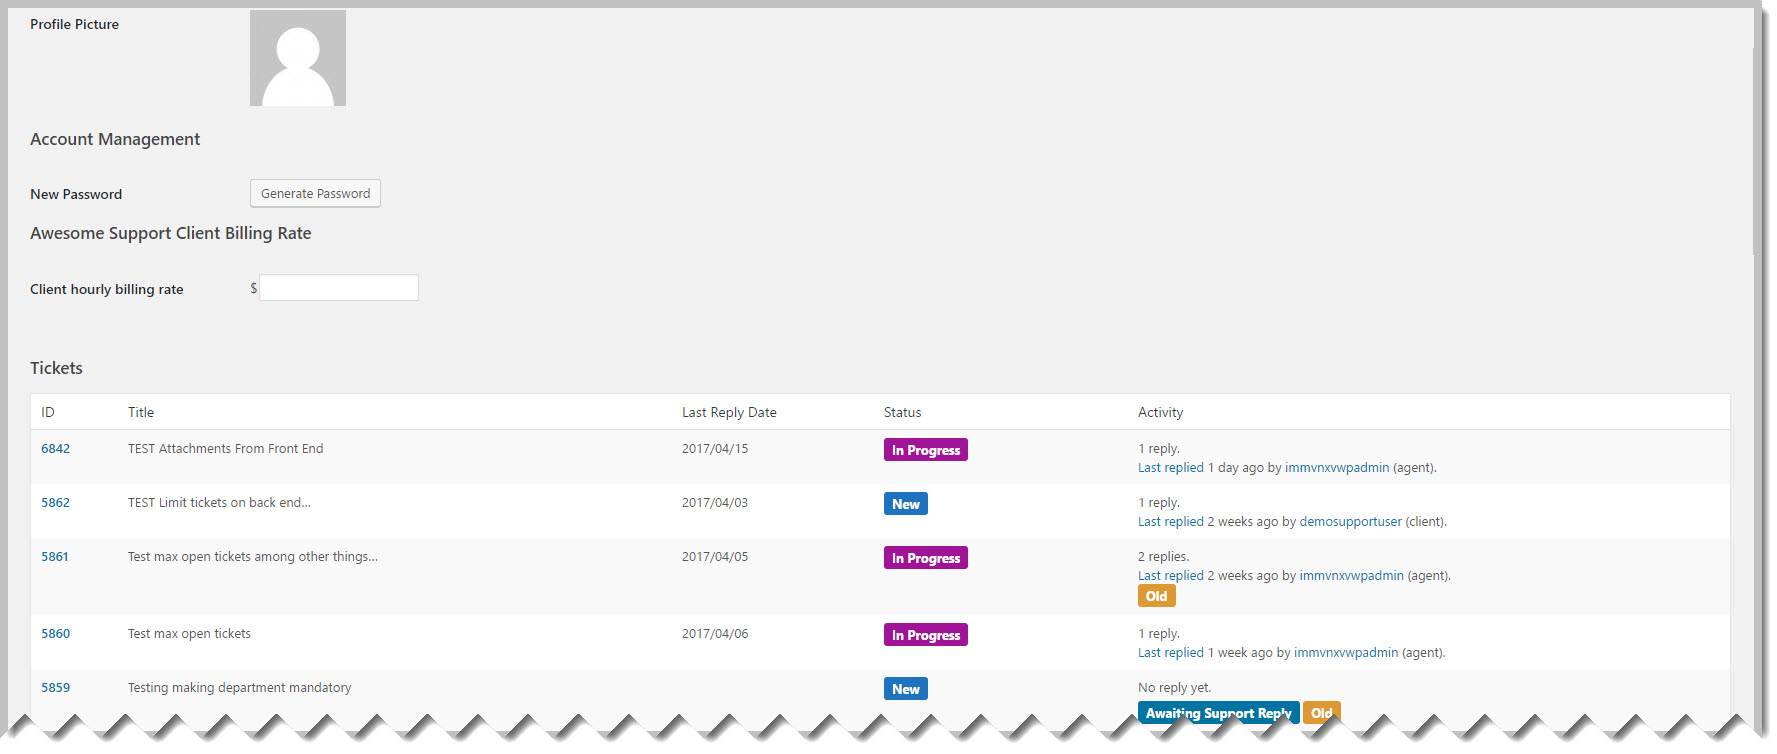
Admins with access to the user profile screen can now see a list of tickets for the user directly in that screen. Clicking the ticket # will take you directly to the ticket screen.
Make the Product Field Mandatory
- Go to TICKETS->SETTINGS->PF OPTIONS tab
- Scroll down to the Mandatory Fields section
- Click the checkbox for Make Product Mandatory
- Scroll down and click the Save Changes button.
Note that this makes the field mandatory on both the front-end and back-end. This means that agents editing a ticket will be forced to enter a product if the product field is empty.
Make the Department Field Mandatory
- Go to the TICKETS->SETTINGS->PF OPTIONS tab
- Scroll down to the Mandatory Fields section
- Click the checkbox for Make Department Mandatory
- Scroll down and click the Save Changes button.
Note that this makes the field mandatory on both the front-end and back-end. This means that agents editing a ticket will be forced to enter a department if the department field is empty.
Set Maximum Number Of Open Tickets For Each User
This function is useful if you have users that are abusing your free support. To limit a user to a certain number of open tickets:
- Go to the TICKETS->SETTINGS->PF OPTIONS tab
- Scroll down to the Other section
- Use the slider next to Maximum Number Of Open Tickets to set the maximum number of tickets.
- Scroll down and click the Save Changes button.
Note that this setting is only applicable if the user is opening a ticket on your website. It does not apply to tickets opened with the Gravity Forms integration or opened via EMAIL.
Limit the Number Of Tickets Shown In The User Profile Widget
The User Profile Widget inside a ticket will show the number of tickets a user has opened/closed with you along with a list of those tickets. By default it shows 10 tickets. Sometimes you might want it to show more tickets or less tickets. To do this:
- Go to the TICKETS->SETTINGS->PF OPTIONS tab
- Scroll down to the Other section
- Use the slider next to Maximum Open Tickets In User Profile Widget to set the maximum number of open tickets to show.
- Use the slider next to Maximum Closed Tickets In User Profile Widget to set the maximum number of closed tickets to show.
- Scroll down and click the Save Changes button.
Allow Certain Agents To Use The Full Editor
By default the editor has restricted functionality. But, you can assign the capability edit_ticket_with_full_editor to an agent role and those agents will see the full WordPress editor.
Assign Capabilities To Roles
Under normal circumstances WordPress does not ship with a visual way to assign capabilities to roles. However, the as of version 2.1.0 the Powerpack add-on includes a bare-bones capability assignment function. You can access it via the TICKETS->TOOLS->CAPABILITIES tab.
More Topics In Productivity Powerpack
- Productivity
- Installation (Powerpack)
- Overview
- Security Profiles for Agents
- Ticket Lock
- Ticket Merge (Single Ticket)
- Ticket Split / Ticket Duplicate
- Ticket Merge (Multiple Tickets)
- New Email Templates For Ticket Merging
- Additional Navigation
- ATTACHMENTS Template Tag For Outgoing Emails
- Custom Fields Template Tags For Outgoing Emails
- Full Ticket Template Tag For Outgoing Emails
- Support Notes For Customer/Client
- Personal Notes For Agents
- Personal Todo Lists For Agents
- Set Content Before the SUBMIT Button (On the Front-end)
- Set Content Before the SUBJECT Field (On the Front-end)
- Set Default Content For SUBJECT and DESCRIPTION Field (On the Front-end)
- Change Label Text
- Agent Signatures
- Click-To-View Email Template Tag
- Click-To-Close Email Template Tag
- Multiple E-mail Addresses For Tickets, End-Users And Agents
- Invisible Captcha
- Save Ticket List Filters
- Custom CSS For Awesome Support Pages
- Bulk Edit Functions


