ADMIN: Short Codes And Pages
The Ticket Submit Shortcode
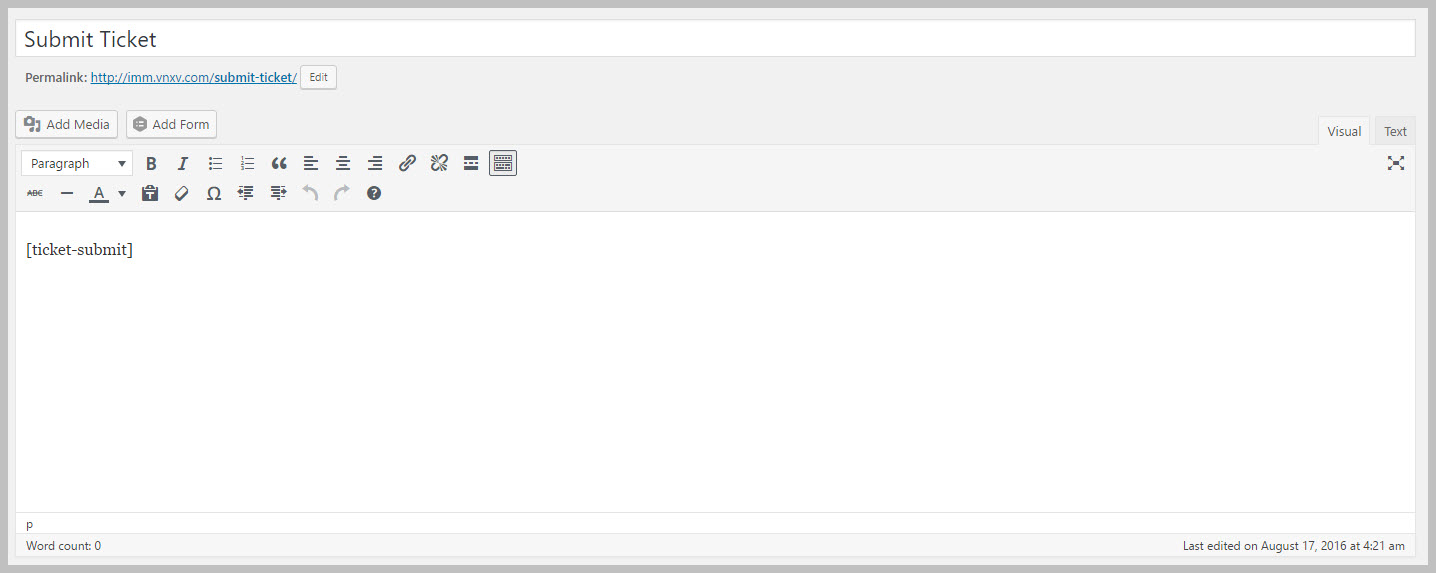
When Awesome Support is installed it automatically creates a new page called SUBMIT TICKET that contains the ticket-submit shortcode. This is the page that will be used when the user needs to open a support ticket on your system.
Shortcodes in WordPress are enclosed with square brackets but we don’t include them in this documentation since they will trigger and show the page itself instead of the shortcode. See the image below for what they should look like in the page though.
You also can place this short code in other pages.
Setting Your Default Ticket Submission Page
While you can place the short-code on any page you like, you still need to choose a default page. This is the page that will contain Awesome Support’s default styling so that the login screen looks good. You need to let Awesome Support know which page you’ve chosen to be the default. To do so:
- Go to the TICKETS->SETTINGS-GENERAL tab
- Scroll down to the PLUGIN PAGES section (close to the bottom)
- Select the default page used for Ticket Submission.
The Tickets Shortcode
The tickets shortcode is placed on the page where the end user will view their existing list of tickets. Upon installation, Awesome Support creates a page called My Tickets with this shortcode on it.
You can also place the shortcode in any other page – for example at the top or bottom of the My Account page used by WooCommerce or EDD.
While you can place the short-code on any page you like, you still need to choose a default page. And, you need to let Awesome Support know which page you’ve chosen to be the default. To do so:
- Go to the TICKETS->SETTINGS-GENERAL tab
- Scroll down to the PLUGIN PAGES section (close to the bottom)
- Select the default page used for Ticket List.
FAQ: Can I put both shortcodes on the same page?
Unfortunately that is not an option. If you do so you might see strange results!
More Topics In Awesome Support Core
- Awesome Support
- How To Create A Ticket On Behalf Of The Client?
- What's New In Awesome Support
- Installation
- Post Installation – What You Need To Know (Quick Start)
- Post Installation - Enter Your First Ticket (As A Customer)
- Post Installation: Adjust Security
- Basic Admin: Add An Agent
- Basic Admin: Turn Off Ticket Assignment To An Agent
- Agent Functions: Manage The Ticket List
- Using POEDITOR.COM For Translations
- Agent Functions: View All Tickets
- Agent Functions: Navigate To A Ticket (View Ticket)
- Agent Functions: Explore The Ticket Interface
- Agent Functions: Reply To A Ticket
- Agent Functions: Close A Ticket
- Agent Functions: Add An Internal Note (Premium)
- Agent Functions: Track Time Spent On A Ticket (Basic)
- WPML and POLYLANG
- ADMIN: Overview
- ADMIN: User Registration Options
- ADMIN: Configure Products
- ADMIN: Synchronize Products With WooCommerce And Easy Digital Downloads
- ADMIN: WooCommerce Integration (Basic)
- ADMIN: Configure Departments
- ADMIN: Configure Email Alerts
- ADMIN: Email Template Sets
- ADMIN: Configure Priorities
- ADMIN: Configure Channels
- ADMIN: Configure Status Colors
- ADMIN: Multiple Agents Per Ticket
- ADMIN: Basic Time Tracking
- ADMIN: Misc Display Options For Agents and Admins
- ADMIN: Misc Display Options For Customers (Front-end Users)
- ADMIN: Misc Display Permissions
- ADMIN: Misc Display Options (Advanced)
- ADMIN: File Upload Options
- ADMIN: Deleting Attachments (Manual and Automatic)
- ADMIN: Advanced System Options
- ADMIN: Audit Trail Options
- ADMIN: Handling Existing Users After Installation
- ADMIN: Roles And Capabilities
- Roles and Capabilities Table
- ADMIN: Roles And Capabilities In Add-ons
- ADMIN: WP-CONFIG Options
- ADMIN: Multiple Ticket Forms
- ADMIN: Multi-Vendor Marketplaces
- Multisite Considerations
- Known Plugin Incompatibilities and Conflicts
- Cookies

