Artificial Intelligence With Dialogflow (Formerly API.ai)
You can create responses using machine learning and artificial intelligence to understand the intention of your users. You do this by integrating with the API.ai service from google. While not very complicated it does take multiple steps to get things set up properly.
In order to really make the best use of Dialogflow and return the most relevant results to your users you should be prepared to spend some time to teach it about your support operations. The Google Dialogflow help pages is a great way to get started. (Note: We do offer custom services to do this for you so contact us if this is something you would like us to do for you.)
Sign up for a Dialogflow account
To get started you must sign up for an API.ai account – which means that you’ll need a Google account and possible a Google Cloud Services account.
Create a Dialogflow “Agent”
Once you have an account set up you should access the console at https://console.dialogflow.com and locate the option to create a new agent. Create the agent using the SUPPORT pre-built agent template.
You can name your new agent “MY SUPPORT” or something similar.
Configure Intents
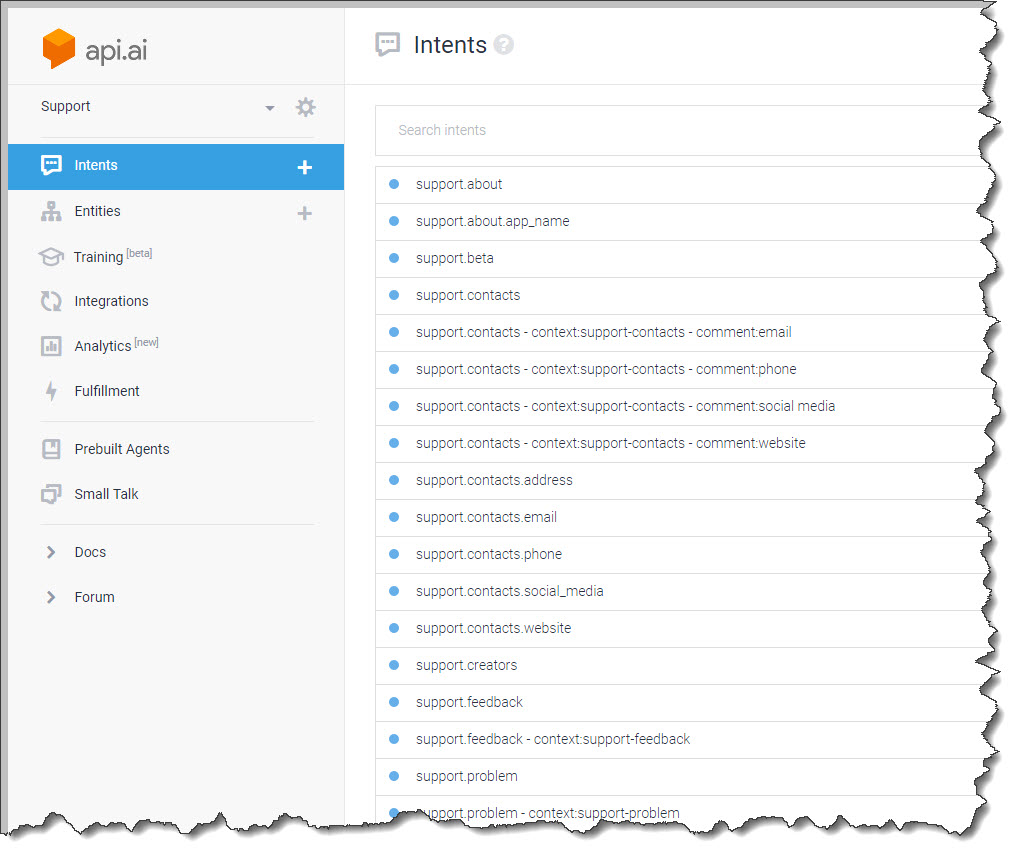
API.ai uses the concept of “Intents”. At the simplest level Intents allow you to match keywords to data that should be returned to the user. When you used the SUPPORT template to create your new SUPPORT agent, API.ai installed some relevant Intents for you to configure. You can find these by going to to the INTENTS menu option on the left side of the API.ai console. Your screen should look something like this:
Each item in the INTENTS list matches a potential question that the user might want answered. Inside of each INTENT is a series of keywords – you will need to provide appropriate answers for each Intent (keywords) so that the user will receive an appropriate response to their question.
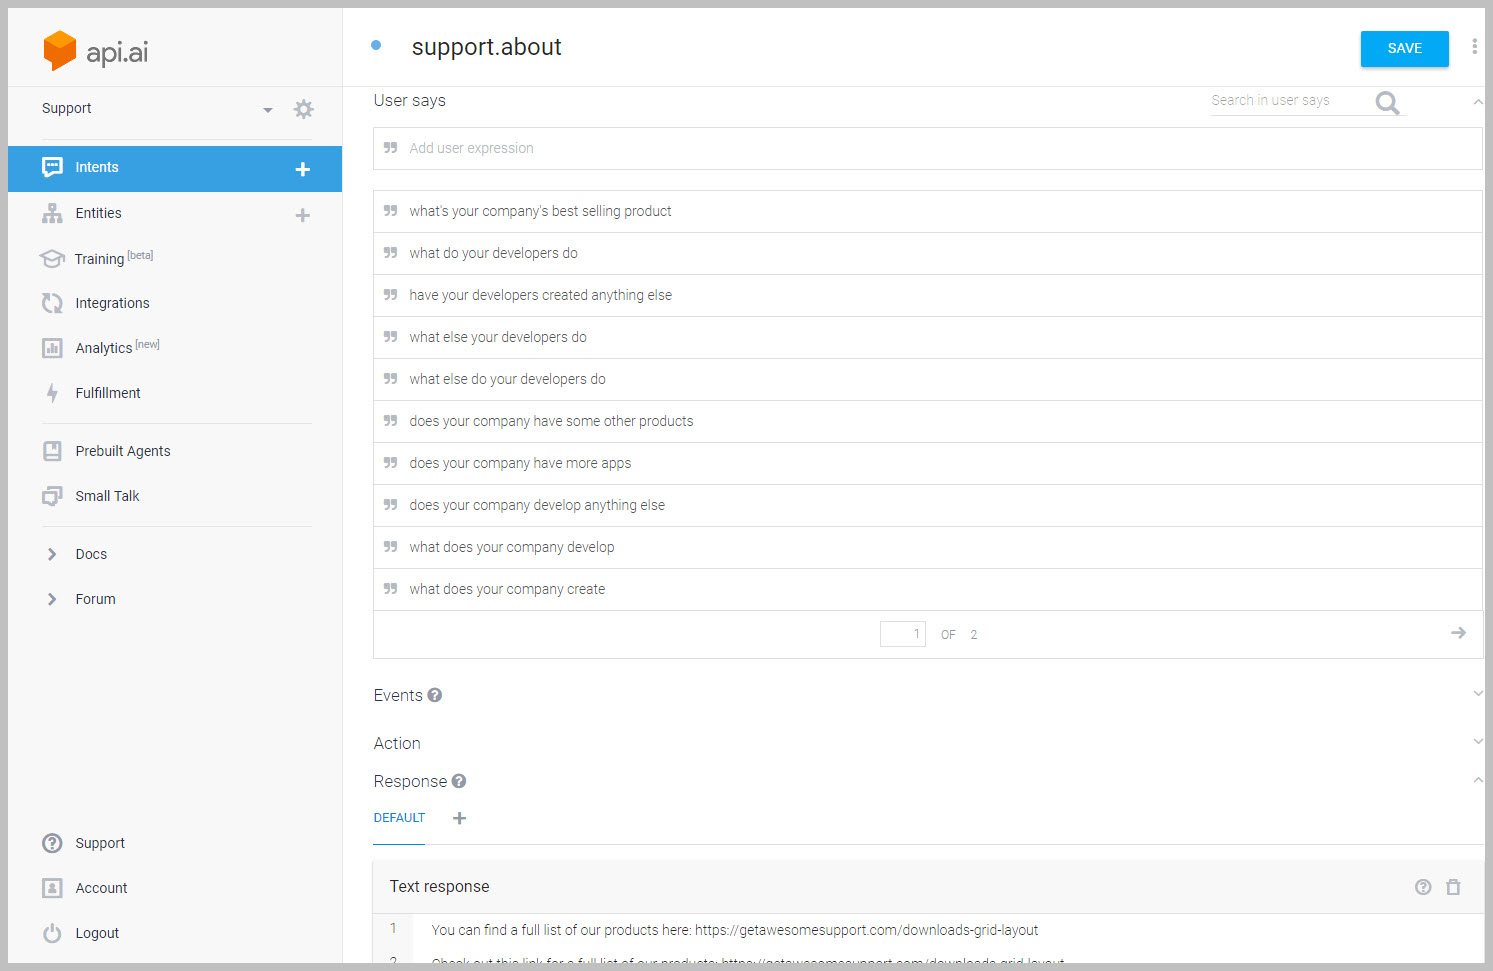
Take a look at the image below – this is what you’ll see when you click an Intent. The top part of the screen allows you to enter many variations of questions that lead to the same answer. The more variations you enter the smarter the bot will be since it can infer additional variations using your examples. The answer to the question is then entered at the bottom of the page – you can give many variations on the answers as well so that the bot does not give the same answer every time.
After configuring your questions and answers for an Intent, don’t forget to click the SAVE button on the upper right of the screen.
Configure Small Talk
Dialogflow allows you to configure responses to “small talk” – basically responses to things such as “Hi”, “Hello” etc. You can do this using the SMALL TALK menu option on the left hand side of the Dialogflow console.
Link Awesome Support to API.ai
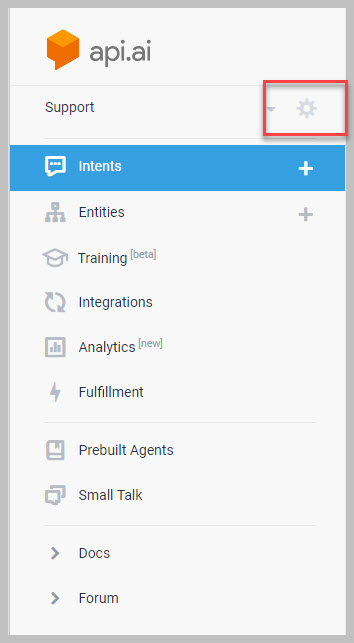
At some point you need to link your new SUPPORT Dialogflow AGENT to Awesome Support. To do this you’ll need a Dialogflow Client Access Token. There is a different token for every Dialogflow agent you create. For your SUPPORT Dialogflow agent you can get the token by clicking on the GEAR icon close to the top of the menu on the left hand side of the Dialogflow console.
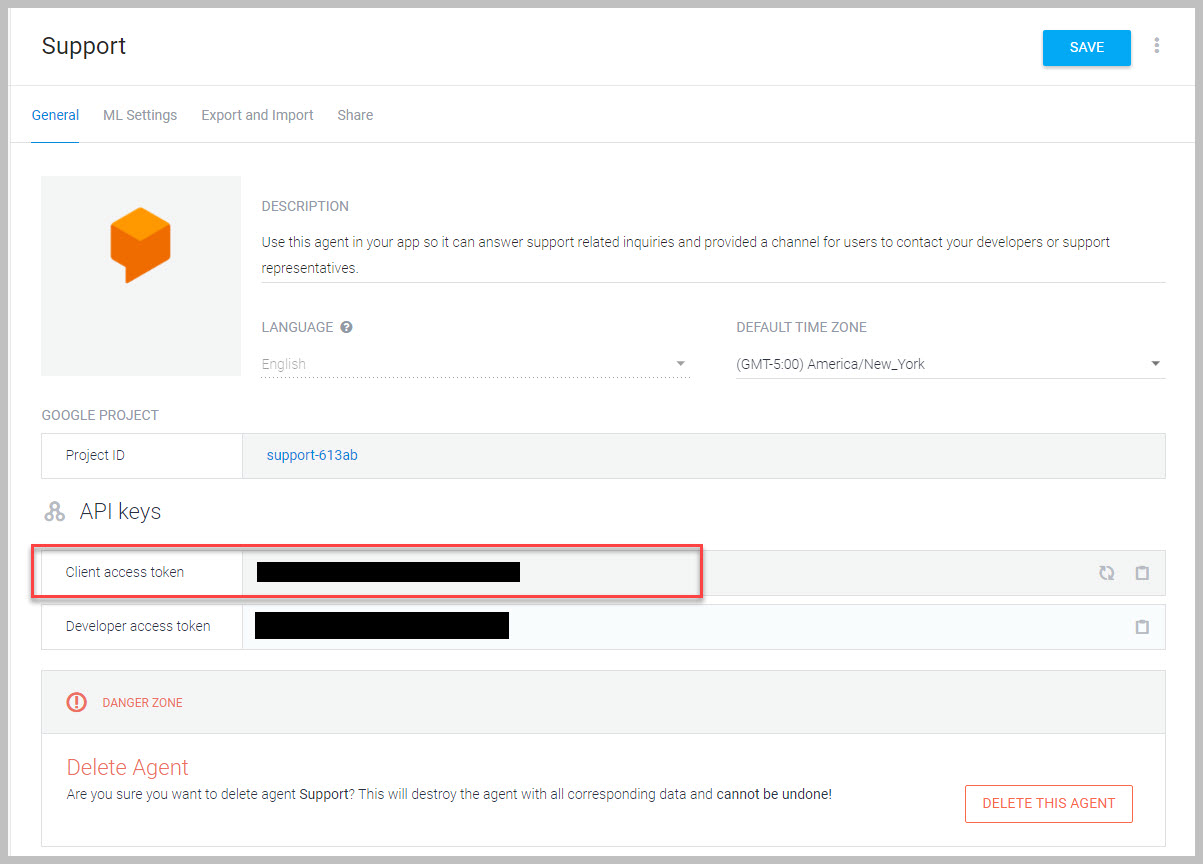
Once the gear icon is clicked you should be at a screen that looks similar to the following. Just copy the client access token to your clipboard…
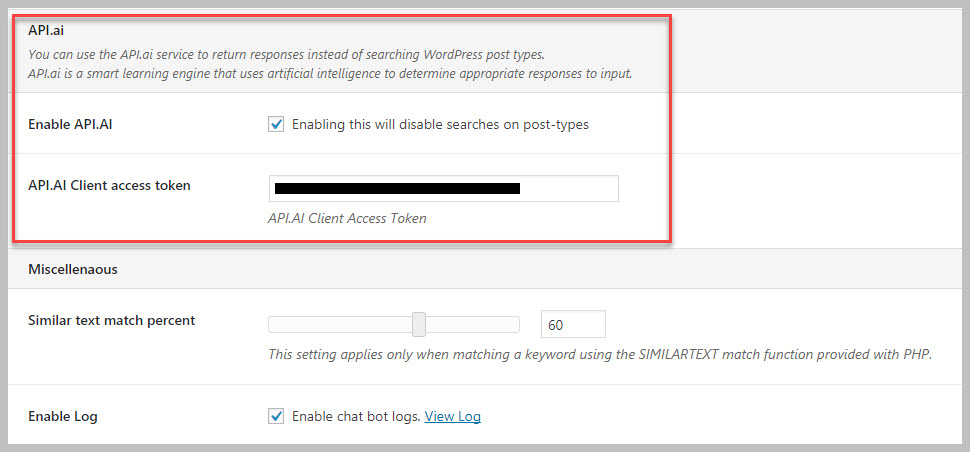
And paste it into the Client Access Token field in Awesome Support (TICKETS->SETTINGS->SMART REPONSES):
You will also need to turn on the Dialogflow (API.ai) option here as well which will disable searches in your POSTS. All answers will be returned from your configuration inside the Dialogflow console.
Don’t forget to save your settings!
Try it Out
Now, you can go to your Facebook page and use messenger there to send a message. (Typically you will see a SEND MESSAGE link in the ABOUT box on the page.) The best thing to do is to try out some of the “Small Talk” options first to make sure that the API.ai link is set up correctly. After that you can progressively configure your INTENTS and test those out as you go. Try small variations on your intents that you did not configure – chances are that API.ai is smart enough to infer your meaning anyway and return the correct answer.
More Topics In Smart Replies
- Smart Replies with Integrated AI
- Introduction to Smart Replies
- Installation
- Smart Chat
- Smart Replies To New Tickets
- Facebook Messenger Chatbot
- Configure Automatic Responses and Replies From PostTypes And Keywords
- Automatic Keyword Extraction With Google Natural Language
- Fulfillment with API.ai
- Troubleshooting


