Assigning Agents To Products
Before you can use any algorithm that involves products you must do three things:
- Enable products
- Add products
- Assign your support agents to products
1. Enable Products
You can enable departments by going to Tickets->Settings->General. About 1/3 of the way down the page you’ll see a section labeled Products Management. First, you must check the box labeled Multiple Products. Once that has been checked, the other options in that section are valid for use.
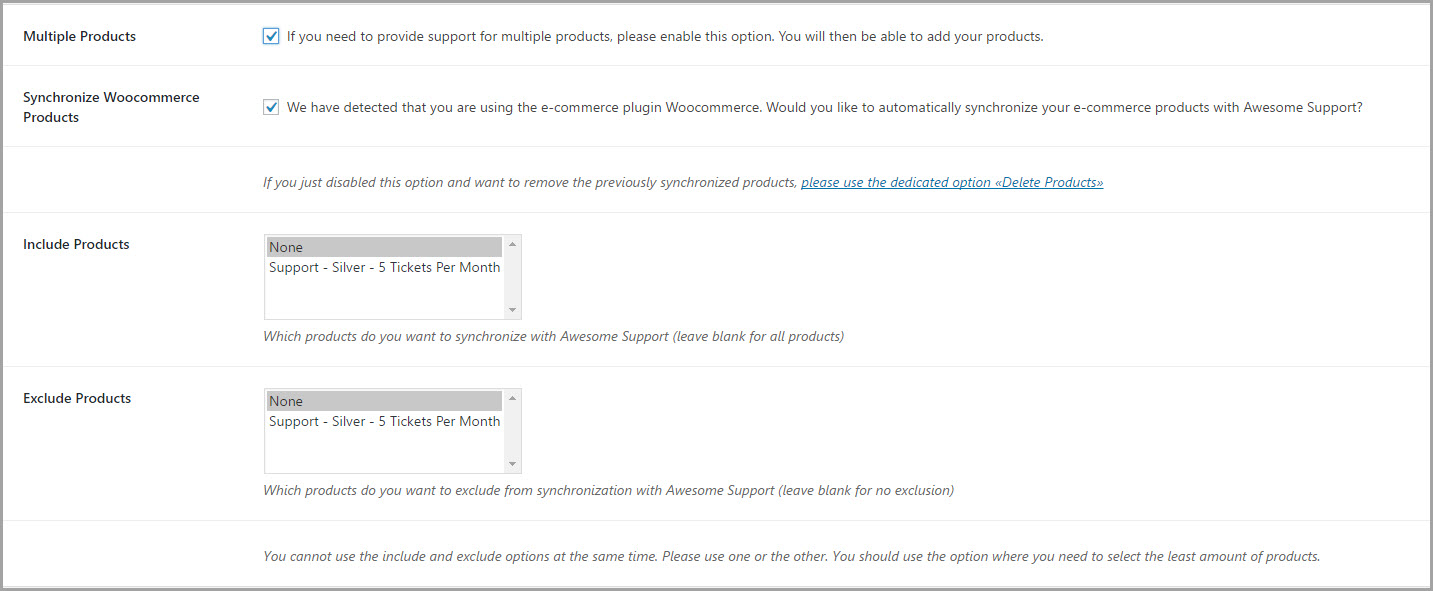
You can automatically synchronize your product list with WooCommerce or EDD. You can also include/exclude products from the list available to your algorithm.
2. Add or Edit Products
Once products are enabled you can create a list of products or edit the existing list of products. Navigate to Tickets->Products to manage your products for Awesome Support.
3. Assign Support Agents To Products
To assign support agents to products you must do so in the support agent’s user profile. Access the agent’s user profile by going to the USERS menu option in the left hand side of the WordPress Administration Console.
Once you are inside agent’s profile, scroll down to the section with the heading: Awesome Support: Set Product and Availability Of Agent

Check off the products(s) that the agent is allowed to work in and then click the Save button at the bottom of the page.