Managing Multiple Mailboxes
Later versions of the Email Support add-on include an option to pull mail from more than one IMAP/POP3 mailbox. There are a number of reasons to use multiple mailboxes – some of them include:
- Create a support mailbox for each department in your company
- Provide dedicated mailboxes to each of your customers or to certain VIP customers
- Create a mailbox for certain products
You can create configuration profiles for additional mailboxes by going to the TICKETS->INBOX CONFIGURATIONS menu option.
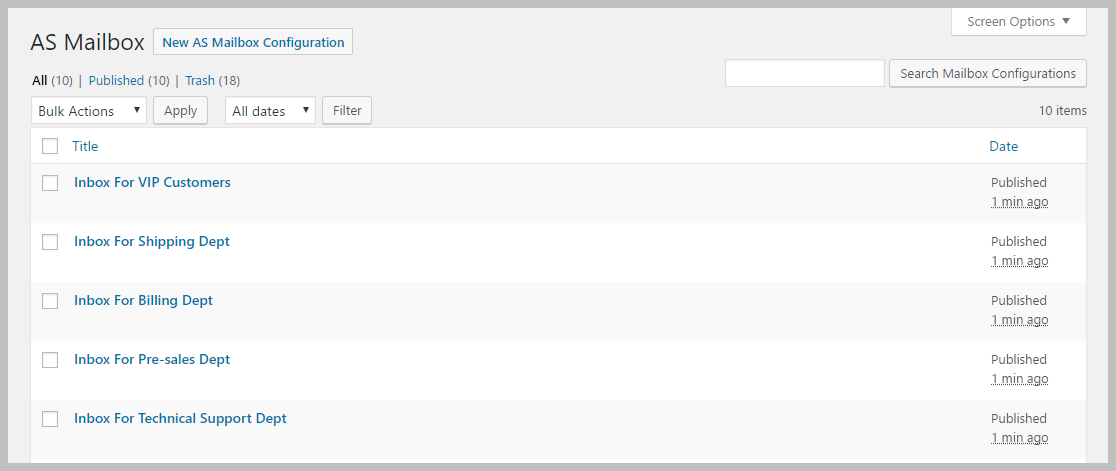
Add A New Mailbox
You can create a new mailbox by going to TICKETS->INBOX CONFIGURATIONS and clicking the New AS Mailbox Configuration at the top of the screen.
When you create a new inbox configuration you will see a screen that has two parts. The first part is where you provide the data needed for Awesome Support to connect to the mailbox. It looks like this:
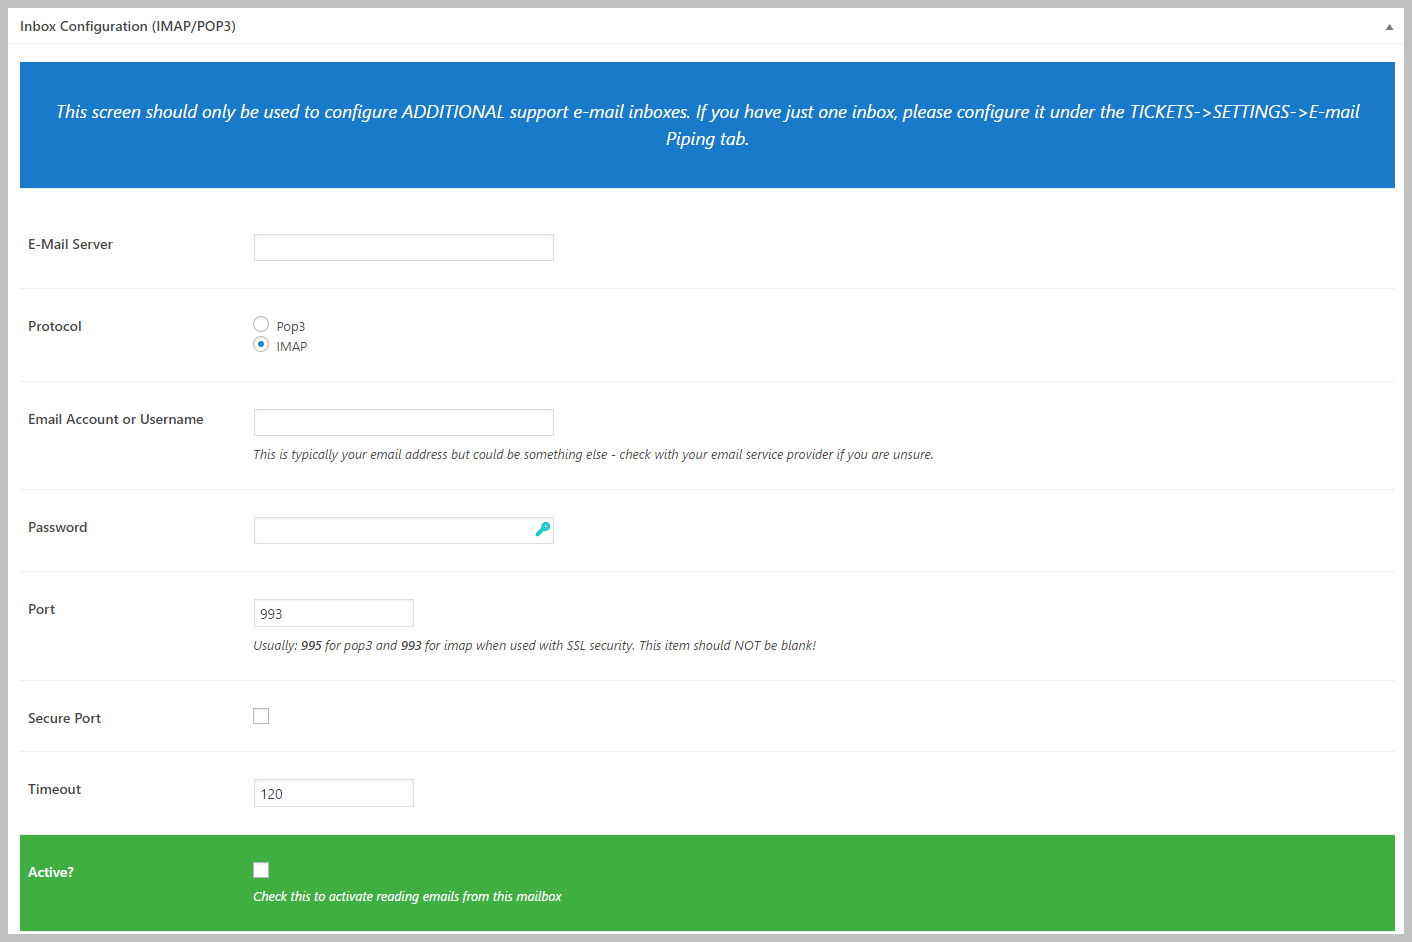
As you’re filling out this information don’t forget to check the ACTIVE box or to fill in the TITLE at the top of the screen. The title is just a user friendly name used to identify the mailbox. The ACTIVE flag is used to tell Awesome Support whether or not to collect the emails in the mailbox and convert them to tickets. Leaving this value unchecked will skip the mailbox during any mailbox retrieval cycle.
You must fill out EACH ITEM shown in the image above in order to be able to connect to your mailbox. There is no option to test your values though so you should double-check them and make sure they are correct before saving the mailbox configuration.
The best way to run a test to verify the values you entered is to save your mailbox configuration and click the FETCH MAILS button located in the TOP BAR of every WordPress admin page. Any error will be shown in the resulting popup in the lower right side of your screen.
To save the configuration you can click the PUBLISH or SAVE button on the upper right of the screen.
Mailbox Default Ticket Values
Each additional mailbox can have default values that are stamped on new tickets as they are received. You can set these default values at the bottom of the NEW MAILBOX configuration screen:
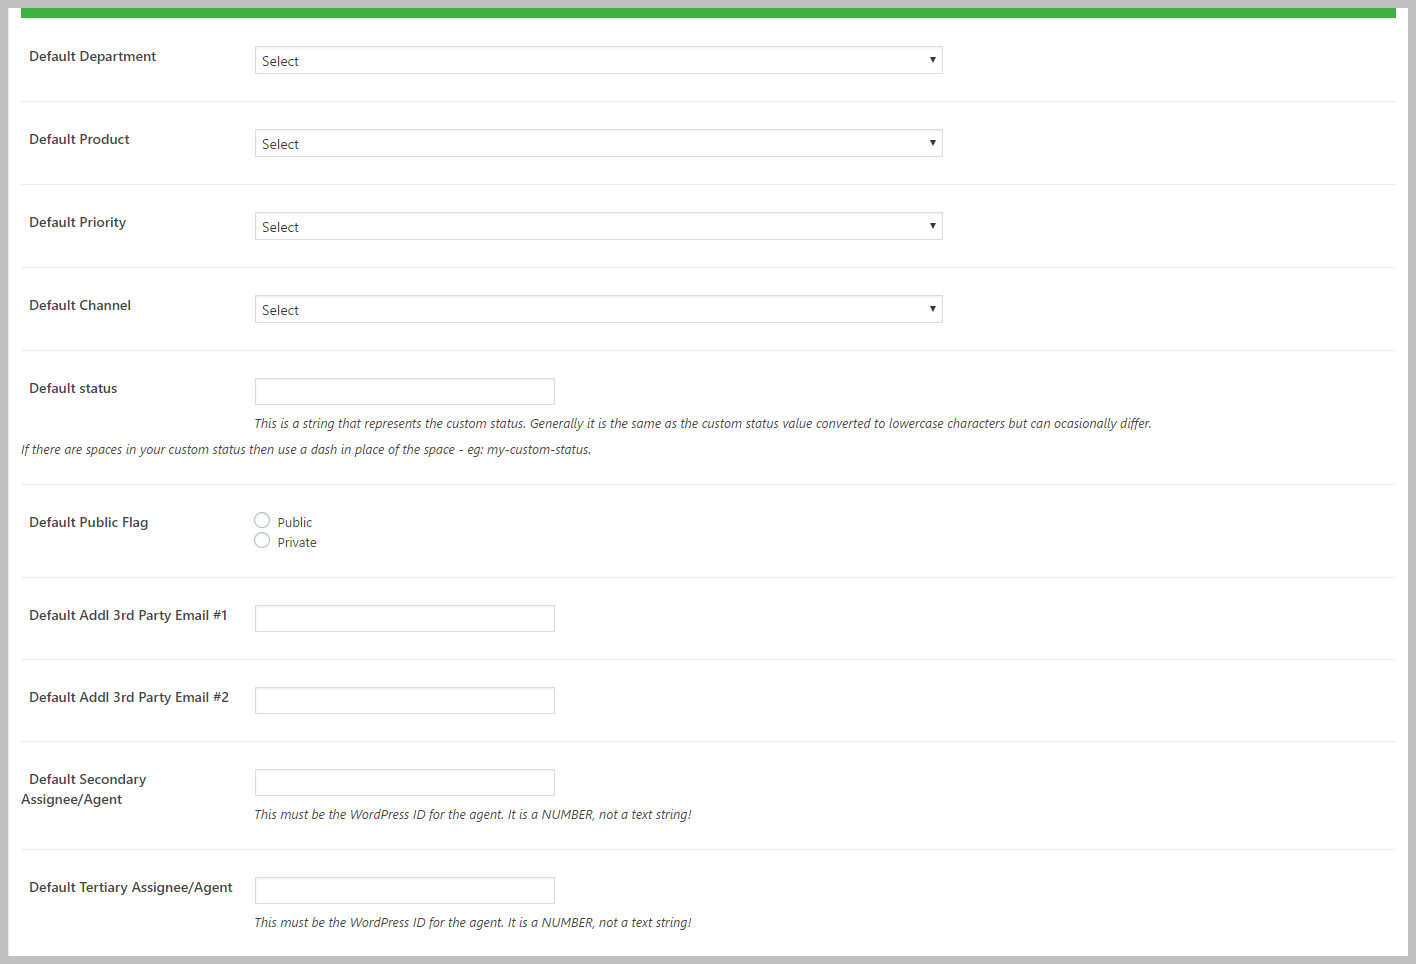
If any of the fields are set then new tickets that are added from the mailbox will automatically be assigned these values.
More Topics In Email Piping and Support
- E-Mail Support (Introduction)
- Installation (E-mail Piping)
- Configuring Email Support / Email Piping
- Creating New Tickets Via Email
- Gmail Considerations
- Handling Replies To Closed Tickets
- Reference: Email Template Tags
- Hooks And Filters (E-Mail Support Add-on)
- Incompatible WordPress Hosts
- Managing Mailbox Rules
- Useful Mailbox Rules
- Handling Unassigned Emails
- Email Support Advanced Topics
- Troubleshooting
- Pre-Built Email Templates
- Email Template Samples
- Switching Email Template Sets