Polylang: Translate Awesome Support Pages
Translating the Awesome Support pages in each language
When the Awesome Support plugin is activated it will create two pages. To work with Polylang you will need to create a language version of each page. Depending on the order that you added languages and activated the Awesome Support plugin, the Awesome Support pages may give a 404 error page on the front end. This happens as a default language for the pages has not yet been set. We will be fixing this in the following section.
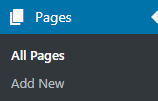
On the administration panel hover over “Pages” and click on the “All Pages” link on the left side menu:
You will see each page that the website contains. There will be a custom column created by the Polylang plugin which shows the flag of each language that has been set up on the website:

View all pages screen for initial Awesome Support pages
When on the administration panel you will be on either a view which displays all language content or content for a certain language. To check and change this you will see a horizontal menu on top of the administration panel. You can choose the “Show all languages” option to see content for all languages or you can choose a specific language that you have set up. We will be using the “Show all languages” in the following examples.

Polylang horizontal language menu
We will now go into both the “My Tickets” and “Submit Ticket” pages and set the default language of that page, this case being English.
When in the “Edit Page” screen you will see a new metabox on the right side of the page labelled “Languages”. You will need to set the “Language” field to the default language and then update the page.
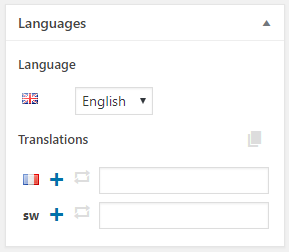
Polylang edit page language metabox
When you are in the “All Pages” screen the custom columns added by Polylang would have changed. You should now see a tick icon on the default language for that page and “+” icons for creating different language versions of the pages:

Polylang view all pages screen with custom columns to create language versions
If you now view any of these pages on the front end in your default language the 404 error will not show if it was appearing before.
We will now click the “+” icons on each page and create a version for each language. In the below example we will set the French version of both pages. Once the “+” icon has been clicked you will notice that the “Language” field will be set to the language that you chose:

Polylang language metabox French default language
You will want to make sure that next to the “Translations” label that the blue icon is highlighted as we want to duplicate the content of the page for each language version. Each Awesome Support page uses a shortcode which we want to be the same on each page’s language version. The content of the shortcodes are translated through each language’s MO/PO file if they exist.
Next it is recommended that you change the page title. If English was set as the default language the title will be the same, so we should change the title to the language that we want. After you have changed the title you should Update/Publish the page.
Note: if you also want your permalink to be of the language you have chosen you should edit the permalink which is located under the title. You must, however, keep the URL format of that language. For example, if the URL ends with /fr/my-tickets you should keep the /fr/ portion of the URL.
After you have translated each page and view the “All pages” screen you will see each language version of the Awesome Support pages. Below is how each page would look after the French and Swahili versions have been created:
All Awesome Support pages created in each language version