ADMIN: Configure Priorities
The standard default installation does not activate the Priority field. This helps to keep things simple and ensure that the plugin is ready to be used immediately after installation. But its easy and quick to enable and customize.
Unlike other products, you can completely customize your drop-down list of priorities. Instead of a generic 1 – 3 or 1 – 5 scale, you can make the priorities whatever you like.
Turn On The Priority Field
- Go to the TICKETS->SETTINGS->FIELDS tab
- Scroll down to the Priority Management section
- Click on the checkbox next to the USE PRIORITY FIELD option.
- Decide if you want to make using this field mandatory. If so, check the box next to the MANDATORY field.
- Do you want customers to fill out this field? If so, check the option labeled Show On Front End.
- Note that if this option is checked and the Mandatory option is also checked then customers will not be able to submit tickets unless this field contains a valid value.
- If this field is not checked then only agents will be able to set the ticket priority.
- You can decide whether you would like the field to show in your ticket listing on the back end by checking the Show in Column List option.
- Note that Turning this option off saves valuable space in the ticket list so unless you absolutely need to see it or use it for filtering the list, you should turn it off.
- Decide if you would like the top border of the ticket in wp-admin to be color-coded to match the priority color.
- You would turn this on if you make extensive use of Priorities. By default the value of the PRIORITY on the ticket is located in the CUSTOM FIELDS tab when viewing an individual ticket, So the color coded top border helps in identifying the current ticket priority without switching tabs.
- Scroll down to the bottom of the page and click the SAVE CHANGES button.

After you turn on support for the Priority field there will be a new menu option under tickets called Priorities. You can add a new priority by going to TICKETS->PRIORITIES.
When you initially activate priorities, the list of valid priorities will be blank. You need to create a set of priority levels suitable for your help desk.
Some examples are:
- 1 – 5
- Level 1 – Level 5
- Low, Medium, High
- No Impact, Low Impact, Outage
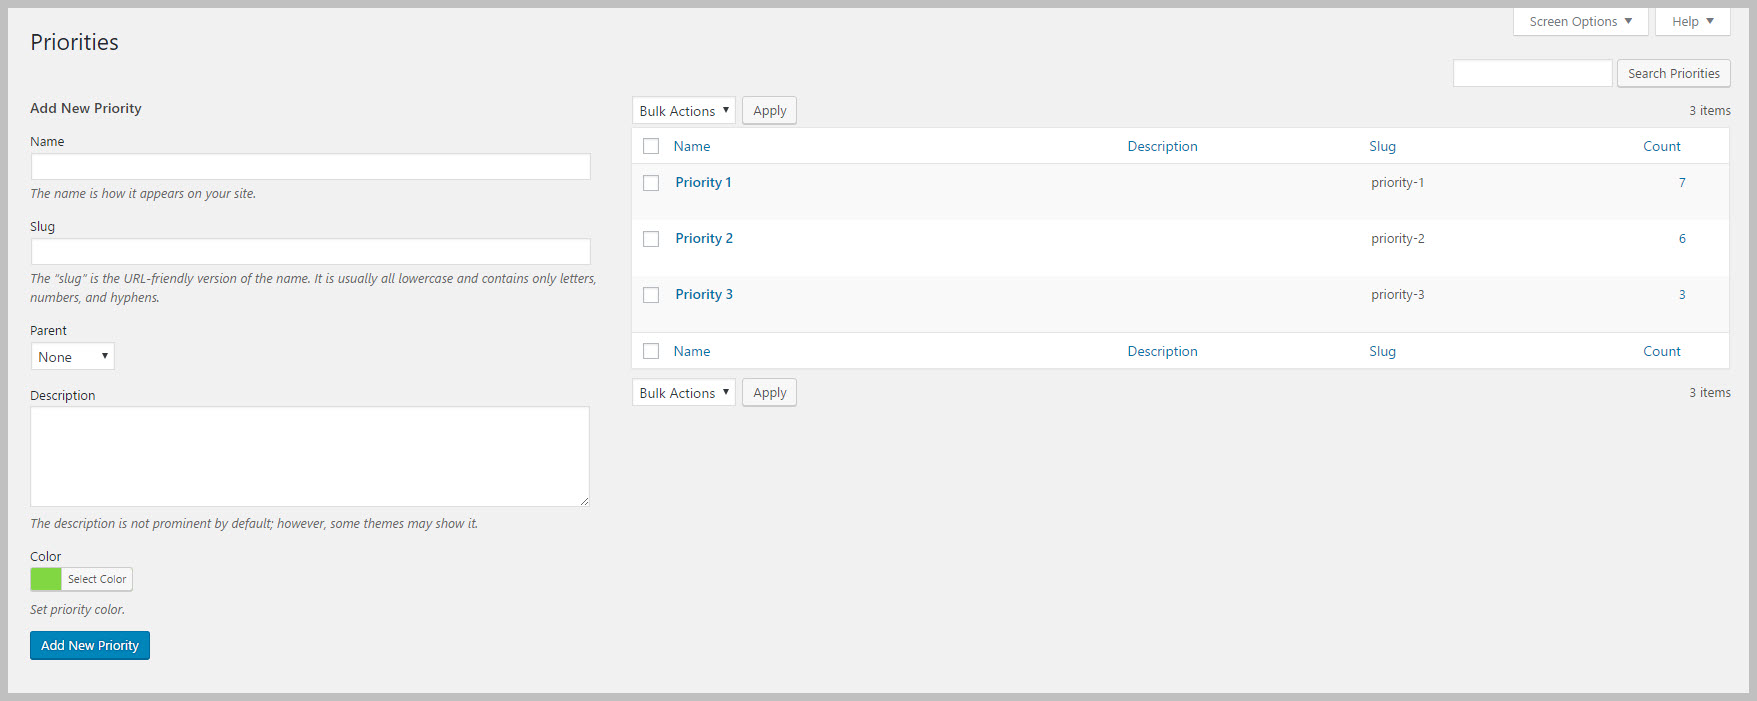
Add / Edit / Delete Priorities
- To add a new Priority, just fill out the name and, if you like a description. You can also set a color for the priority level to help easily identify tickets of various priorities in the main ticket list. Then click the Add New Priority button. This will add the Priority to the list on the right side of the screen.
- To delete a Priority level, you have two choices:
- In the Priority list on the right side of the screen, hover over the link under the NAME column. A series of links will show up – just click the DELETE link.
- Click the check box next to the Priority and then select DELETE from the Bulk Options drop-down at the top of the list. Click the APPLY button to delete the selected Priority(s).
- To update a Priority, just click on the link under the NAME column. This will take you to a new screen where you can make your changes. You can apply your changes by clicking the UPDATE button at the bottom of the screen.
More Topics In Awesome Support Core
- Awesome Support
- How To Create A Ticket On Behalf Of The Client?
- What's New In Awesome Support
- Installation
- Post Installation – What You Need To Know (Quick Start)
- Post Installation - Enter Your First Ticket (As A Customer)
- Post Installation: Adjust Security
- Basic Admin: Add An Agent
- Basic Admin: Turn Off Ticket Assignment To An Agent
- Agent Functions: Manage The Ticket List
- Using POEDITOR.COM For Translations
- Agent Functions: View All Tickets
- Agent Functions: Navigate To A Ticket (View Ticket)
- Agent Functions: Explore The Ticket Interface
- Agent Functions: Reply To A Ticket
- Agent Functions: Close A Ticket
- Agent Functions: Add An Internal Note (Premium)
- Agent Functions: Track Time Spent On A Ticket (Basic)
- WPML and POLYLANG
- ADMIN: Overview
- ADMIN: User Registration Options
- ADMIN: Configure Products
- ADMIN: Synchronize Products With WooCommerce And Easy Digital Downloads
- ADMIN: WooCommerce Integration (Basic)
- ADMIN: Configure Departments
- ADMIN: Configure Email Alerts
- ADMIN: Email Template Sets
- ADMIN: Configure Channels
- ADMIN: Configure Status Colors
- ADMIN: Short Codes And Pages
- ADMIN: Multiple Agents Per Ticket
- ADMIN: Basic Time Tracking
- ADMIN: Misc Display Options For Agents and Admins
- ADMIN: Misc Display Options For Customers (Front-end Users)
- ADMIN: Misc Display Permissions
- ADMIN: Misc Display Options (Advanced)
- ADMIN: File Upload Options
- ADMIN: Deleting Attachments (Manual and Automatic)
- ADMIN: Advanced System Options
- ADMIN: Audit Trail Options
- ADMIN: Handling Existing Users After Installation
- ADMIN: Roles And Capabilities
- Roles and Capabilities Table
- ADMIN: Roles And Capabilities In Add-ons
- ADMIN: WP-CONFIG Options
- ADMIN: Multiple Ticket Forms
- ADMIN: Multi-Vendor Marketplaces
- Multisite Considerations
- Known Plugin Incompatibilities and Conflicts
- Cookies
Search