Configuration Options
Introduction
On the configuration tab for Satisfaction Survey, the options are divided into seven sections
- Survey Behavior
- Miscellaneous (General)
- Slugs
- Rating Scale
- Unsatisfied Reasons
- Email Template
- Thank You Messages
Survey Behavior
You have three choices to trigger your surveys
- Send a survey by email after a ticket is closed
- Show a survey popup via a re-direct to the survey page immediately after a ticket is closed. Note that the redirect (pop-up) will only work if the ticket is being closed by a user on the front-end of the site. Tickets closed by agents will not show the survey!
- Send survey quick-links in every email that goes out with an agent’s reply to a ticket
Please note that if you choose the option to pop-up the survey after the ticket is closed you cannot use the click-to-close template tag included with the powerpack/productivity add-on in your outgoing emails.
Miscellaneous (General)
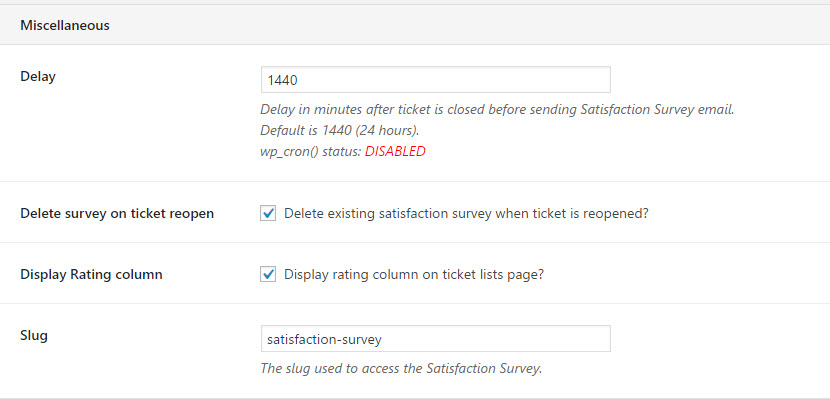
Delay: This is the number of minutes to wait AFTER a ticket is CLOSED before sending out the survey email. The default is 1440 mins (24 hours).
Delete survey on ticket reopen: If a ticket is reopened, the existing rating can be automatically removed. If left unchecked, the original rating stays and the customer will have no option to provide a different rating after the ticket is closed again.
Display Rating column: The satisfaction rating that the customer has assigned to a ticket can be shown in the primary ticket list by keeping this box checked.
Slugs
Slugs control what the user sees in their browser address bar. You can change these items to something that matches your brand. But after the change you must go to the WordPress SETTINGS->PERMALINKS page and click the Save button. This forces WordPress to update its URL scheme to recognize your new choices.
Rating Scale
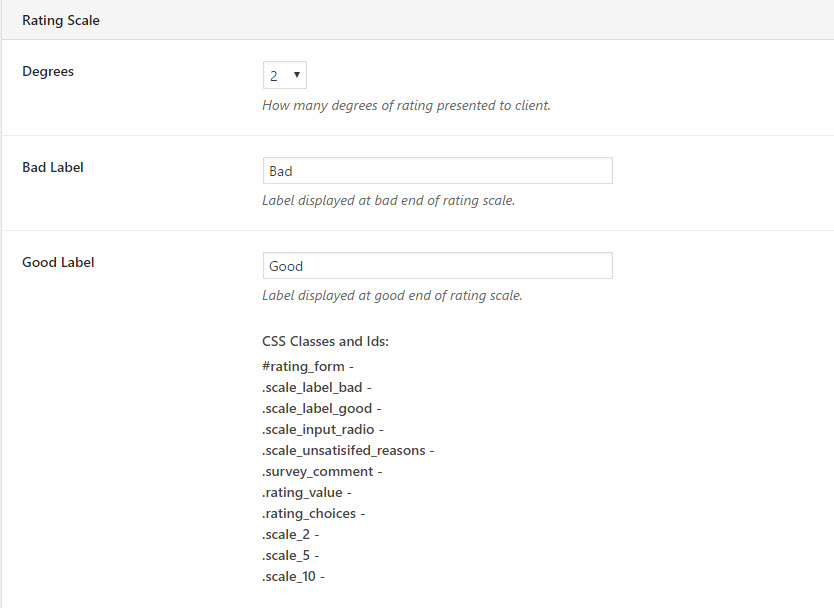
Degrees: This sets the granularity of the scale. The default is two – basically giving the customer only two choices (bad/good or unsatisfied/satisfied). But you can set the rating up to a scale of 10. Common scales are 2, 3 (Bad, Neutral, Good), 5 and 10.
Bad Label: This is the label the user sees on the “bad” end of the scale. Common labels are “Bad” and “Unsatisfied”. But, obviously, you can choose your own.
Good Label: This is the label the user sees on the “good” end of the scale. Common labels are “Good”, “Very Satisfied” and “Satisfied”
You can use the CSS classes and IDs listed to configure the look of the survey webpage. (If this sentence is greek to you, please ask your software developer for assistance).
Unsatisfied Reasons
When the customer selects a bad rating, they see a drop-down that allow them to choose a reason they are not satisfied.
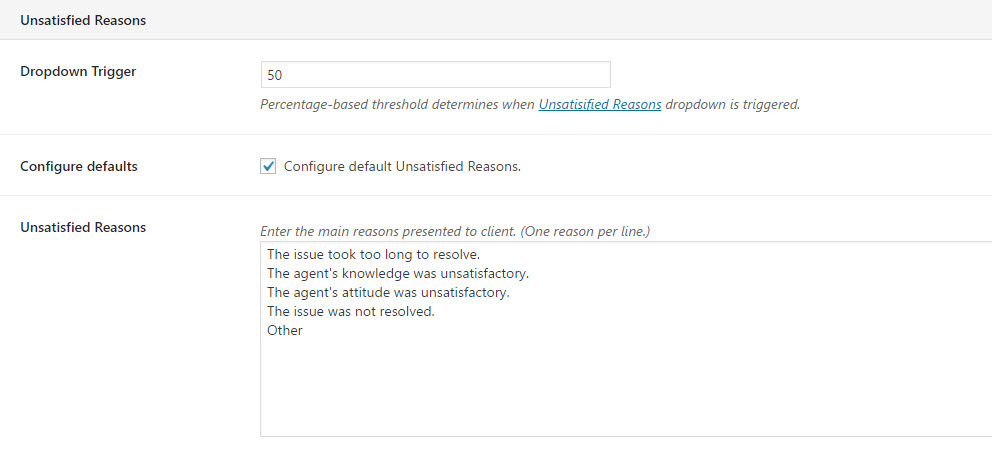
Dropdown Trigger: This is the percentage on the scale that triggers the drop-down to be visible. Generally, if a user chooses anything below 50% of the scale, you would want to know why. So, if the Degrees is set to 10 and this Dropdown Trigger is set to 50% then the user will see the drop-down of reasons if their rating is 5 or less.
- If the Degrees is set to 2 and this Dropdown Trigger is set to 50% then the user will see the drop-down of reasons if their rating is bad/unsatisfied
- If the Degrees is set to 6 and this Dropdown Trigger is set to 50% then the user will see the drop-down of reasons if their rating is 3 or less
Unsatisfied Reasons: This is the list of reasons that the customer can choose from if they provide a rating that is less than the Dropdown Trigger field. You can edit this list by placing each reason on a new line.
Email Template
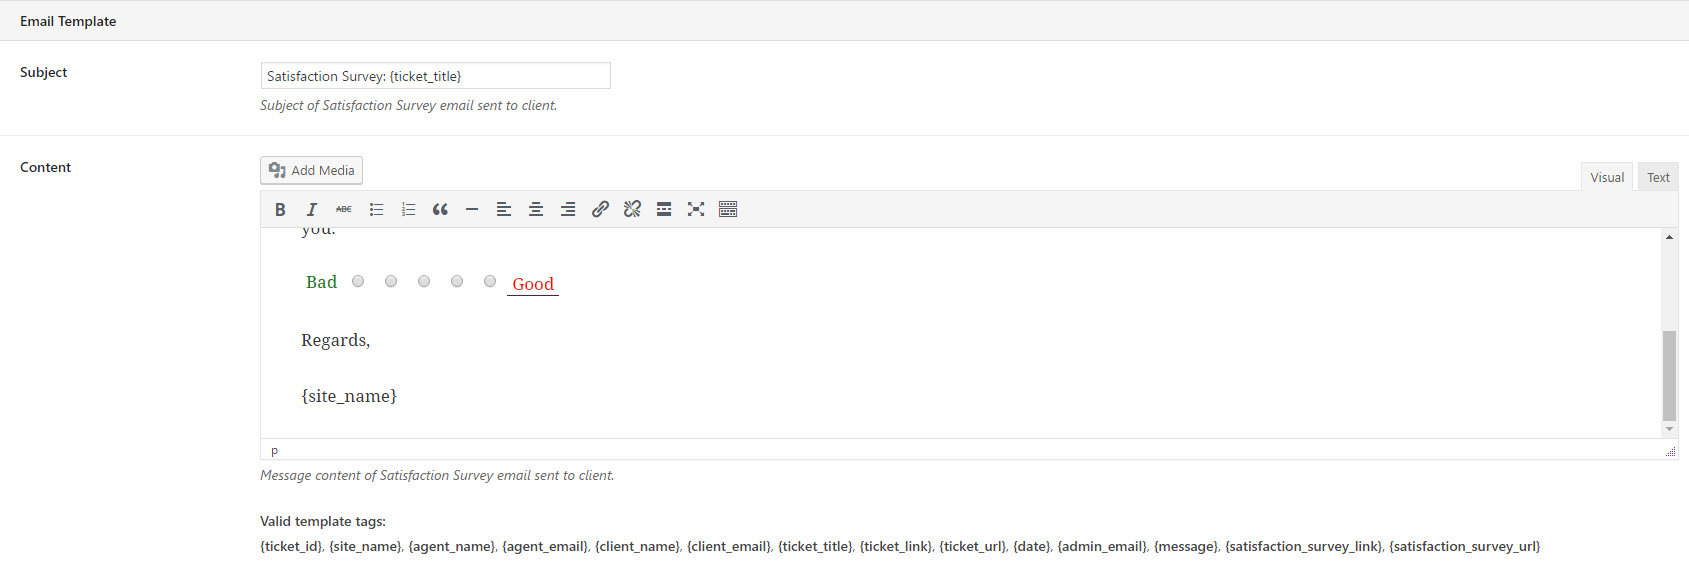
The email template allows you to configure the contents of the survey email that is sent out to the customer. You can use “template tags” – valid tags are shown at the bottom of the section.
Thank You Confirmation Messages
You can configure the messages that is displayed to the user after they complete their survey. There are five different messages you can configure – one for each type of SLUG / LINK.


