Overriding The Algorithm In Use
For most users a single algorithm is all that is needed. However, there are situations where you might want to turn off the algorithm and fall-back to the core round-robin algorithm. Or you might want to change the algorithm in use entirely on a ticket by ticket basis. These are advanced scenarios generally employed by the largest helpdesk operations.
We provide a number of options that you can use to support this multi-algorithm scenario.
Turn off the algorithm based on the Channel
If you receive tickets from multiple sources you might want to turn off the algorithm for one or more of those sources. For example if you receive tickets from your website, email and via a special Gravity Form, you might want to allow your preferred algorithm to run for tickets received from your website but turn it off for EMAIL and GRAVITY FORMS. You would do this because you have special logic embedded in the EMAIL RULES or your GRAVITY FORM that assign a very specific agent to a ticket.
Its simple to turn off the algorithm for certain channels. Just go to the TICKETS->SETTINGS->SMART AGENT tab and scroll down to the bottom. There you will be able to enter the ID for the CHANNEL.

Turn off the algorithm by setting a flag on a ticket
You can set a special flag on the ticket to tell the SMART AGENT add-on to not run its algorithm. The special flag (or meta field) is called _wpas_bypass_smart_agent and should be set to “1” in order to turn off the algorithm.
One way to do this is to use the GRAVITY FORMS BRIDGE add-on along with the CUSTOM FIELDS add-on. Here is how you would use these two modules to set this field:
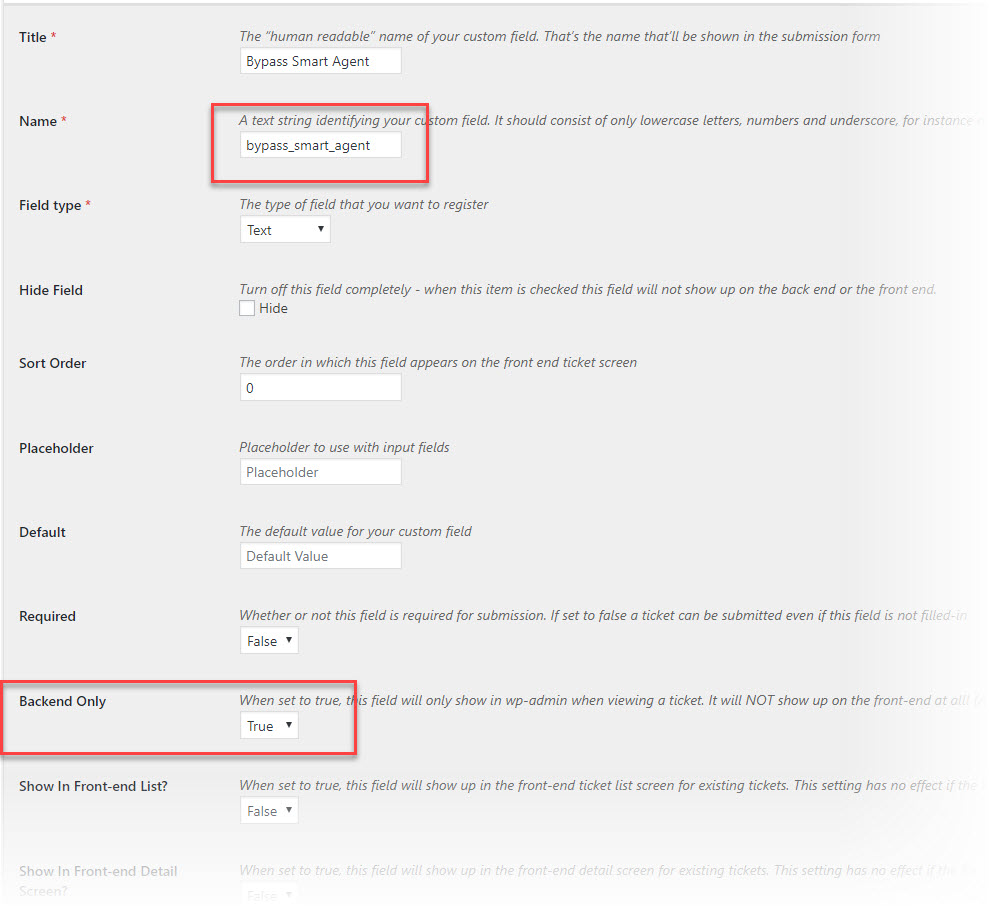
In the CUSTOM FIELDS add-on screen the field name would be bypass_smart_agent (without the _wpas in front of it). You would also want to make sure that the field does not show up in the front end. So, your custom field definition might look like this:
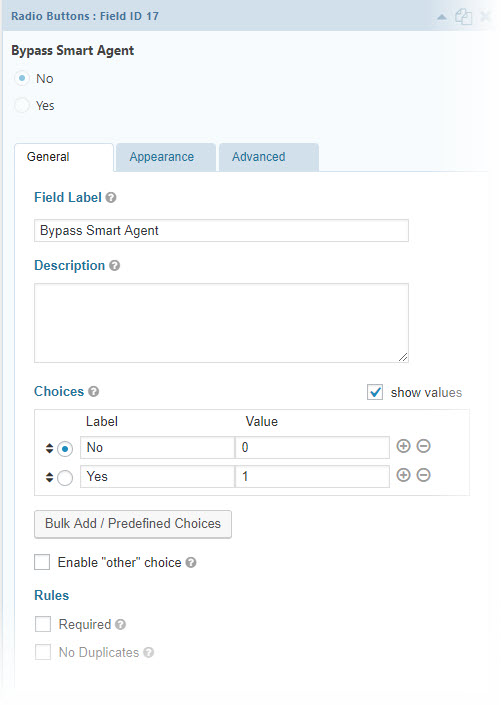
Once you’ve defined the custom field you can then MAP to it using a GRAVITY FORM. Your GRAVITY FORM field definition might look like this:
And your mapping in the Awesome Support Gravity Forms Bridge might look like this:

When you submit your Gravity Form ticket this field will be populated with a 1 or 0 which the SMART AGENT add-on will respect.
Obviously you can set this meta field using PHP code as well.
Change the algorithm by setting the algorithm ID on the ticket
You can force SMART AGENT to run a different algorithm for any ticket by setting a value in the _wpas_smart_agent_algo_override meta field on the ticket. One way to do this is to use the Gravity Forms bridge add-on along with Custom Fields add-on. Here is how you would use these two extensions to set this field:
In the CUSTOM FIELDS add-on screen the field name would be smart_agent_algo_override (without the _wpas in front of it). You would also want to make sure that the field does not show up in the front end. So, your custom field definition might look like this:

Once you’ve defined the custom field you can then MAP to it using a GRAVITY FORM. Your GRAVITY FORM field definition might look like this:

And your field mapping in the Gravity Forms bridge add-on would look similar to this:

When you submit your Gravity Form ticket this field will be populated with an algorithm id (valid values are 1 – 5 right now) which the SMART AGENT add-on will respect.
Obviously you can set this meta field using PHP code as well.