Facebook Messenger Chatbot
If you would like to automatically respond to user queries via Facebook Messenger you need to configure the Facebook connection in both Awesome Support and Facebook itself.
Unfortunately, creating the Facebook connection is probably the trickiest part of the entire installation and configuration process. Facebook just doesn’t make it easy at all!
If you have a Facebook Page already set up you are ready to proceed. To get started you need to access the Facebook DEVELOPERS portal at https://developers.facebook.com
1. Create APP Definition in Facebook
Once you have accessed (or signed up) for that portal, you need to create an APP definition. To do this, just look for the drop-down on the upper right of the FB developer portal home page labeled MY APPS.
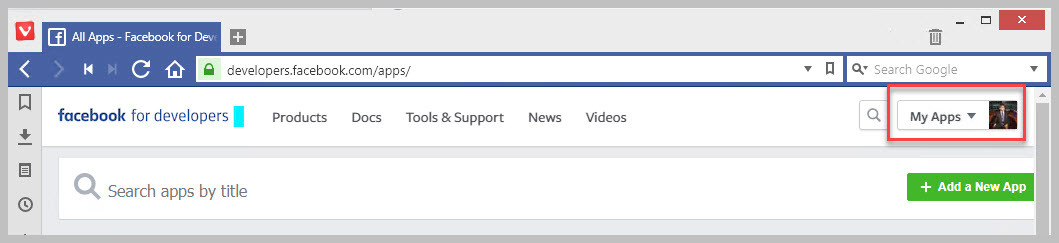
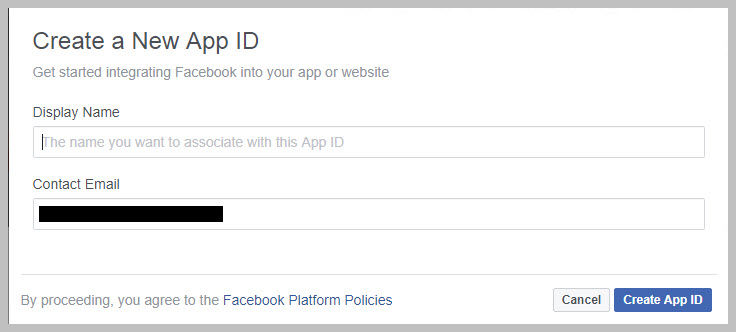
Either click on it or open the drop-down and you’ll see an option to ADD A NEW APP. This will open a dialog box. Just fill in the name of your new app (can be anything) and click the CREATE APP ID button. You might get a captcha type SECURITY CHECK prompt before you can create the app id.
2. Set up Messenger Options
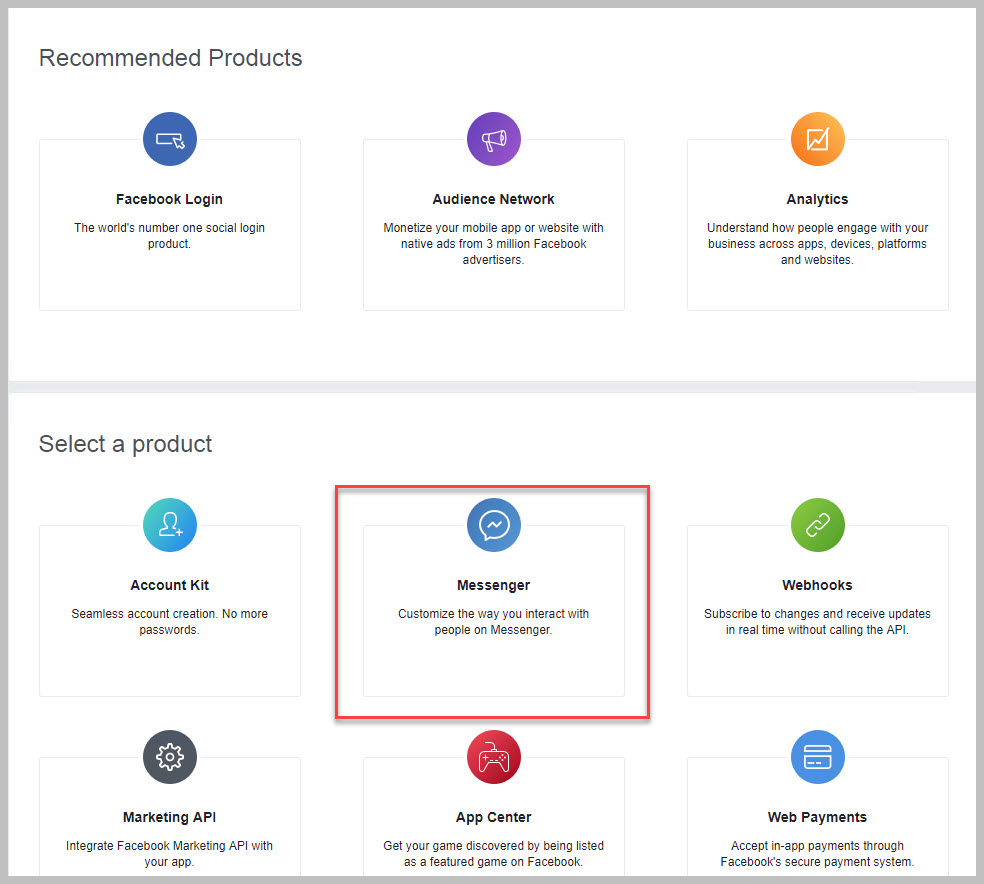
After creating an APP ID you will be presented with a list of FB products that your APP will interact with. Choose the MESSENGER APP: Hover over the name and click the SETUP button.
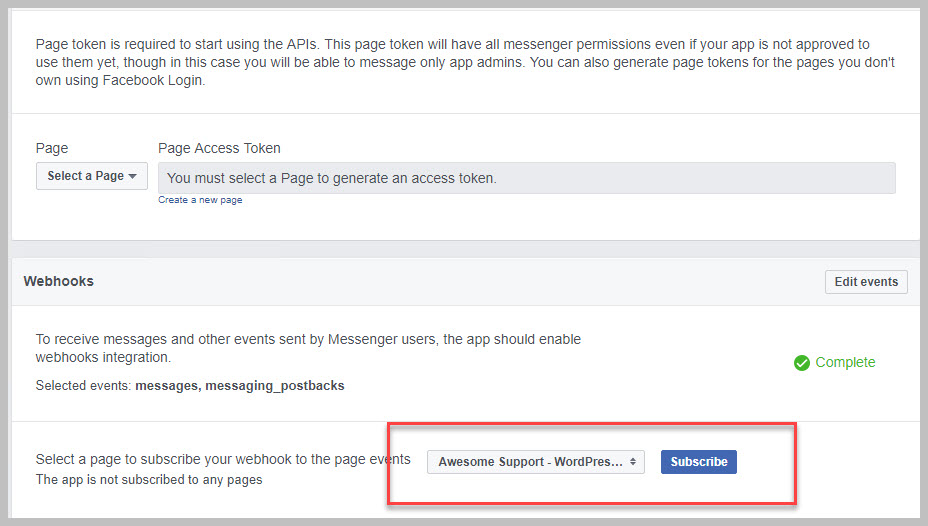
Once inside the MESSENGER options screen the first thing you need to do is select your page from the SELECT A PAGE drop-down. This will likely prompt a popup or a new page asking for you to confirm that your Facebook Account is allowed to access this page. After confirming that, you will be provided with a token. DO NOT NAVIGATE AWAY FROM THIS PAGE after the token is generated.
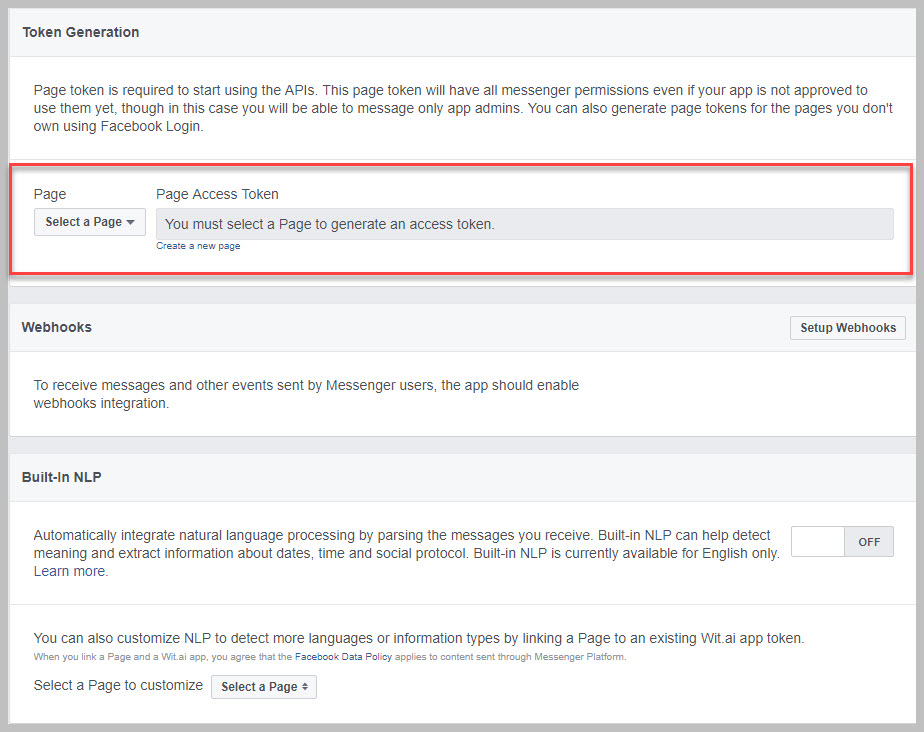
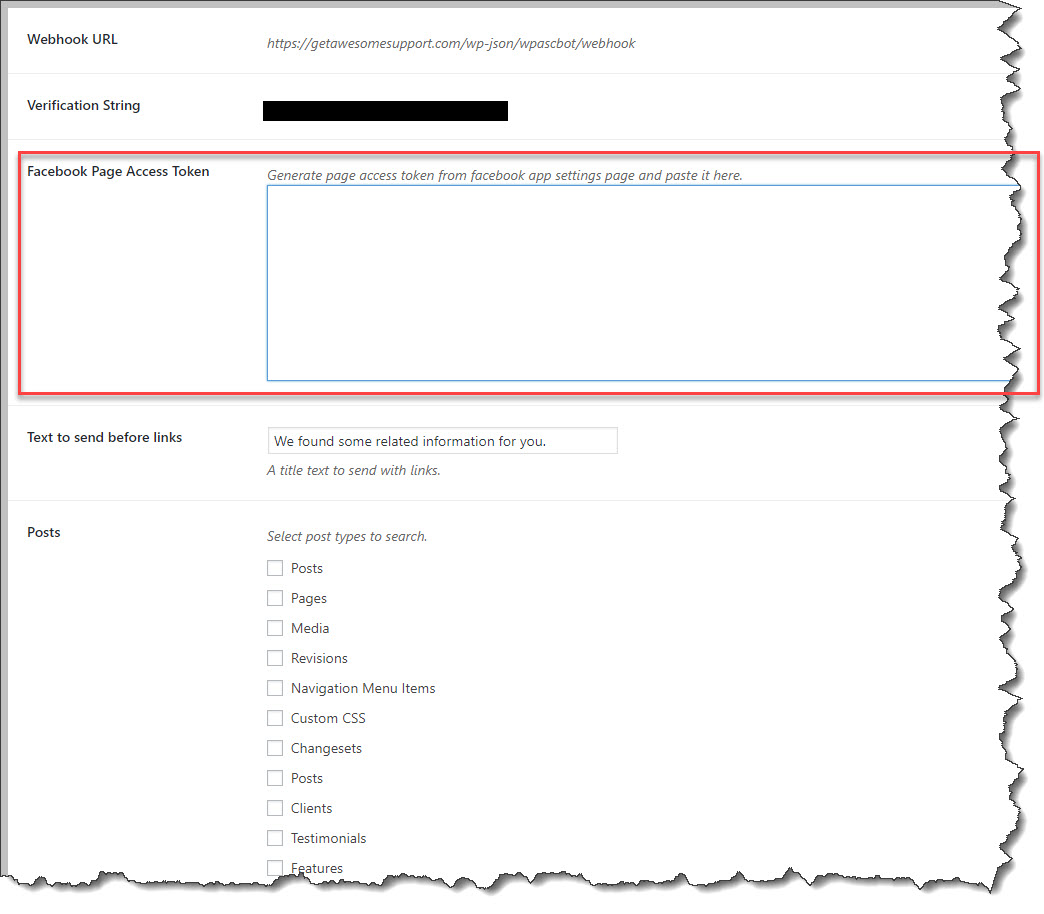
Click on the token to copy it to your clipboard. Then, IN A SEPARATE BROWSER TAB navigate to TICKETS->SETTINGS->FB CHAT BOT. Paste the token into the Facebook Page Access Token field and click the Save Changes button at the bottom of the screen.
Now, switch back to your FACEBOOK Messenger Configuration browser tab and click on the SETUP WEBHOOKS button. This will bring up a new dialog box.

The CALLBACK URL can be obtained from the WEBHOOK URL field in Awesome Support – TICKETS->SETTINGS->FB CHAT BOT.
The VERIFY TOKEN data can be obtained from the VERIFICATION STRING field in Awesome Support – TICKETS->SETTINGS->FB CHAT BOT.
Once filled in, just click the VERIFY AND SAVE button. This will take you back to the Messenger settings screen.
Next, make sure you select the page that your APP will work on and click the SUBSCRIBE button.
That’s it, you are done with this section. Whew!
3. Activate Your APP For Your Facebook Page
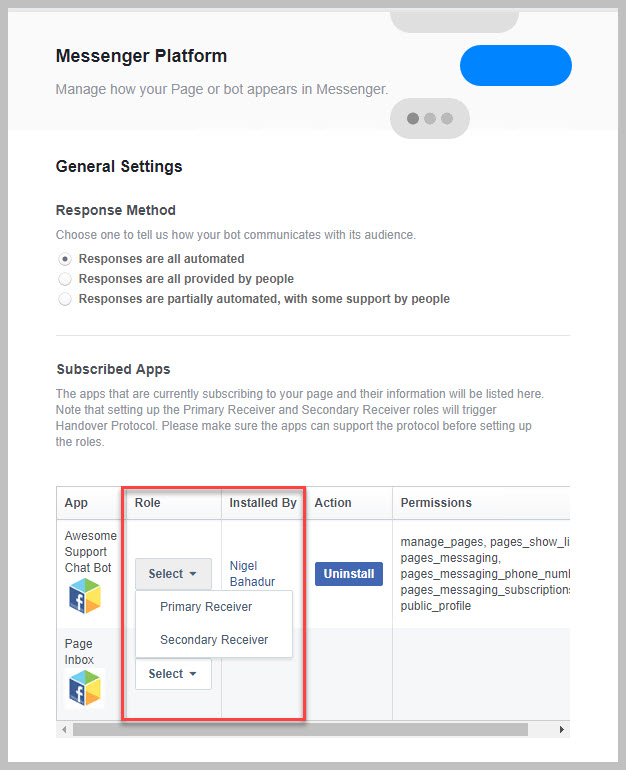
Go to your Facebook page SETTINGS and select MESSENGER PLATFORM from the left side. This will bring up a screen showing all the APPs with access to your page. You need to tell FB that your new app is the one that will receive messages. To do this you need to set the ROLE for each app – either as the primary receiver of all messages or the secondary receiver. See the image below:
4. Finish Configuration Awesome Support Facebook Chat Bot
At this time you now need to tell the Awesome Support chat bot how to respond to queries. By default it will search FAQs and DOCUMENTATION post types and send back up to three matching links. But you can also set up keywords to send back specific responses such as a response to “Hi” or “Hello”. You can set this up in TICKETS->SETTINGS->FB Chat Bot.
5. Test Your APP
Now, you can go to your Facebook page and use messenger there to send a message. Typically you will see a SEND MESSAGE link in the ABOUT box on the page. Only you, as admin can send a message right now because FB has not approved your app. You can also set up specific test users in the Facebook Developer Portal for the App. Look for the ROLES option in the left menu bar of the screen.
6. Submit Your App To FB To Make It Public
In order for other users to be able to send messages to your new Bot, you need to submit the APP to Facebook for approval. To do this, go back to your app’s MESSENGER settings and scroll down to the bottom. Click the Add to Submission button next to the PAGES_MESSAGING. You will be given instructions for how to proceed from there.
More Topics In Smart Replies
- Smart Replies with Integrated AI
- Introduction to Smart Replies
- Installation
- Smart Chat
- Smart Replies To New Tickets
- Configure Automatic Responses and Replies From PostTypes And Keywords
- Automatic Keyword Extraction With Google Natural Language
- Artificial Intelligence With Dialogflow (Formerly API.ai)
- Fulfillment with API.ai
- Troubleshooting