ADMIN: Configure Email Alerts
Awesome support includes the ability to send email alerts to agents and customers. The following email alerts are available as part of the free core plugin:
- Submission Confirmation: Sent to the client/customer when they submit a new ticket
- New Assignment: Sent to the agent that is assigned to the new ticket (or when the ticket is first transferred to a new agent)
- New Reply From Agent: Sent to the client/customer when an agent replies to a ticket
- New Reply From Client: Sent to the agent when a client/customer replies to a ticket
- Ticket Close By Agent: Sent to the client/customer when an agent closes a ticket
- Ticket Close By Client: Sent to the agent when a ticket is closed by the client/customer
To configure your emails please go to the TICKETS->SETTINGS-EMAILS tab.
Email Template
The first section you will see is the Email Template sections. This section controls the overall look of your email. You can:
- Upload your logo
- Add a header section to all your emails
- Add a footer section to all your emails
You can also turn of templates completely. You would usually turn off templates if you have a WordPress wide email templating plugin that already modifies outgoing emails to prettify them.
Email Defaults
The second section, Email Defaults, control the out-going headers on your email. This includes:
- The sender name you would like the customer/client/agent to see in emails
- The actual email address you would like shown on your emails (sender e-mail)
- The reply-to address that any replies would be sent to (reply-to-mail)

Email Contents
The next series of sections allow you to configure the contents of each email type. For each email type you can:
- Decide whether or not you want to activate it (i.e.: send the email when the event occurs)
- Configure the subject line
- Configure the main body contents (everything other than the header and footer)
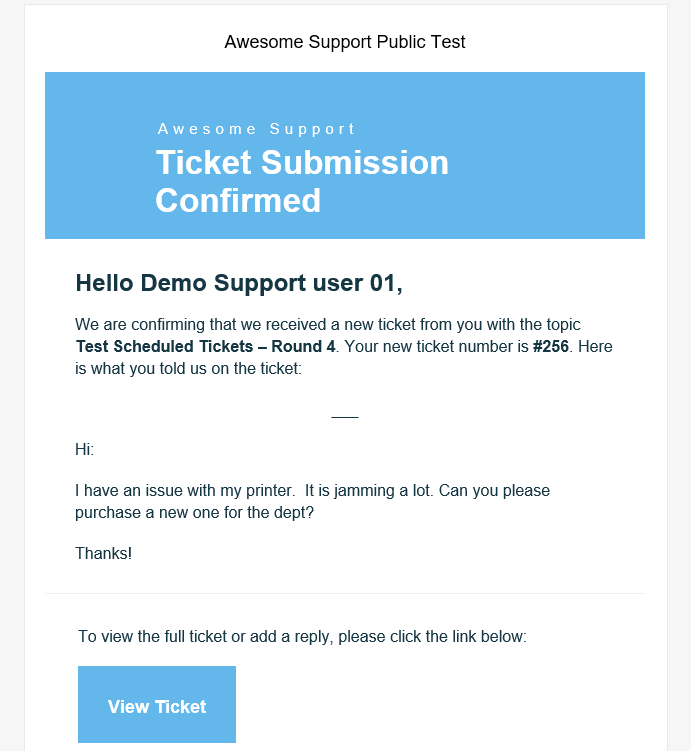
As of version 5.2 of Awesome Support, we include a set of six html formatted emails. Prior to version 5.2 we only included text for the default emails. The html formatted emails look similar to the following:
Email Template Tags
You can include special codes called TEMPLATE TAGS inside each email (subject and body) that will automatically be converted to the appropriate value at the time the email is sent. For example, if you include {client_name} in your body, that text will be converted to the name of the client just prior to the email being sent.
Available Template Tags
There are two ways that you can view a list of available template tags:
1. Click the {} icon in the email editor. It will pop up a list of tags to choose from:
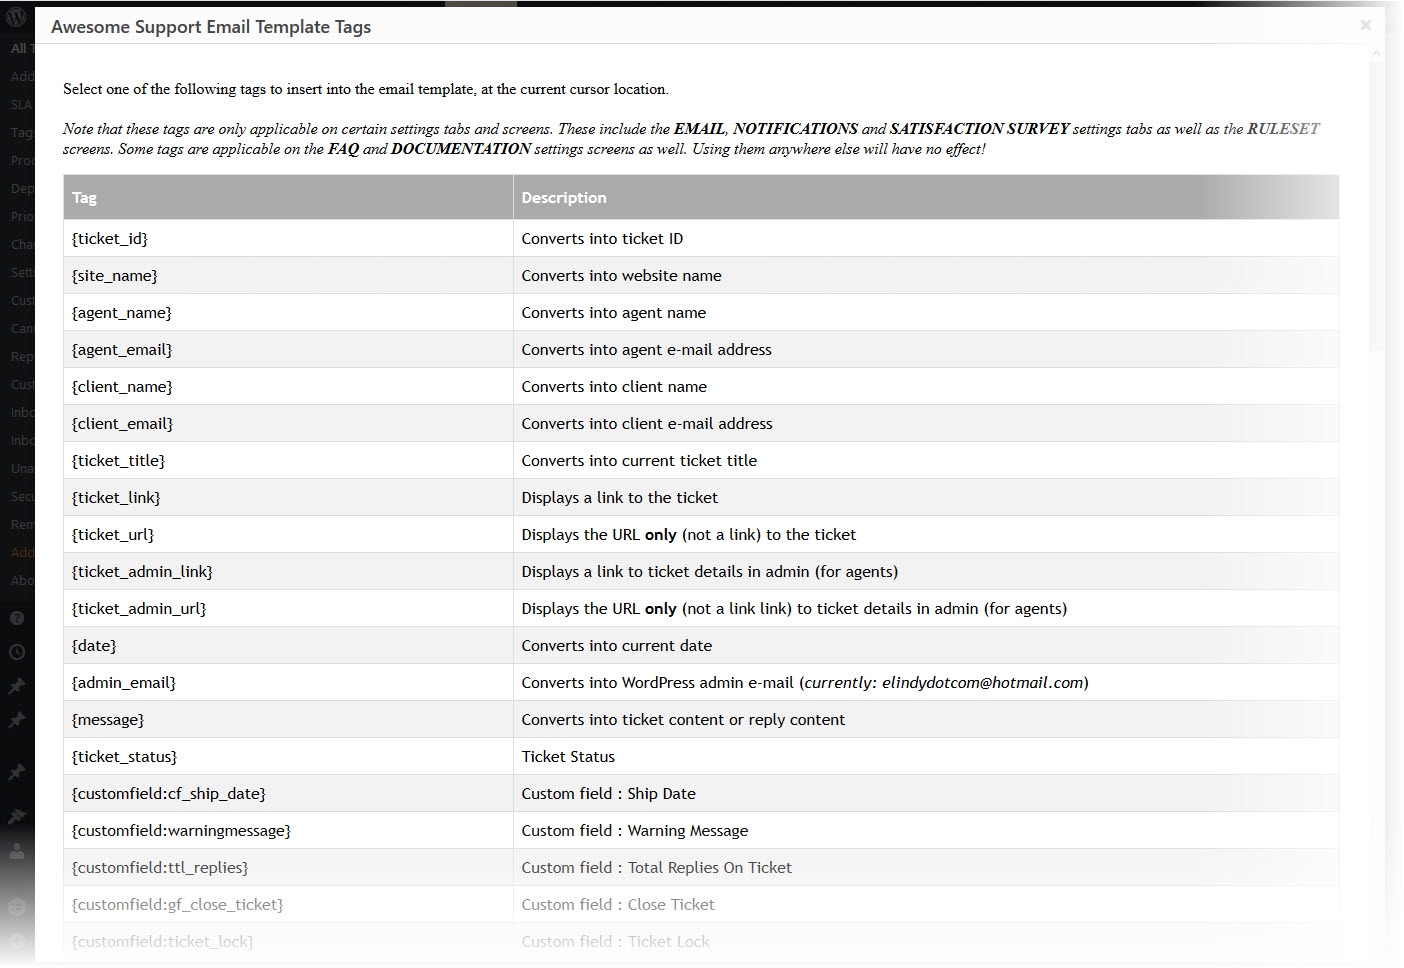
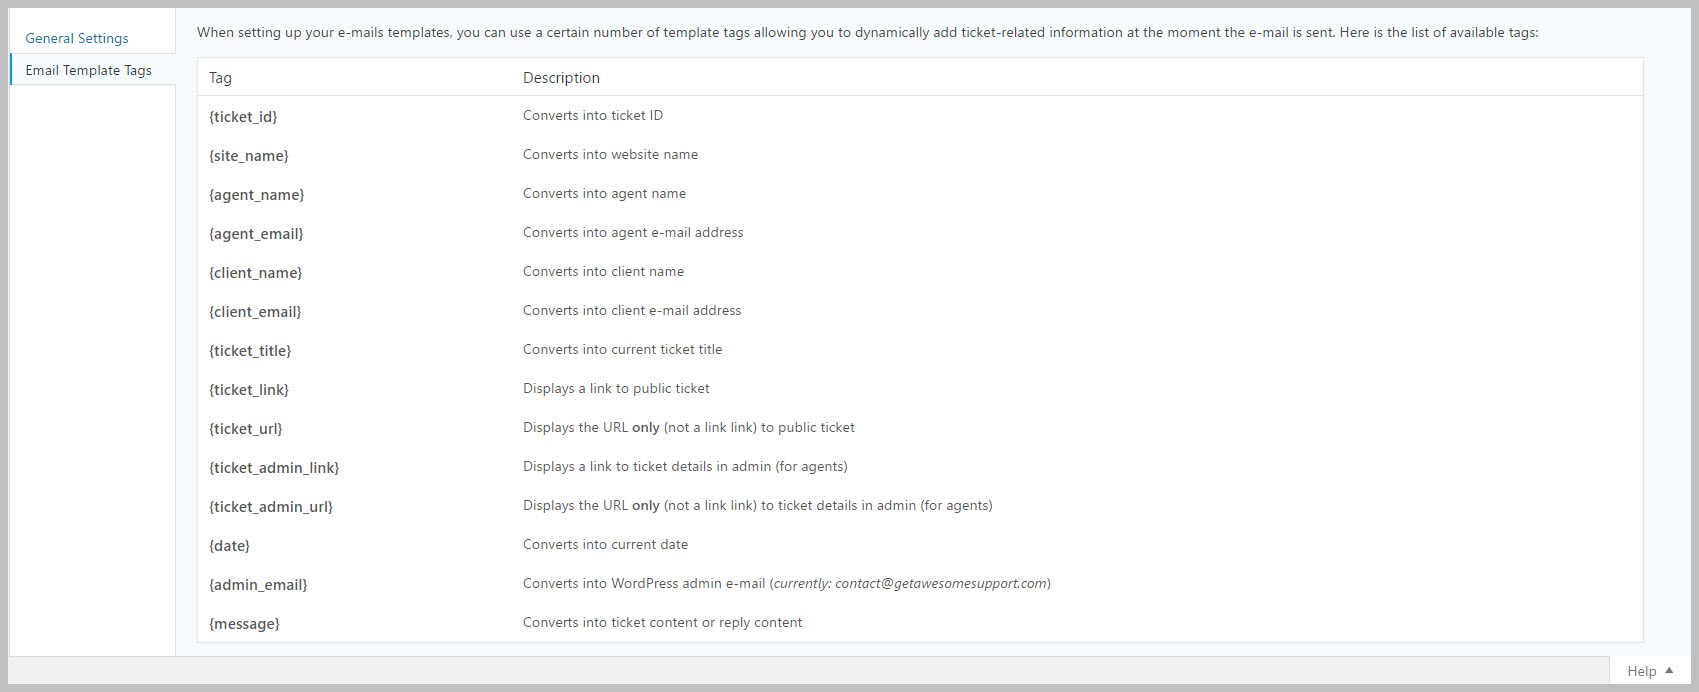
2. You can see a full list of template tags when you are in the TICKETS->SETTINGS->EMAILS tab – just click the HELP link at the top right of your screen and then click Email Template Tags to see the full list.
Here is a partial list of the the tags available in the free core version of Awesome Support:
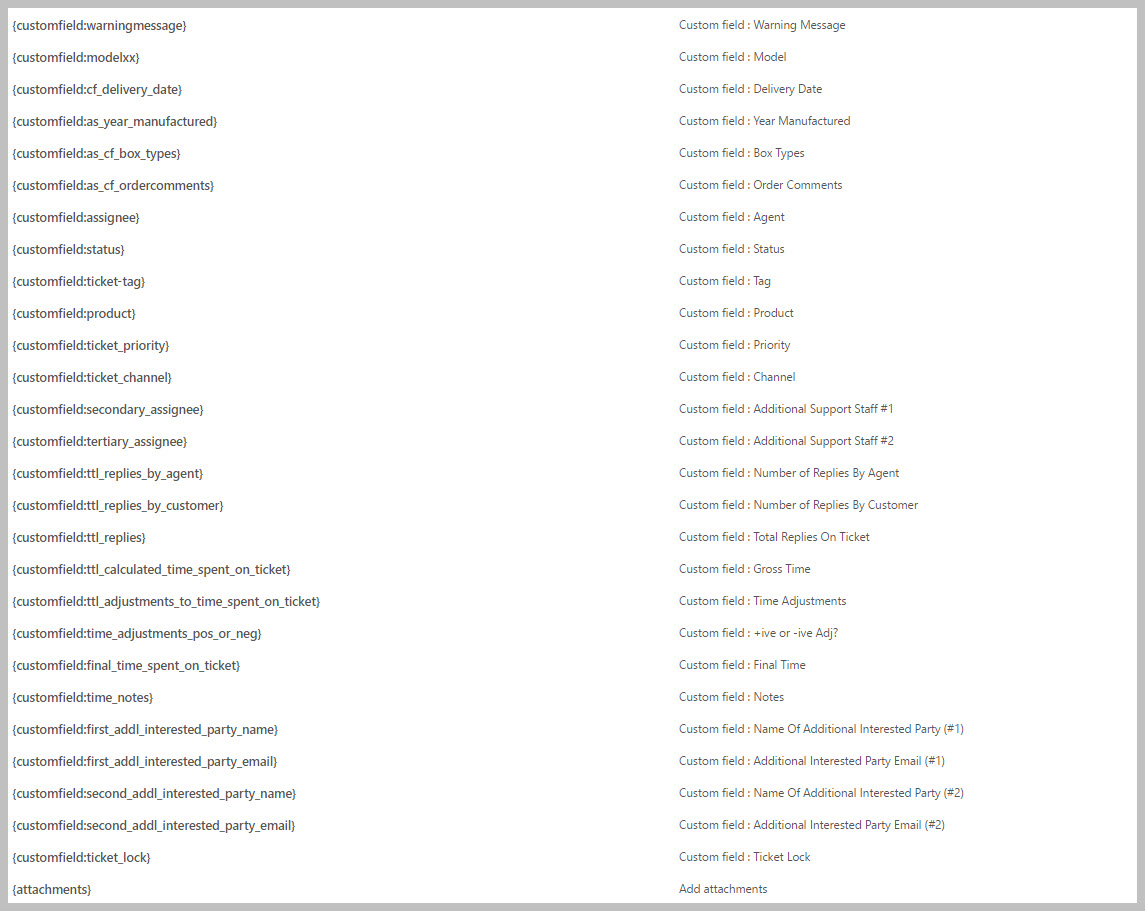
If you install the POWERPACK add-on, you can also use template tags for your CUSTOM FIELDS. Here is an example list of template tags for custom fields:
Finally, some add-ons such as Satisfaction Survey add additional emails and template tags:

More Topics In Awesome Support Core
- Awesome Support
- How To Create A Ticket On Behalf Of The Client?
- What's New In Awesome Support
- Installation
- Post Installation – What You Need To Know (Quick Start)
- Post Installation - Enter Your First Ticket (As A Customer)
- Post Installation: Adjust Security
- Basic Admin: Add An Agent
- Basic Admin: Turn Off Ticket Assignment To An Agent
- Agent Functions: Manage The Ticket List
- Using POEDITOR.COM For Translations
- Agent Functions: View All Tickets
- Agent Functions: Navigate To A Ticket (View Ticket)
- Agent Functions: Explore The Ticket Interface
- Agent Functions: Reply To A Ticket
- Agent Functions: Close A Ticket
- Agent Functions: Add An Internal Note (Premium)
- Agent Functions: Track Time Spent On A Ticket (Basic)
- WPML and POLYLANG
- ADMIN: Overview
- ADMIN: User Registration Options
- ADMIN: Configure Products
- ADMIN: Synchronize Products With WooCommerce And Easy Digital Downloads
- ADMIN: WooCommerce Integration (Basic)
- ADMIN: Configure Departments
- ADMIN: Email Template Sets
- ADMIN: Configure Priorities
- ADMIN: Configure Channels
- ADMIN: Configure Status Colors
- ADMIN: Short Codes And Pages
- ADMIN: Multiple Agents Per Ticket
- ADMIN: Basic Time Tracking
- ADMIN: Misc Display Options For Agents and Admins
- ADMIN: Misc Display Options For Customers (Front-end Users)
- ADMIN: Misc Display Permissions
- ADMIN: Misc Display Options (Advanced)
- ADMIN: File Upload Options
- ADMIN: Deleting Attachments (Manual and Automatic)
- ADMIN: Advanced System Options
- ADMIN: Audit Trail Options
- ADMIN: Handling Existing Users After Installation
- ADMIN: Roles And Capabilities
- Roles and Capabilities Table
- ADMIN: Roles And Capabilities In Add-ons
- ADMIN: WP-CONFIG Options
- ADMIN: Multiple Ticket Forms
- ADMIN: Multi-Vendor Marketplaces
- Multisite Considerations
- Known Plugin Incompatibilities and Conflicts
- Cookies