Personal Todo Lists For Agents
Agents can create PERSONAL TODOs that are tied directly to their profile. Only admins can see an agent’s personal list – other agents cannot view each others’ list. Each personal list is date and time stamped. And they will all show up at the bottom of any ticket for that agent as well as in the WordPress user profile screen for that agent
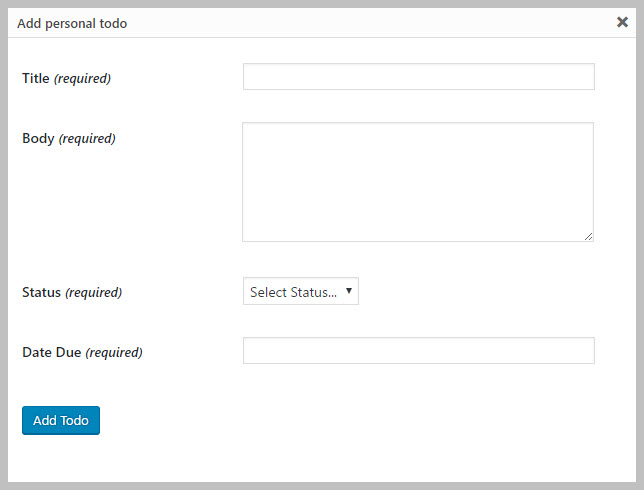
Add Personal Todo
- Scroll down to the bottom of the ticket
- Click the Add Personal Todo button
- Fill in your todo in the popup window.
- Click the Add Todo button to save the item to the list
- Hit the ESC key on your keyboard to exit the popup window.
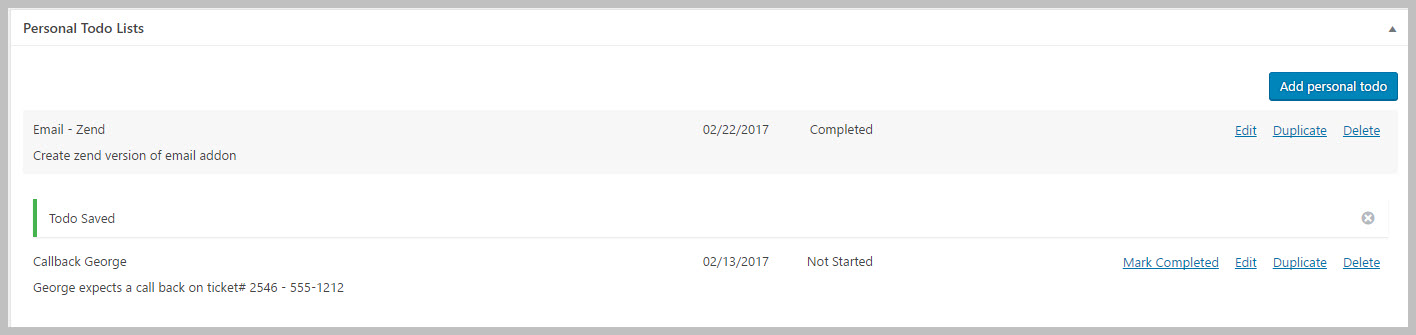
Delete Todo
- Scroll down to the bottom of the ticket and locate the Personal Todo metabox
- Click the Delete link next to the item you’d like to delete.
Duplicate Todo
- Scroll down to the bottom of the ticket and locate the Personal Todo metabox
- Click the Duplicate link next to the item you’d like to duplicate.
Edit Todo
- Scroll down to the bottom of the ticket and locate the Personal Todo metabox
- Click the Edit link next to the item you’d like to edit
- Update your item in the popup window.
- Click the Save Todo button to save the updates.
- Hit the ESC key on your keyboard to exit the popup window.
Mark Complete
- Scroll down to the bottom of the ticket and locate the Personal Todo metabox
- Click the Mark Completed link next to the item you’d like to mark as complete. This action cannot be reversed!
You can also perform these actions in the WordPress User Profile screen.
More Topics In Productivity Powerpack
- Productivity
- Installation (Powerpack)
- Overview
- Security Profiles for Agents
- Ticket Lock
- Ticket Merge (Single Ticket)
- Ticket Split / Ticket Duplicate
- Ticket Merge (Multiple Tickets)
- New Email Templates For Ticket Merging
- Additional Navigation
- ATTACHMENTS Template Tag For Outgoing Emails
- Custom Fields Template Tags For Outgoing Emails
- Full Ticket Template Tag For Outgoing Emails
- Support Notes For Customer/Client
- Personal Notes For Agents
- Set Content Before the SUBMIT Button (On the Front-end)
- Set Content Before the SUBJECT Field (On the Front-end)
- Set Default Content For SUBJECT and DESCRIPTION Field (On the Front-end)
- Change Label Text
- Agent Signatures
- Click-To-View Email Template Tag
- Click-To-Close Email Template Tag
- Multiple E-mail Addresses For Tickets, End-Users And Agents
- Invisible Captcha
- Save Ticket List Filters
- Custom CSS For Awesome Support Pages
- Bulk Edit Functions
- Useful Misc Functions
Search