Ticket Merge (Multiple Tickets)
Merging multiple tickets into a single existing ticket is a piece cake – as long as you’re running under WordPress 4.7 or later. The entire process is initiated from the main ticket list screen in the WordPress Admin dashboard.
Merge Multiple Tickets Into A Single Ticket
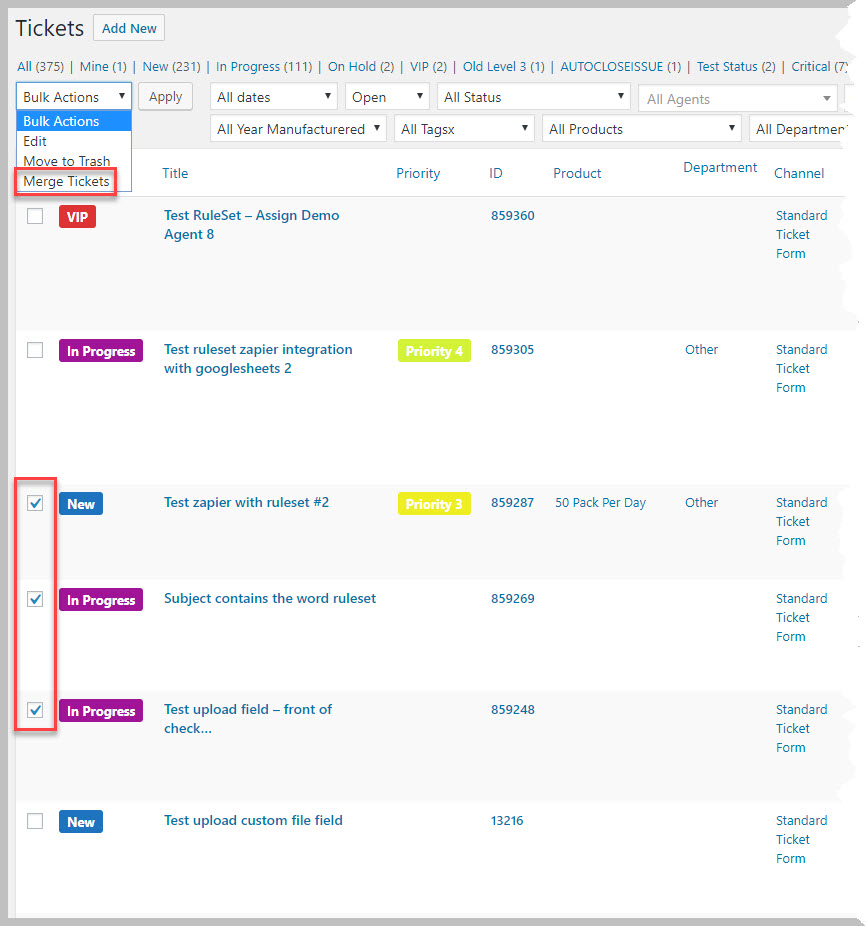
- Open the main tickets dashboard (TICKETS->ALL TICKETS)
- Check the tickets you want to merge
- Click the BULK ACTIONS drop-down at the top of the ticket list
- Select Merge Tickets and click the APPLY button next to the drop-down (see image below)
- In the popup window search for the target ticket and click on it
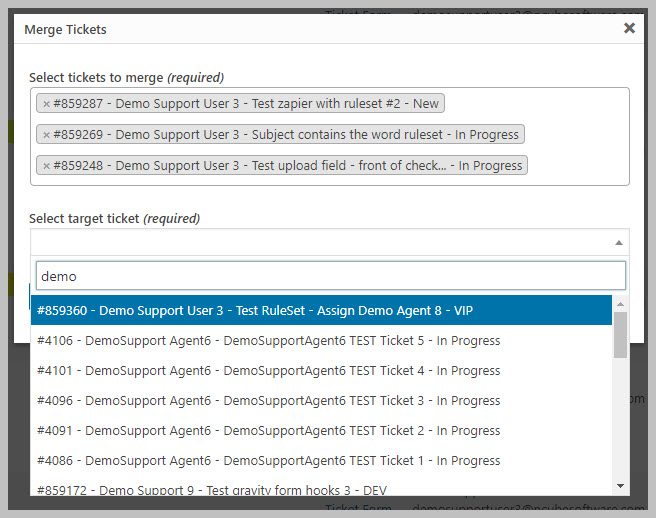
- Click the MERGE button
- Once the process has been completed, click the CLOSE button
Important Notes About This Process
- This is a processor intensive process – if your host gives you limited resources you could experience time-outs.
- Attachments are not merged into the new tickets. However, links in the new ticket give you direct and convenient access to the old tickets where you can view the attachments
- All email addresses on the closed tickets are automatically added to the target ticket:
- Agents
- Secondary and Tertiary agents
- Ticket creator
- Third party 1 & 2
- Emails from the email address tab
- Users from the WordPress users tab
More Topics In Productivity Powerpack
- Productivity
- Installation (Powerpack)
- Overview
- Security Profiles for Agents
- Ticket Lock
- Ticket Merge (Single Ticket)
- Ticket Split / Ticket Duplicate
- New Email Templates For Ticket Merging
- Additional Navigation
- ATTACHMENTS Template Tag For Outgoing Emails
- Custom Fields Template Tags For Outgoing Emails
- Full Ticket Template Tag For Outgoing Emails
- Support Notes For Customer/Client
- Personal Notes For Agents
- Personal Todo Lists For Agents
- Set Content Before the SUBMIT Button (On the Front-end)
- Set Content Before the SUBJECT Field (On the Front-end)
- Set Default Content For SUBJECT and DESCRIPTION Field (On the Front-end)
- Change Label Text
- Agent Signatures
- Click-To-View Email Template Tag
- Click-To-Close Email Template Tag
- Multiple E-mail Addresses For Tickets, End-Users And Agents
- Invisible Captcha
- Save Ticket List Filters
- Custom CSS For Awesome Support Pages
- Bulk Edit Functions
- Useful Misc Functions
Search