Security Profiles for Agents
Security profiles allow you to control exactly which tickets an agent can view.
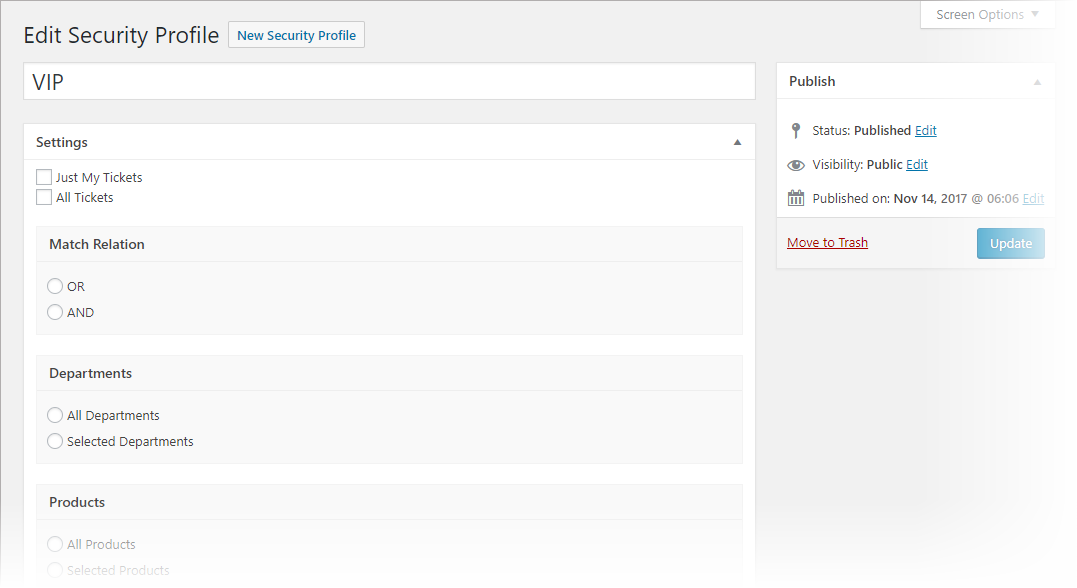
You can create a security profile based on the following attributes:
- My Tickets (tickets assigned to just the agent)
- All Tickets
- Department
- Products
- Channel
- Priorities
- Users
- User Groups
- Status
- State (Open / Close)
- Primary Agent
- Company (If the Company Profiles add-on is installed)
You can mix and match attributes using and/or combinations. For example you can create a security profile for PRIORITY 1 tickets that are also NEW. Or you can create a security profile for tickets with VIP status that belong to just a particular user group.
Create A Security Profile
- Go to TICKETS->SECURITY PROFILES
- Click the NEW SECURITY PROFILE button at the top of the list
- Select the options you want and then click the PUBLISH button.
Assign Security Profiles To Agents
Once you have created a security profile, you can assign them to one or more agents. Then, when those agents log in, they will only see the tickets that match the criteria in the security profile that they have been assigned.
- Access the WordPress USERS menu (USERS->ALL USERS)
- Locate the Agent User Profile and open it for editing
- Scroll down and find the TICKET SECURITY PROFILE field
- Select the profile you want to assign to the agent from the drop-down
- Scroll down to the bottom of the page and click the UPDATE USER button.
Using USER GROUPS
User groups allow you to group users so that they can be used as attributes in your agent security profiles.
To use USER GROUPS, you need to create the groups and then assign them to users.
Create User Groups
To create user groups, just go to the WordPress USERS menu option and click on TICKET USER GROUPS

Assign A Group to A User
To assign a group to user, just edit the User’s WordPress profile and locate the GROUPS field. Then just select one or more groups (you can select multiple groups from the list by holding down the CTRL key and then clicking on your selections).
More Topics In Productivity Powerpack
- Productivity
- Installation (Powerpack)
- Overview
- Ticket Lock
- Ticket Merge (Single Ticket)
- Ticket Split / Ticket Duplicate
- Ticket Merge (Multiple Tickets)
- New Email Templates For Ticket Merging
- Additional Navigation
- ATTACHMENTS Template Tag For Outgoing Emails
- Custom Fields Template Tags For Outgoing Emails
- Full Ticket Template Tag For Outgoing Emails
- Support Notes For Customer/Client
- Personal Notes For Agents
- Personal Todo Lists For Agents
- Set Content Before the SUBMIT Button (On the Front-end)
- Set Content Before the SUBJECT Field (On the Front-end)
- Set Default Content For SUBJECT and DESCRIPTION Field (On the Front-end)
- Change Label Text
- Agent Signatures
- Click-To-View Email Template Tag
- Click-To-Close Email Template Tag
- Multiple E-mail Addresses For Tickets, End-Users And Agents
- Invisible Captcha
- Save Ticket List Filters
- Custom CSS For Awesome Support Pages
- Bulk Edit Functions
- Useful Misc Functions