Clients and Customers: Changing Public/Private Status
Your clients or customers can perform the following actions on a ticket:
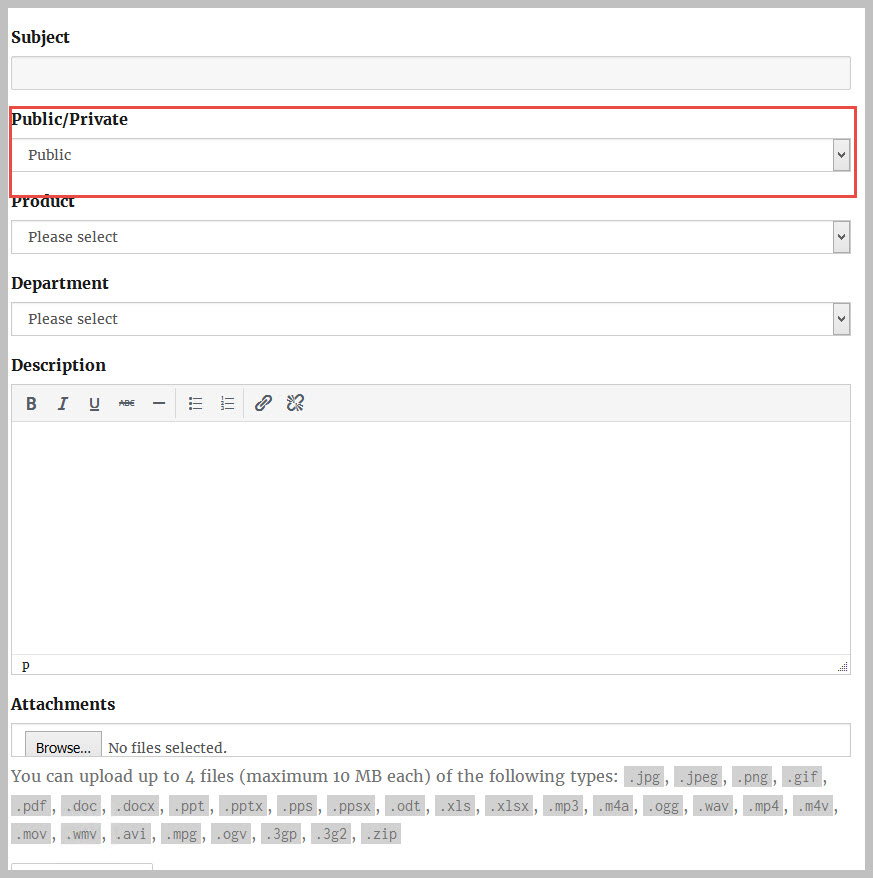
1. Create A New Ticket as Private or Public
If you have set the option to allow your clients and customers to set the public/private status themselves, have them follow these instructions to open a ticket as explicitly public or private
- Create a new ticket
- Scroll down to the Public/Private field
- Select Public or Private from the dropdown
- Fill out the rest of the ticket as normal.
- Submit the ticket.
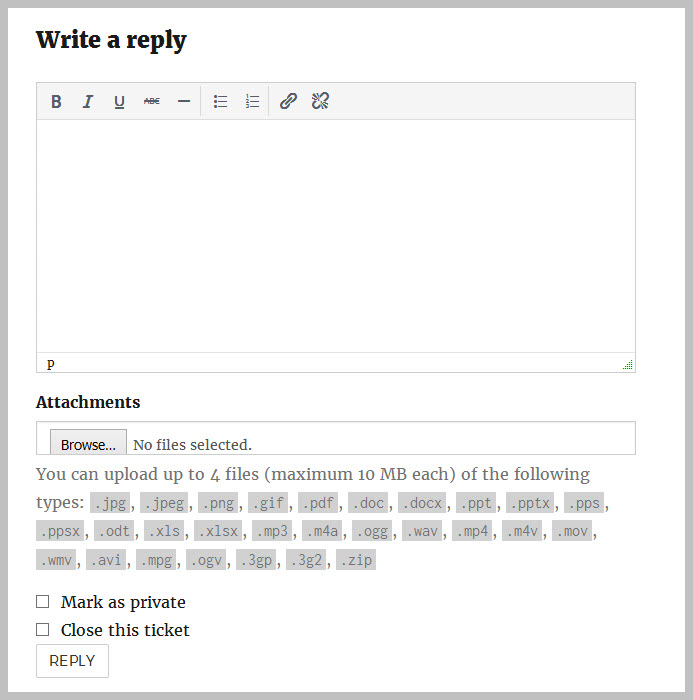
2. Send A PRIVATE Reply
- Open the existing ticket
- Scroll down to the reply area
- Enter the contents of the reply
- There should be a single checkbox that says Mark As Private just below the Attachments box. Click on it to turn the checkbox on.
- Click the REPLY button.
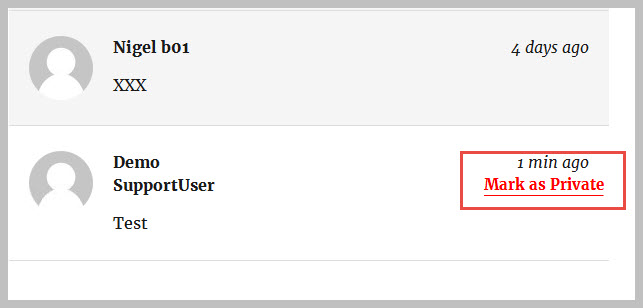
3. Change an Individual Reply From Public to Private or Private to Public
If there are replies already in the ticket you can change the public or private status of the reply.
- Open the ticket
- The Mark as Private or Mark As Public link will show up in red in the appropriate replies
- Click the Mark As Private link (which will show up if the reply is public) or the Mark As Public link (which will show up if the reply is private)
Search