Explore The User Interface
The Awesome Support Gravity Forms add-on user interface is slightly more complex than our other add-ons and it requires you to make several decisions for every field you need to import/map from your Gravity Forms form.
Below is a typical Gravity Forms Mapping. You can map multiple Gravity Forms, each of which will appear in a separate level in an “accordion” widget. The image below shows four forms mapped and the edit screen for current mapping we are working with.
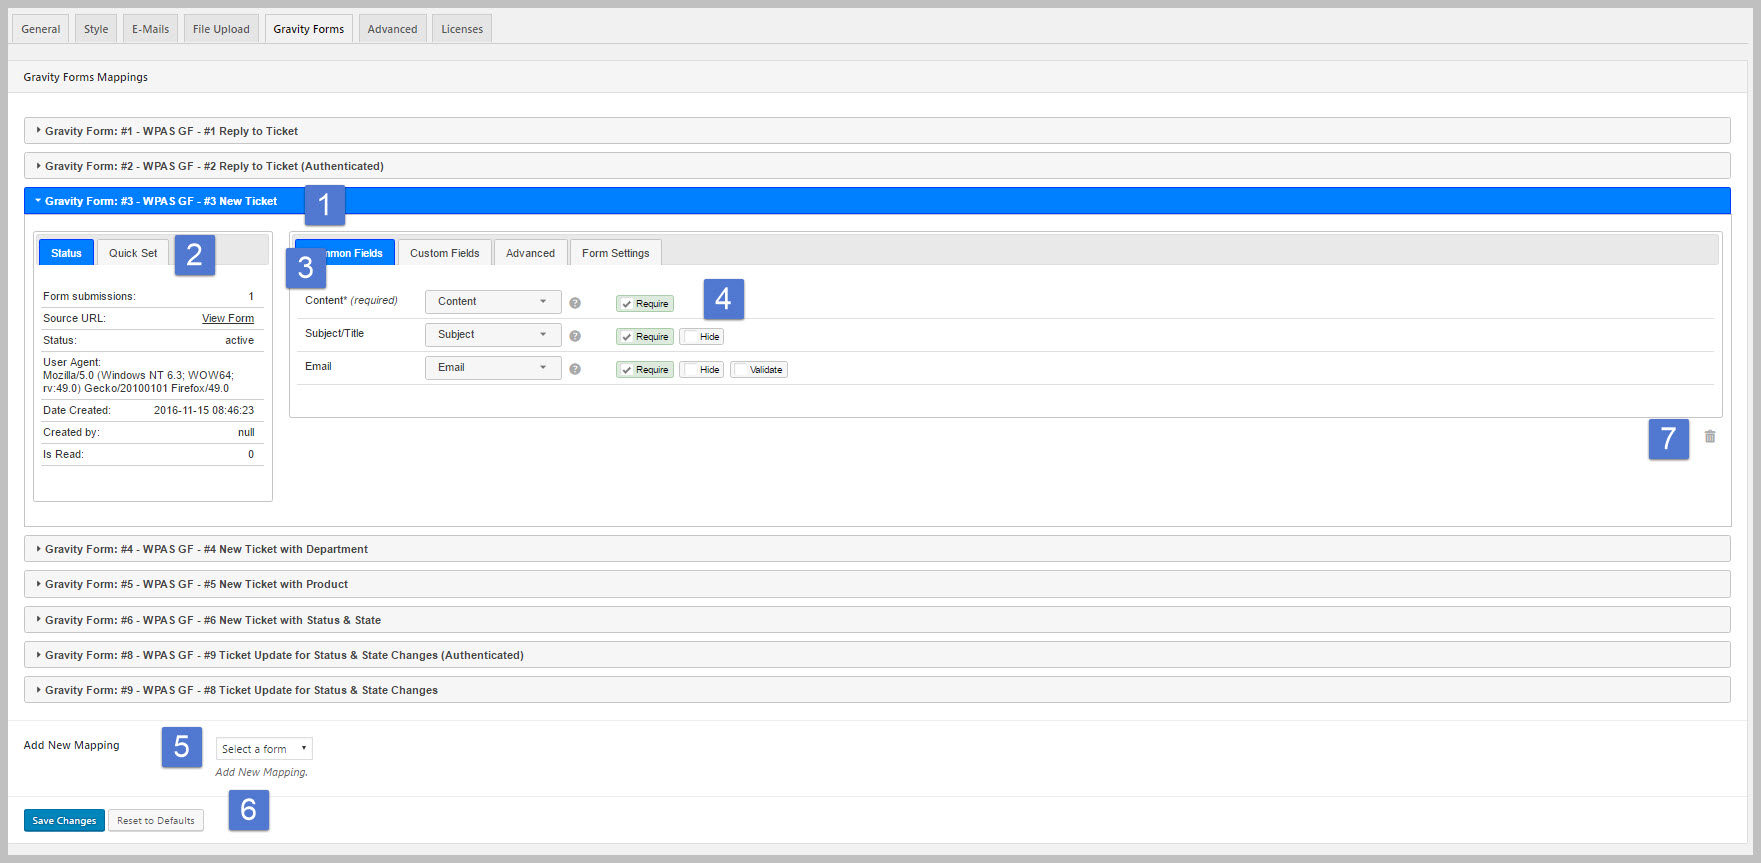
In the image above you can see that there are four forms mapped with the first one being the one that we have choosen to edit. The Mapping currently being edited will have a blue header.
We have labeled the primary areas in the image – a description of each area is as follows:
- This is the header that shows the name of the Gravity Form being mapped – it is the “source” of the data that will be flowing into Awesome Support. Clicking this header will “close up” the accordion.
- This area will show some basic statistics about the mapping in future versions – while the image above shows some data, your version could be blank.
- This is the MAIN area you’ll be using. The field names on the left eg: content, subject etc., are all Awesome Support data fields. The drop-down boxes next to them show the fields that are available in your selected Gravity Forms form. You can select which field from your Gravity Form will populate the selected Awesome Support data field.
- These check boxes allow you to control how Awesome Support will validate the data. Depending on your use case for the Gravity Form, some of these fields will be required to be checked.
- Require: Forces the field to be required. If this option is checked any form data submitted without data in it will be rejected.
- Hide: This prevents the data in this field from being added to the “body” of the ticket. Sometimes you want to map a field but you do not want the Awesome Support customer user to see that data. Since any data in the “body” of the ticket can be seen by all parties, this checkbox prevents the mapped data from appearing in the ticket or reply body.
- Validate: Will apply Awesome Support validation rules to the field. Each Awesome Support field has validation rules that you can choose to enable or disable. We recommend that, if a field you are mapping has a validation option, that you enable it (unless you want to allow blanks).
- Populate: Some mapped fields have this option. Examples include Status, State and Assignee/Agent. Checking this field feeds the awesome support data back to the Gravity Form just before rendering the form to the end-user. This allows the end-user to be able to pick from a drop-down of valid values.
- This is where you can select your form to be mapped. Once you select a from from the drop-down, a new “accordion” tab will be created and you can get to work mapping your data.
- You can save your data by clicking the appropriate button in this area.
- Use this icon to delete a mapping