Creating Your First New Ticket Form
There are THREE steps to creating a Gravity Forms form that will automatically send data to the Awesome Support ticket system.
- Create the Gravity Forms form
- Add the form to a page using the Gravity Forms short-code
- Tell the Awesome Support Gravity Forms add-on what to do with the form data
We assume that you already know how to use Gravity Forms so this part of the documentation will not be covering those steps. Please contact Gravity Forms for technical support if you need help creating a form.
1. Create The Gravity Forms form
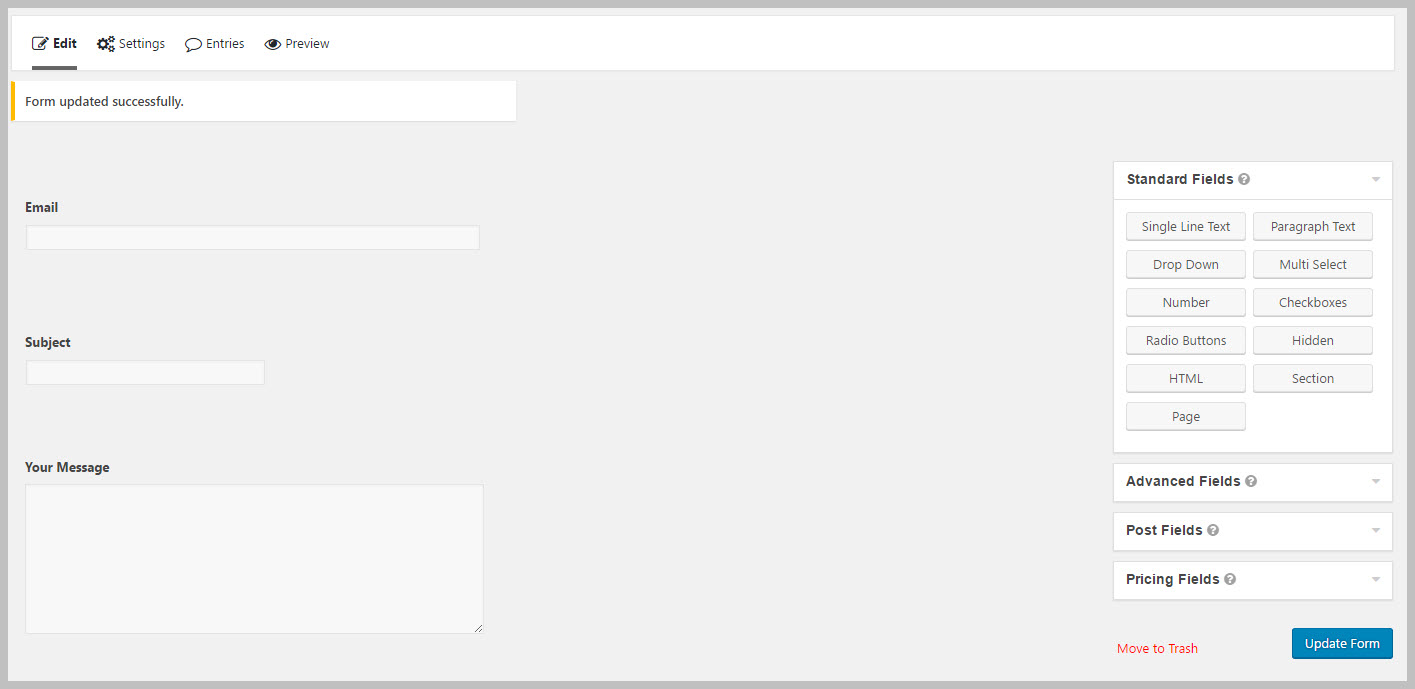
Create a form with three fields on it:
- Email Address
- Subject (“Single Line Text” field type)
- Message (“Paragraph Text” field type)
This is an example of what that form would look like in the Gravity Forms designer:
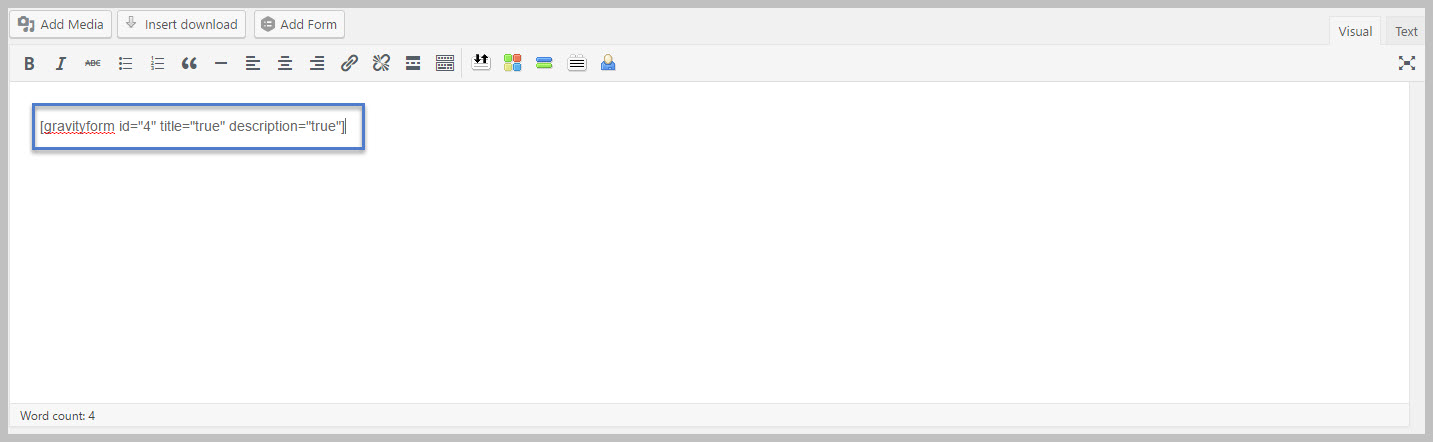
2. Add The Form To A Page
Add the form’s short-code to a new WordPress page. An example of that shortcode would be something that looks like this:
3. Tell Awesome Support What To Do With The Gravity Forms Data
- Go to the TICKETS->SETTINGS->Gravity Forms Tab
- In the Add New Mapping dropdown, select the Gravity Form you created in Step #1

- Once selected, the MAPPING window may or may not appear. If it does not appear, just click the accordion to show it.
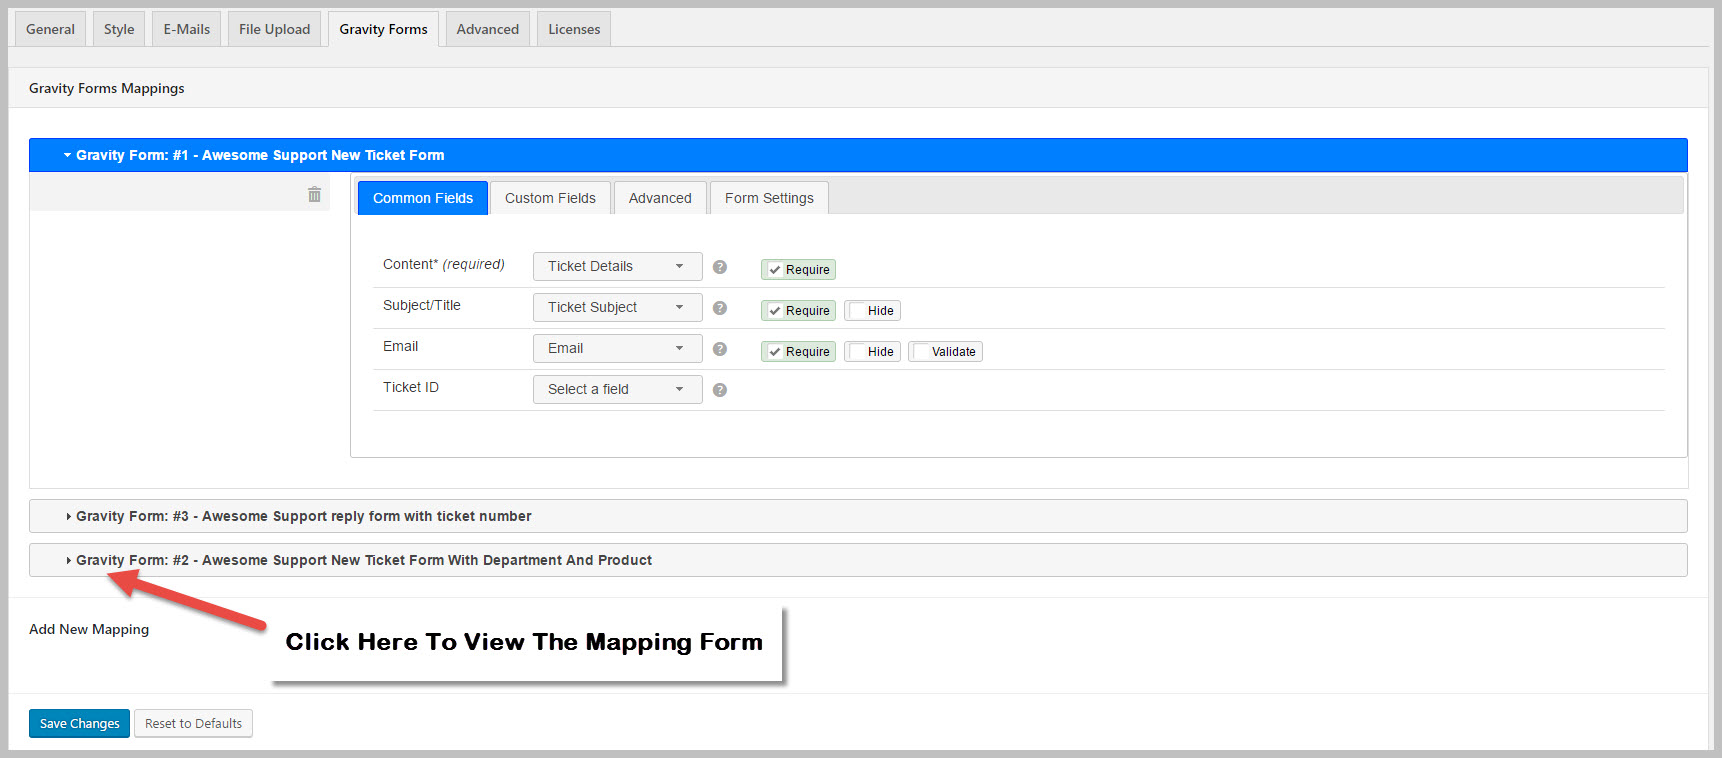
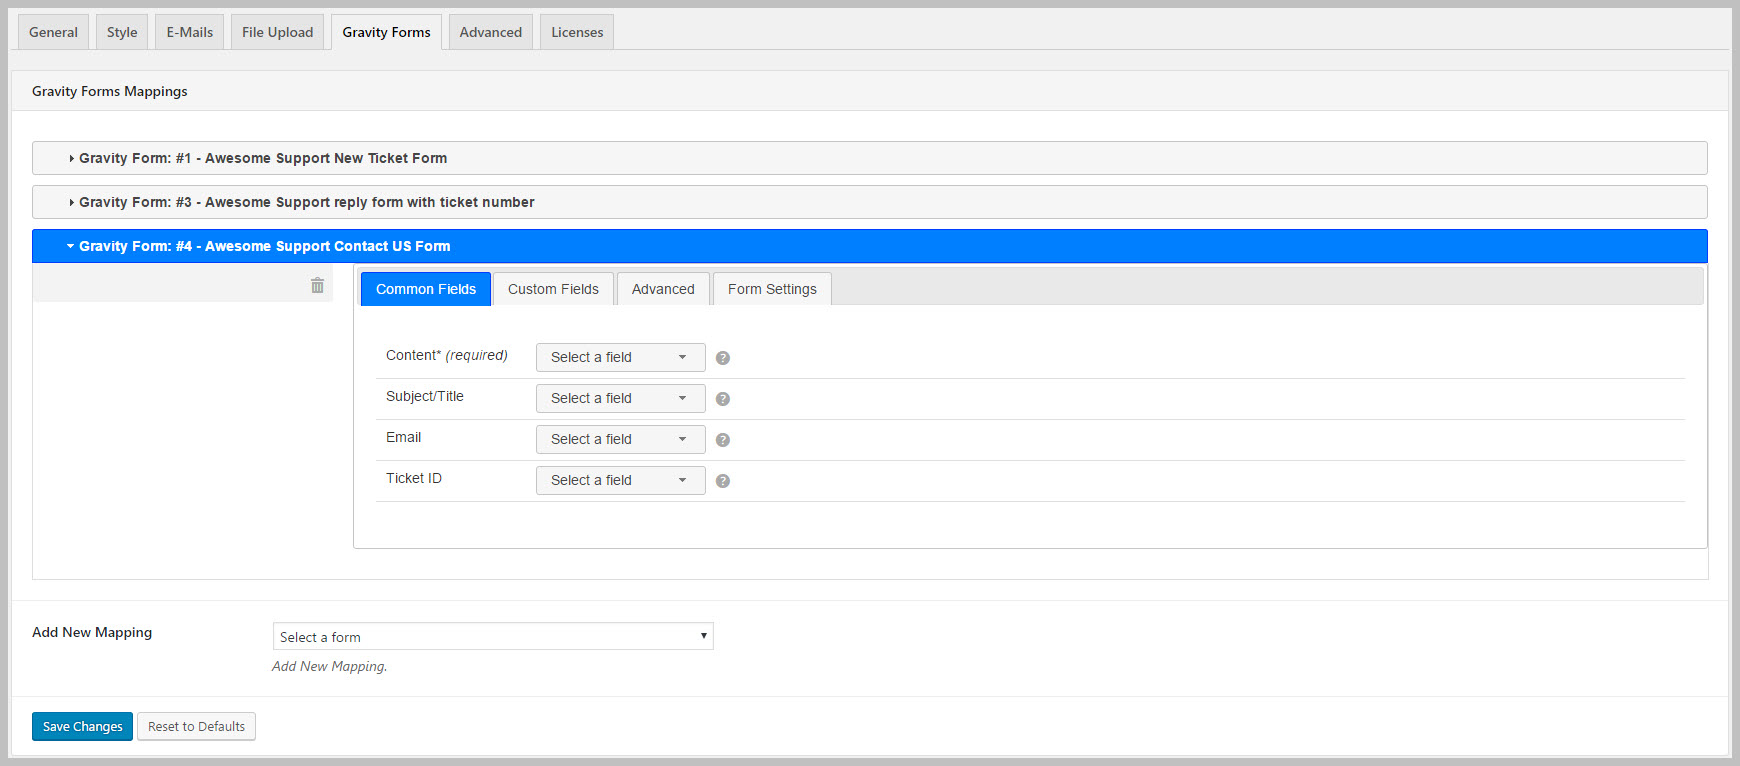
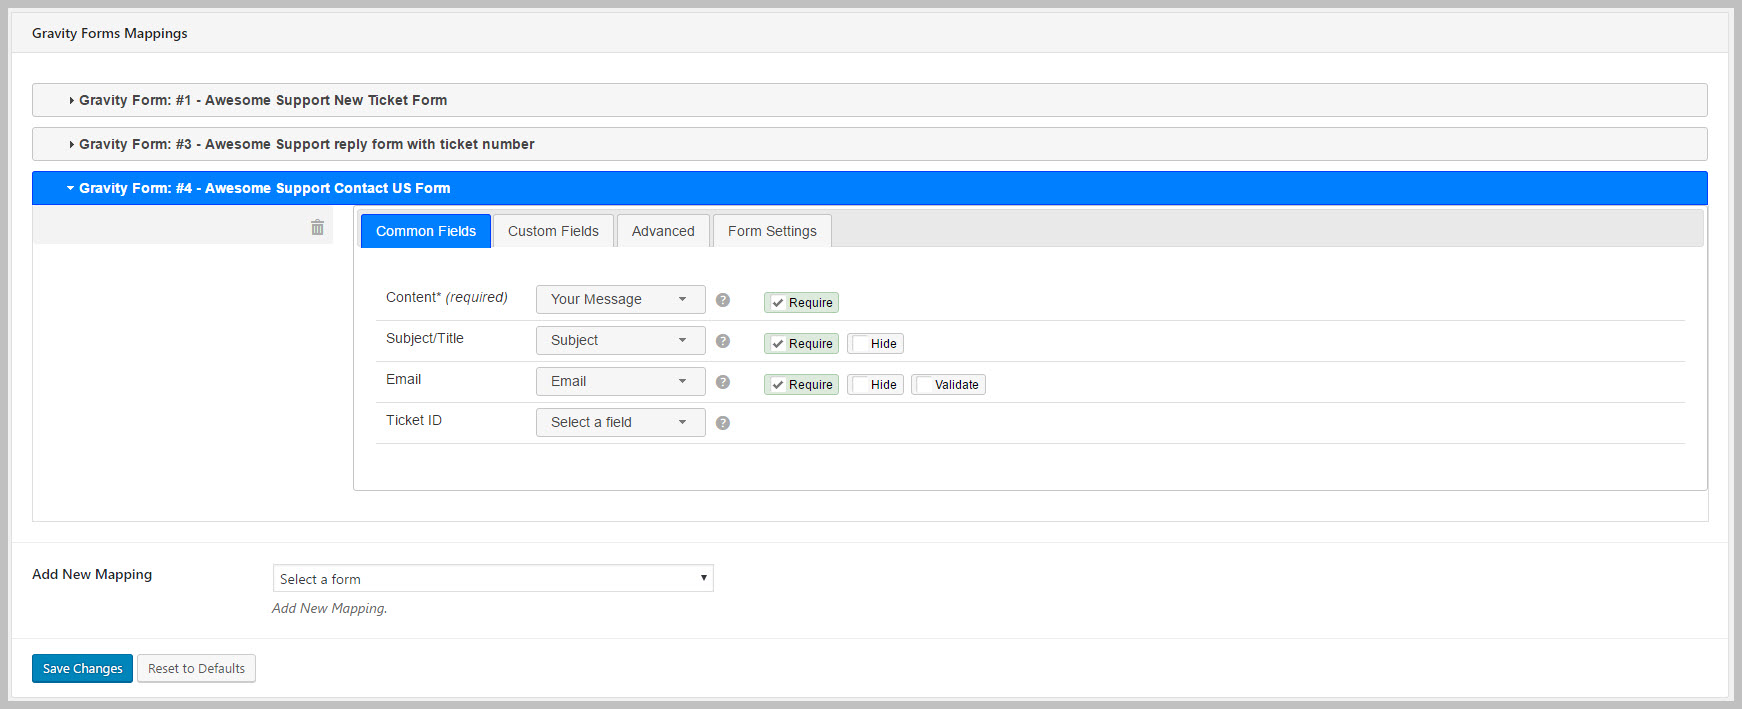
- Lets start mapping your form fields to Awesome Support Fields
- Select the drop-down for the CONTENT field and select the YOUR MESSAGE item. (“Your Message” is the name of the field on the Gravity Forms form).
- Select the drop-down for the SUBJECT/TITLE field and select the SUBJECT item.
- Select the drop-down for the EMAIL field and select the EMAIL item.
- Make sure you check the Require box next to each of the three fields.
Your screen should now look similar to this:
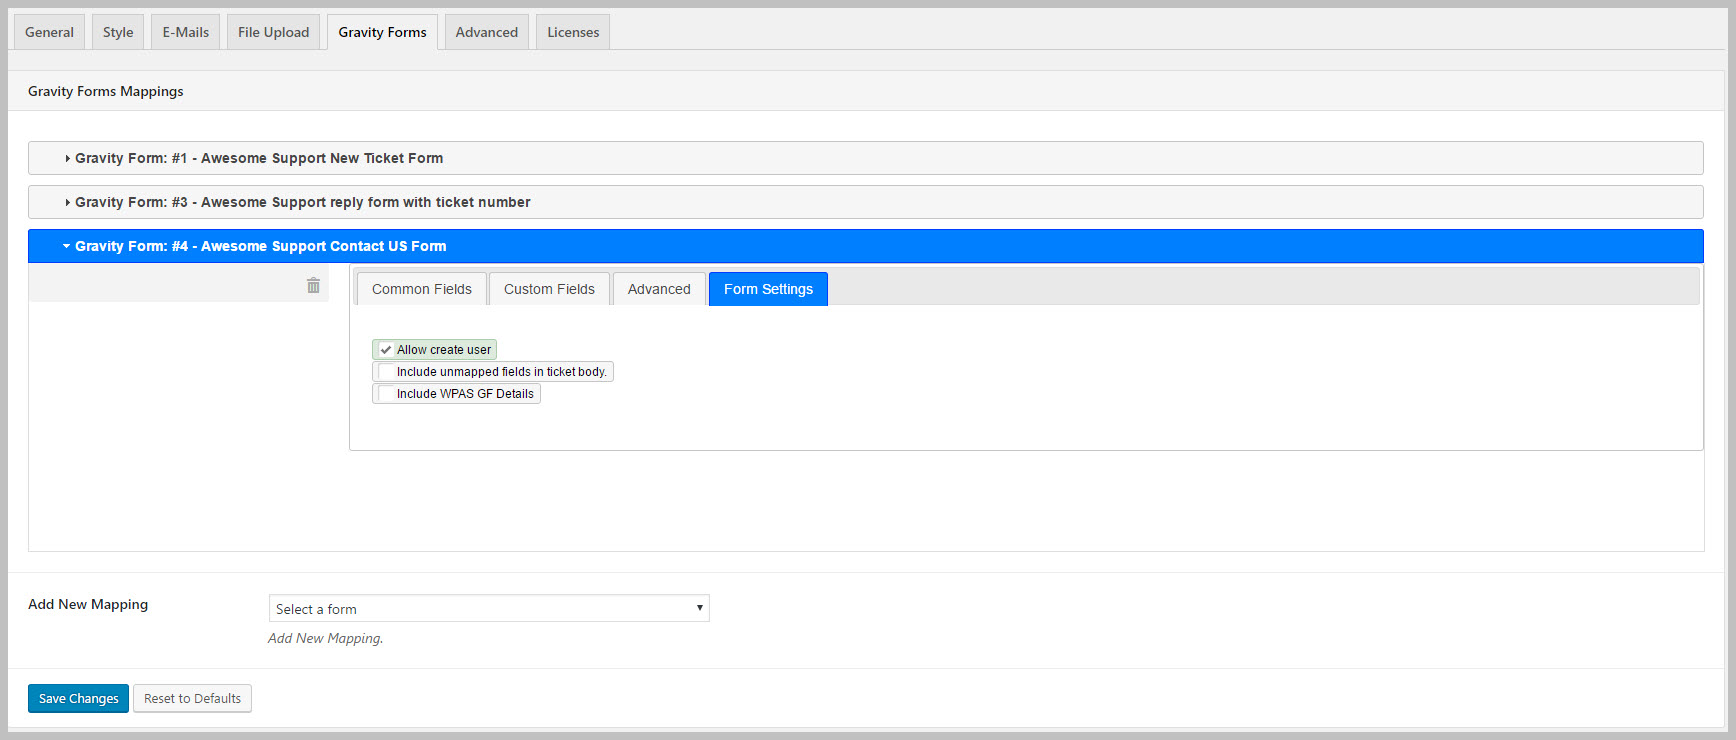
- Now lets set some form options.
- Click on the FORM SETTINGS tab.
- Click the ALLOW CREATE USER option – this will allow the ticket to be created without forcing the user to log in.
Your screen should now look similar to this:
- Save Your Configuration by clicking on the SAVE CHANGES Button. If you have only one form mapped (which, if this is a new installation, should be the case), then the accordion tab will remain open. Otherwise it will close up and the first tab will re-open. All you have to do is click on the accordion tab that has the name of your Gravity Forms form on it.
Test Your Form
Pull up your page on the website front-end with the Gravity Forms short-code on it. Here is what our screen looks like (we’re using the DIVI version 3.x theme):
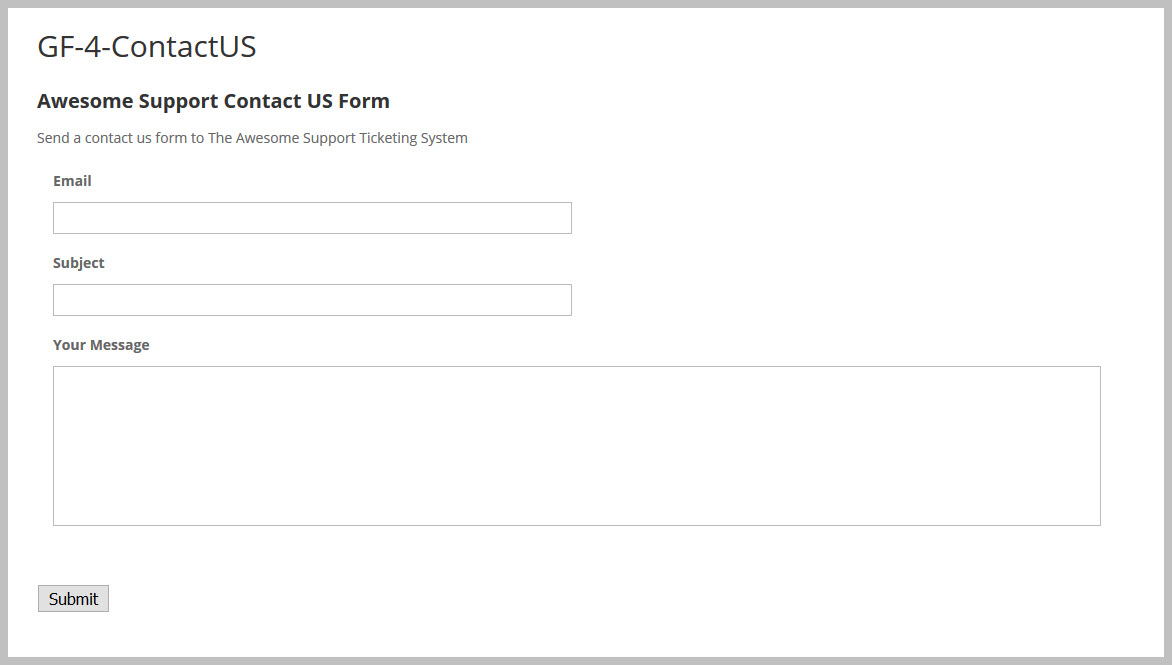
If you fill it out, you should see a ticket show up in the Awesome Support ticket list!