Add Your First Product
To create your first SUBSCRIPTION product go to the WooCommerce Add Product Screen: PRODUCTS->ADD PRODUCT
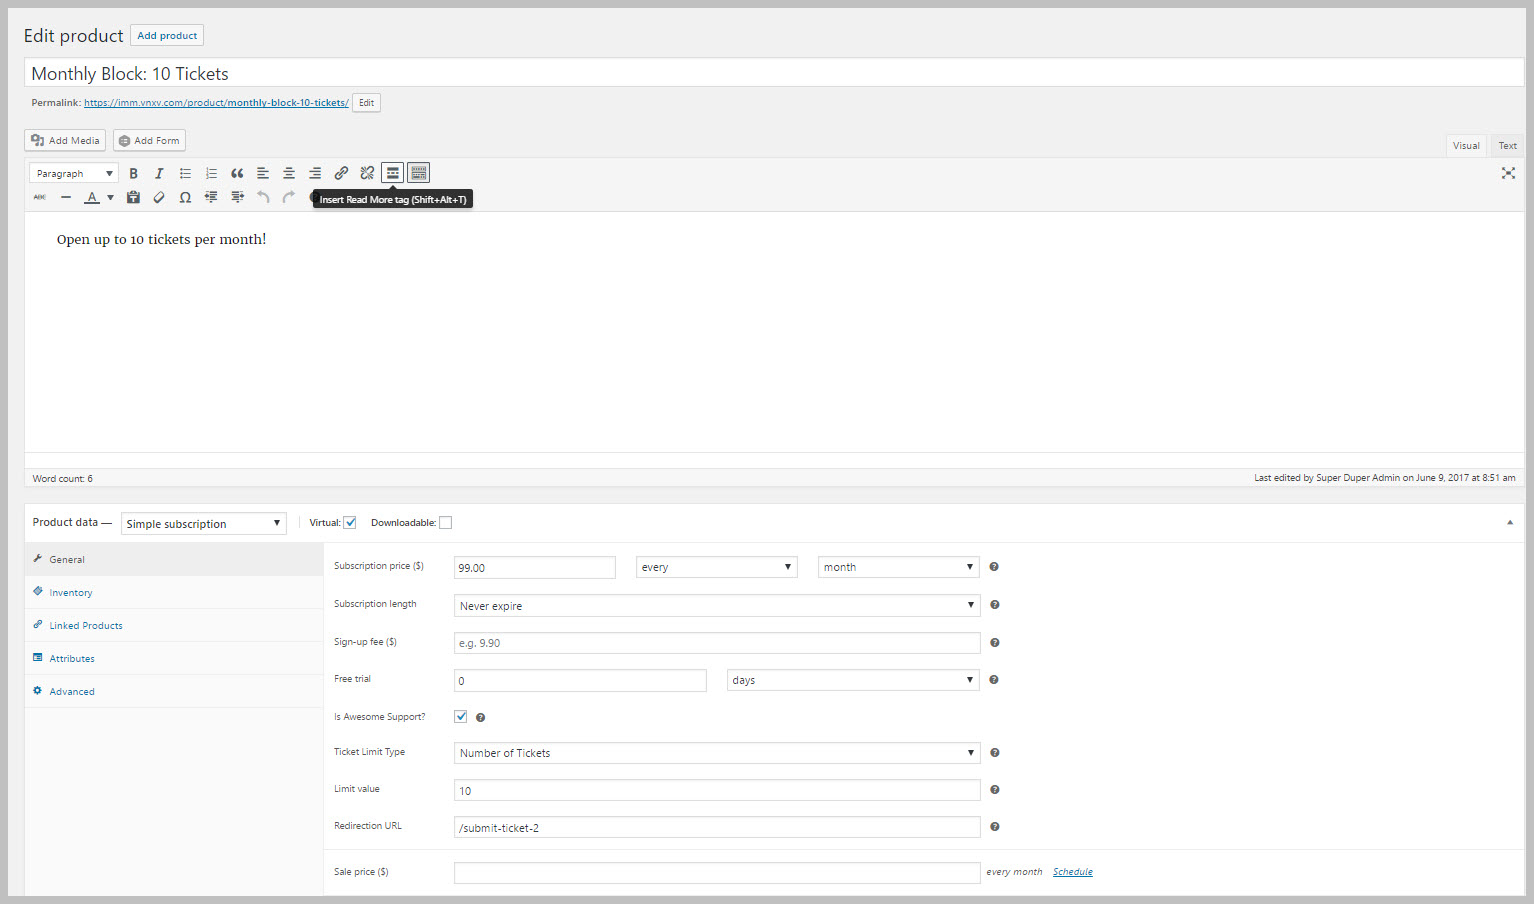
- Fill out the Product Name at the top and add a description in the main description area.
- Below the main description area is a field called PRODUCT DATA with a drop-down. Choose SIMPLE SUBSCRIPTION.
- Check the box next to that field that says Virtual since there is no physical product that is being delivered.
- You can then set your subscription price and period, sign up fee if any and specify a trial period.
- Enable the checkbox that says Is Awesome Support. You should then see some additional fields:
- Ticket Limit Type: This controls whether you are limiting the subscription to a fixed number of tickets or a fixed number of hours.
- Limit Value: This sets the number of actual tickets or hours allowed for this product
- Set a URL to be redirected to when the purchase is complete. Typically this would be the standard Awesome Support SUBMIT TICKET form or it could be a custom Gravity Forms ticket form.
- Click the PUBLISH button.
Here is an example of what a completed product form might look like:
Note: When WooCommerce is installed, it creates a separate menu option in the WordPress left menu bar called PRODUCTS. This is a separate option from Awesome Support’s TICKETS->PRODUCTS screen!
Search