Configure A Remote Tickets Site
To configure a remote tickets site you need to set the options that will be used for that site. To do this:
- Go To TICKETS->REMOTE TICKETS
- Click the ADD NEW button at the top of the screen. You will see a screen that looks similar to the following:
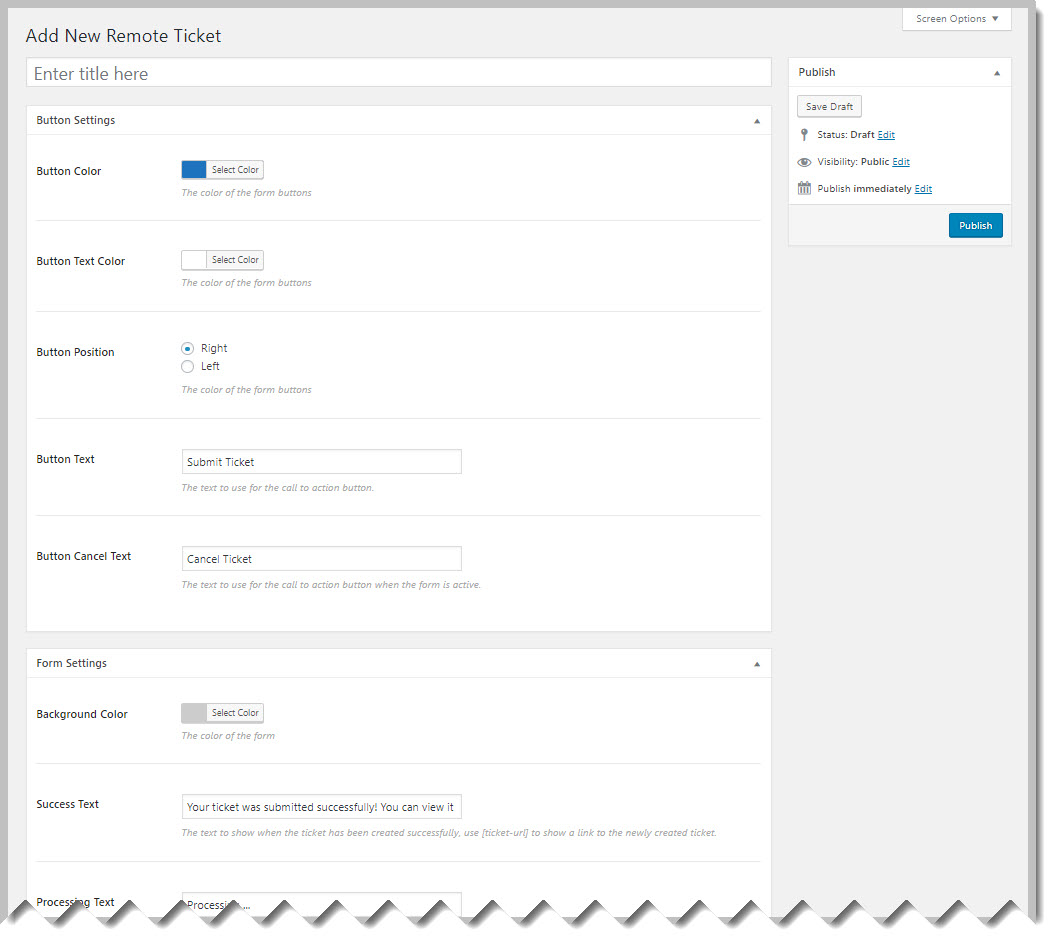
- Fill in a title – generally the site where you’re collecting tickets or your master site
- You can accept the defaults for the other fields or change them as you see fit
- Click the PUBLISH button on the upper right to activate this profile
Installing On The Remote Site
After you save a REMOTE TICKETS profile you will see a new field called FORM CODE that shows up at the top of the screen.
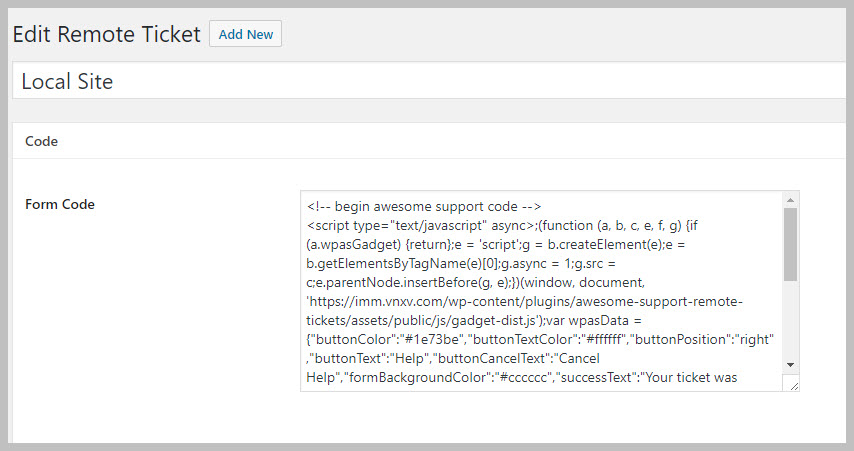
The contents of this field is the JAVASCRIPT snippet that needs to be installed on remote sites.
There are three ways to install this on a remote site:
- If using WordPress on the remote site, some themes have an option in their configuration screen to add Javascript in the header or footer. This is generally the same area where you would add in Google or Facebook code.
- If using WordPress and your theme does NOT have an option to add Javascript in the header or footer you can install the free INSERT HEADERS AND FOOTERS plugin from WordPress.org. Once installed, you can go to SETTINGS->INSERT HEADERS & FOOTERS and add in this code there.
- If not using WordPress on the remote site you will have to manually edit your HTML files or use whatever facility the remote site content management system has to allow Javascript to be inserted into pages.
Once installed the HELP button should immediately be visible on all site pages.
More Topics In Remote Tickets
Search