Filepicker
The Filepicker add-on will replace the classic WordPress uploader used for file attachments by Filepicker.io. This means that all files uploaded using Filepicker will be stored on their servers instead of your local WordPress install.
This add-on supports all upload methods offered by Filepicker but it is important to note that some of them will require a paid plan on Filepicker. Also, some of the upload methods, such as Dropbox, will require additional configuration on Filepicker’s side.
Premium Upload Methods
If you wish to use one of the following upload methods, you will need to buy the appropriate plan with Filepicker. See their pricing page for more details.
- Amazon S3
- Azure, Rackspace
- Dropbox
Activating the Plugin
Once the plugin is installed and activated, you will need to input your Filepicker API key to enable the feature. The WordPress uploader will remain in place until you fill-in your Filepicker API key.
Creating an App
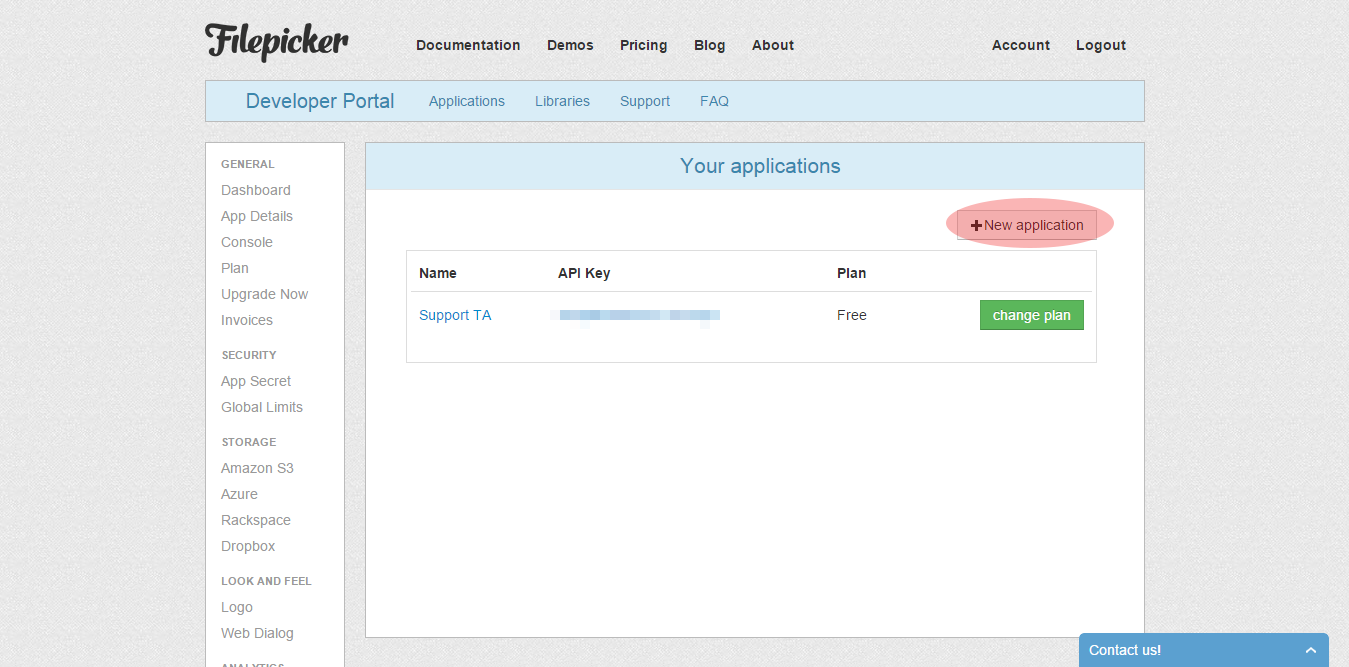
In order to get an API key, you will need to create an application on Filepicker. To do so, head over to the developer portal and click the “New Application” button.
During the app creation, select “Web” when asked “Which Filepicker.io file SDK(s) are you planning to use?”.
After your new app is created, go to the Dashboard of your app to get the API key.
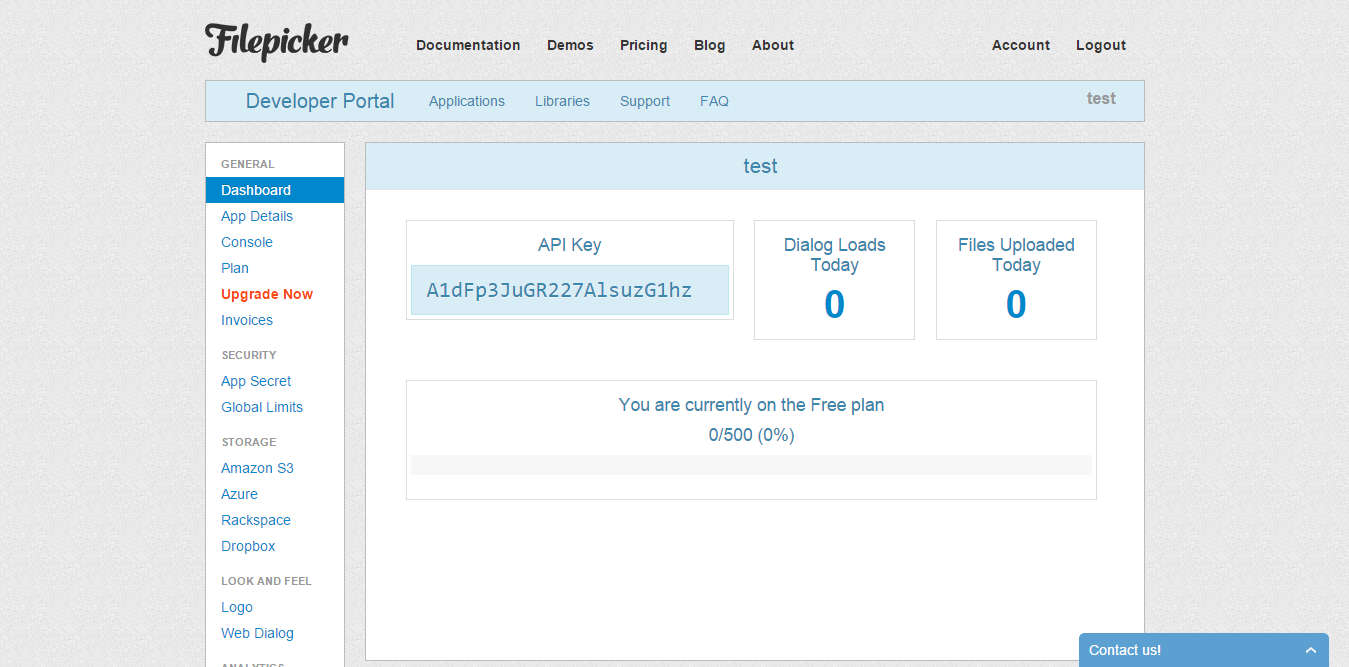
Copy this key in the blue box. This is what you need to paste in the add-on settings. Reach Awesome Support settings page and click the “File Upload” tab. Scroll down the page until you see the Filepicker section and paste the API key in the “API Key” field. Hit save and you’re done.
Securing Filepicker
By default, the Filepicker is not secured. This doesn’t mean that you’re at risk, but if one of your users decided to share a direct link to an uploaded file, everyone with the link would access it.
If you want enhanced security and limit the rights given to users over your files, you need to enable the security.
How Security Works
There are 2 different scenarios where Filepicker is used. For each scenario, a different security level is used.
- A file is uploaded: the uploader can upload files for 30 minutes after the page was loaded
- A user opens an uploaded file: the user can only read a file attached to his ticket (no other) for 1 hour after the page was loaded
Those security rules are here to:
- Prevent users from seeing files that are not related to their ticket,
- Prevent users from sharing a valid link to an uploaded file (links always expire after 1 hour)
Enabling Security
First of all you need to enable the security in Filepicker itself. Head over your developer dashboard and select the application. Click “App Secret” in the left hand side menu and check “Use Security”. Confirm your action when asked.
You now need to reload the page in order to get your Secret Key. Hit F5 of click the reload button in your internet browser. A “App Secret” now appears on your screen.

Now go back to Awesome Support settings page. Click the “File Upload” tab and scroll down to the Filepicker section. Paste your Secret Key in the “API Secret” field and hit save.
You’re done! Your Filepicker account is now secured.