Frequently Asked Questions
On this page, you'll find the most common questions about Awesome Support.
Please checkout the FAQ below before contacting us or submitting a support request.
General
Is it compatible with WPML?
The short answer to this question is: it depends on what you’re trying to accomplish. There have been reports with edge cases where WPML isn’t working perfectly. Some of the issues you might encounter include:
- Many of the configuration screens we use only support a single language. For example, there is only one data entry box for your email templates. To support more than one language you would need additional data entry boxes – one for each of the languages, which is not something we support.
- We only support one style sheet – there is no dynamic switching of style-sheets for languages.
- WPML translations will not work with product syncing with WooCommerce and EDD.
Having said that, we have written an extensive guide to setting up Awesome Support with WPML – for the areas that are supported. You can find that guide here: WPML Integration With Awesome Support.
Translating To A Single Language
If you need to support a single non-English language, you do not need WPML – in fact, that might be overkill. Instead, you can use our translation projects to translate and download our language files: Links to translation projects on poeditor.com. However, if you need to support multiple languages simultaneously (which is one key reason to use WPML), the above limitations (and likely more) will apply.
Is the price of bundles and extensions a one time payment?
No it’s not a one time payment. All bundles and add-ons need to be renewed every year if you want to keep the plugins updated (compatibility and security fixes). While you can choose to not renew, without a paid up license you will no longer receive enhancements, security and compatibility updates.
Renewal is 10% cheaper :)
Can Existing Users Submit Tickets?
If you just installed Awesome Support on a WordPress site that already has registered users, those users don’t need to create a new account. However, there are a few things to adjust in order to give them the capabilities to open tickets.
Typically, an existing user trying to submit a ticket will get an error message saying “You do not have the capacity to open a new ticket”. This is quite easy to fix. Please see Users get “You do not have the capacity to open a new ticket” for more information.
Is it possible to network activate this plugin?
Awesome Support does work out of the box with WordPress Multisite, but you have to manually activate the plugin for each site.
Submit ticket without login
Yes, you can submit a ticket without logging into the support system using our guest tickets add-on. With this add-on new users can submit a ticket without creating an account. Existing users will be required to log in.
Alternatively, you can use our EMAIL SUPPORT add-on to allow users to simply email you a ticket. You can read more about this feature here.
Troubleshooting
Resolving Conflicts With The AVADA Theme
When Awesome Support is installed on the Avada Theme, you sometimes see strange behavior with drop-downs that require searches – eg: the SUPPORT agent drop-down. This is usually because Avada and Awesome Support are using different versions of the same library (a library named SELECT2).
A possible resolution is to enable the full version of SELECT2 on Awesome Support:
- Go to the TICKETS->SETTINGS->ADVANCED tab
- Scroll down to the COMPATIBILITY section
- Select the FULL or FULL – MINIMIZED option.
- Click the SAVE button at the bottom of the screen.
In order for this change to activate properly you must clear caches:
- Clear your WordPress cache (eg: if you’re using WP ROCKET or a similar caching plugin)
- Clear your CDN cache because javascript files are usually cached on there
- Clear your browser cache for the same reason
- Your WordPress host might have a built-in cache as well that need to be cleared
Resolving Conflicts with the DIVI Theme
We have the DIVI theme on our list of incompatible themes. But, here are some ways to work around the most common issues:
Vertical lines on the SUBMIT TICKET page
You might sometimes see a vertical line in the middle of your fields on the SUBMIT TICKET page. 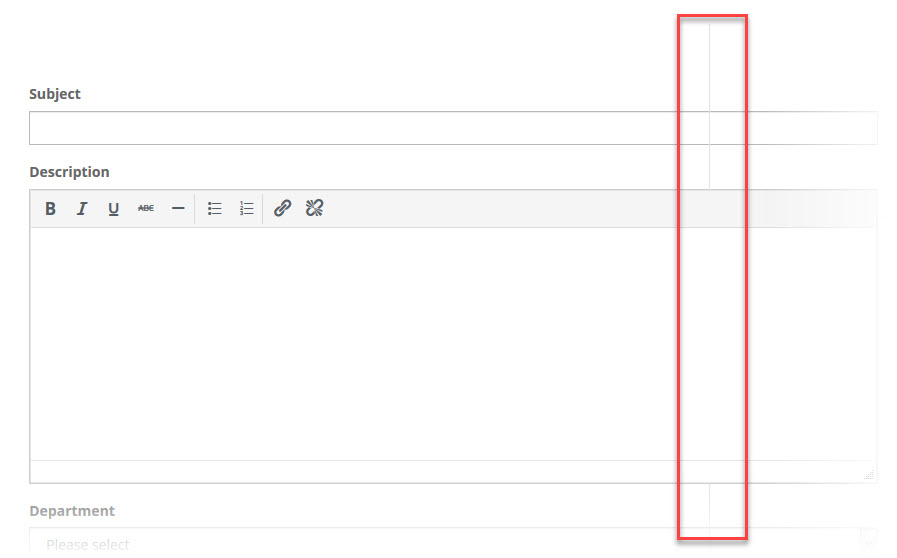
You can try adding the following CSS to your DIVI custom css field (DIVI->THEME OPTIONS) to remove this line:
.wpas-submission-form-inside-after-subject.container::before {
display: none;
}
EMAIL PIPING: “Malformed Header” shows up in debug.log and emails are not retrieved
If emails are not being retrieved, one reason could be that an error is being thrown. You can turn on the WordPress error logging flags and check the debug.log file to see if a related message is logged in there.
If the error message in the log file includes “Malformed Header” as part of the message you should check to see if there your SPAM filters are adding text to your email messages.
SPAM ASSASSIN, for example, adds some text to the headers of each email message but does it in a non-standard way. The easy fix is to turn off spam checking for your support inbox or, if available, disable the option to add spam information headers to incoming email.
Here is an explanation on StackOverflow.com that discusses why SPAM ASSASSIN might cause an issue: https://stackoverflow.com/questions/48243201/zend-mail-headers-issue-malformed-and-content-preview
Another Example
Here is another example where a SPAM filter added a header to an email that does not conform to the EMAIL RFC standards.

Why This Example Is An Issue
In this particular case the spam filter software added data to the email headers that included a sequence of line breaks – a violation of the RFC standards. Something like this will cause Awesome Support to reject the email message.
Ticket Reply Editor is Disabled and/or You Get A Message That Reply Cannot Be Blank
This can occur for a variety of reasons. Try any of the following:
- If you have the POWERPACK/Productivity add-on installed, check to see if the capability edit_ticket_with_full_editor has been assigned to your role. If so, remove it. It means that the using the advanced editor for replies is incompatible with your installation.
- Add this to your wp-config.php file: define(‘CONCATENATE_SCRIPTS’, false );
- Check for the existence of a .htaccess file in wp-includes. If one exist, remove it or rename it temporarily to see if it fixes the issue. If it does you’ll need to get with your server admin to decide how to handle that file
- Check to see if any directive in any .htaccess file might be preventing access to executions in the wp-includes/js folder. Your host might also be preventing access to this folder.
- If all else fails do a google search for “wordpress editor loaded disabled”. Maybe one of the many suggestions there might help.
Missing Tabs or Menu Options After Version 4.0 Upgrade
This happens because new WordPress security capabilities were introduced in version 4.0.0. If you are using roles that are not standard Awesome Support roles then you might need to modify them to include the additional capabilities:
Here are the new capabilities that were added to Awesome Support 4.0:
For admins and similar users:
- ‘view_all_tickets’ (Set this only if you want a non-admin user to see all tickets in the ticket list. This overrides the settings in TICKETS->SETTINGS->ADVANCED)
- ‘view_unassigned_tickets’ (This only applies if you are using the EMAIL SUPPORT add-on. Grant this to agents or admins or any role that needs to view and manage unassigned tickets)
- ‘manage_licenses_for_awesome_support’
- ‘administer_awesome_support’
For agents:
- ‘ticket_manage_tags’
- ‘ticket_edit_tags’
- ‘ticket_delete_tags’
- ‘ticket_manage_products’
- ‘ticket_edit_products’
- ‘ticket_delete_products’
- ‘ticket_manage_departments’
- ‘ticket_edit_departments’
- ‘ticket_delete_departments’
- ‘ticket_manage_priorities’
- ‘ticket_edit_priorities’
- ‘ticket_delete_priorities’
- ‘ticket_manage_channels’
- ‘ticket_edit_channels’
- ‘ticket_delete_channels’
You can use a plugin like User Role Editor to assign these new capabilities to your custom roles.
If you are NOT using custom roles and you still have an issue then try the following:
- Deactivate and Reactivate the plugin
- Go to TICKETS->TOOLS->CLEANUP and click the button next to the item labelled: Re-run conversion from 3.3.x to 4.0.0
PHP Fatal error: Can’t use function return value in write context
You will see this error in your error.log file if the WordPress debug flags are turned on. This is because you are using a PHP version earlier than 5.6.30. The minimum php version we support is 5.6.30.
Clicking An Attachment Results In A White Screen (Or A Message Indicating The File Is Corrupt)
This issue is commonly seen by users who run their own servers or VMs. The easiest fix is to place an entry in your hosts file (linux: etc/host) pointing your domain to the local IP address. eg:
10.0.0.168 yourdomain.com
The reason the error occurs is because the webserver is converting a URL call to a local filesystem call. This suggestion mitigates that issue.
Another way to mitigate the issue if you don’t have control over your server hosts file is to proxy your traffic through a free cloudflare account. However, this requires changes to your DNS.
As of version 4.0.5 of Awesome Support we have created a possible work-around that might work for you. Go to the TICKETS->SETTINGS->ADVANCED tab and scroll down to the Attachment Overrides section. Turn on the Do Not Mask Attachment Links option. Don’t forget to click the save button at the bottom of the page.
Awesome Support Conflicts With Gravity Forms
Symptom
Attempting to create a new Gravity Form does not show the standard popup box. And, there is a wpcolorpicker errror in your browser’s Javascript console.
Solution
Go to FORMS->SETTINGS (in Gravity Forms) and make sure that the No-Conflict mode is set to OFF. Ironically, setting this to ON causes a conflict.
404 Errors on FAQs or Satisfaction Surveys: Reset Permalinks
Sometimes you get 404 errors on things like FAQs or Satisfaction Surveys. There is a native WP bug. To fix it just go to the WordPress Settings->Permalinks page and click the “Save Changes” button in order to make some custom post types work. You should do this twice before trying to view them again.
Style is missing or broken
If the plugin’s pages (login/register, ticket submit, ticket list) looks unstyled, there’s a simple solution:
- Go the plugin’s Settings → Style
- Click the “Save” button
- That’s it!
Now you can refresh for instance the login/register page, and you’ll see that the forms now looks good :)
Gmail: Sign-in attempt prevented
If you’re having issues setting up Gmail with our Email Piping addon, then read this.
If you get an email from Google about “Sign-in attempt prevented”, don’t worry;
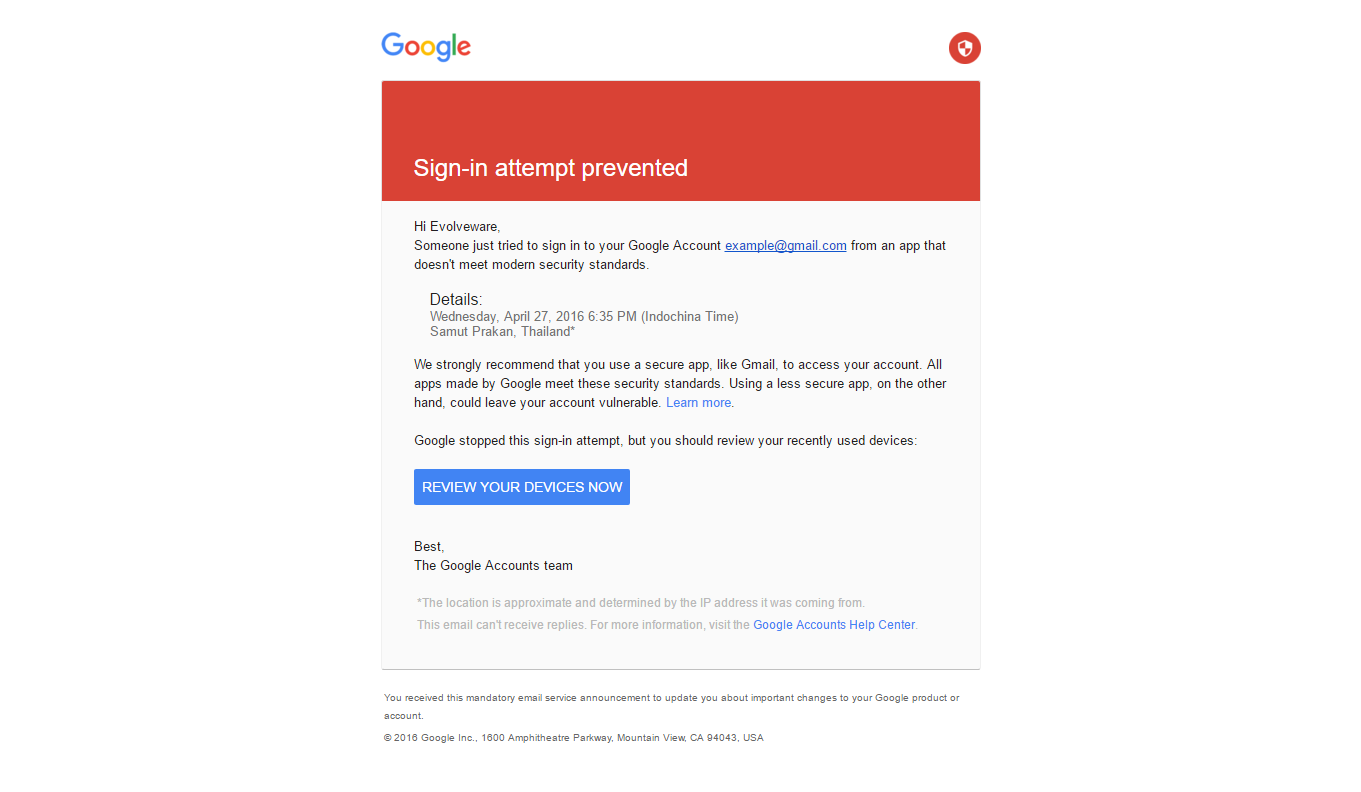
- All you have to do is to login to your Google Account here: https://myaccount.google.com/security?pli=1
- Then you turn ON the setting called “Allow less secure apps“
You will then get an email confirmation from Google:
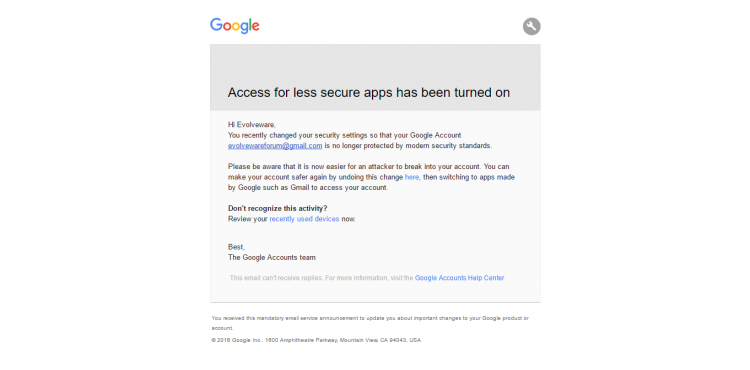
When you try to connect to Gmail, the error should now be gone :)
How to fix an empty Ticket List page
- Make sure that the page has the shortcode
Built with Awesome Support,
the most versatile WordPress Support Plugin - Go to the plugin’s Settings.
- Locate the section called “Plugin Pages”
- Make sure that your page is selected under “Ticket List”
Translation does not work
Awesome Support is available in a variety of languages. If one of these languages does not work, then please make sure that:
- Your plugin is up-to-date
- The language files exist
- The language files are correctly named, for example:
awesome-support-fr_FR.mo
You can find links to the translation projects on POEDITOR.COM here: Translation Projects on POEDITOR.COM
And, you can find out how to use POEDITOR.COM to create and obtain translations: Using POEDITOR.COM For Translations
Want to help with translations? Here are the links to the Awesome Support Translation Projects on POEDITOR.COM: Translation Project Links.
Users get “You do not have the capacity to open a new ticket”
Normally, when a user registers through the plugin, he is given the role Support User. This role has special capabilities.
If your users get the error message “You do not have the capacity to open a new ticket”, it means that they don’t have the special capabilities.
Here you have two choices:
- Change all your users’ role to Support User
- Give the role you want to use (eg. Subscriber) the special capabilities
If you don’t know how to add new capabilities to a role, I suggest you use a plugin like User Role Manager and give the desired role the following capabilities:
view_ticketcreate_ticketclose_ticketreply_ticketattach_files
Do not give your users more than those 5 capabilities, otherwise they could get administrative privileges.
The plugin data isn’t removed from the database after uninstall
If you want to delete the plugin and all of its data, you need to go to the Advanced tab in the plugin settings and check the Delete Data option. Only then the data will be removed from the database during the uninstall process.
Blank page after ticket submission
This is most likely a permalinks issue. What you need to do is log into your WordPress admin, go to Settings > Permalinks and hit the Save button. You don’t actually need to change anything, just hitting Save will refresh your permalinks structure, including the new ticket post type.
E-Mail Piping Won’t Work With Gmail
In order to improve security, Google recently added an option that blocks what they consider “less secure connections”.
By less secure connection, Google means that a third-party software trying to login using your username and password is more vulnerable than one using the more complex OAuth identification process.
The e-mail piping addon uses this method to login and that’s the reason why, with some accounts, the piping won’t work. Don’t worry though, this doesn’t mean that the addon is not secure. In fact, most e-mail clients use the same method: Microsoft Outlook, Mozilla Firebird, Mailbird…
In order to solve this problem, you need to allow “less secure connections” in your Google Apps settings. The process is detailed in Google’s documentation: https://support.google.com/a/answer/6260879?hl=en
Customization
How To Create A Custom Registration Form
One of the common requests we get is to customize our login form. Unfortunately Awesome Support does not have that feature – primarily because there are at least a dozen login-form customizer plugins out there. We figured there was no need to build yet another plugin to offer the same functionality. Instead, here is the process you can use to build your own login form and integrate it seamlessly with Awesome Support.
Build A Custom Registration Form
How To Add Content Before The Submit Button
Here is an example of how you can add some text before the submit of the ticket form. You can add this code to your theme’s FUNCTIONS.php file or to a custom plugin – a plugin is better since you wouldn’t lose changes when you switch themes.
add_action( 'wpas_submission_form_inside_before_submit', 'inside_before_test');

function inside_before_test() {

echo 'This is test output' ;

}How To Add Content BEFORE the Subject Line
Here is an example of how you can add some text before the subject line of the ticket form. You can add this code to your theme’s FUNCTIONS.php file or to a custom plugin – a plugin is better since you wouldn’t lose changes when you switch themes.
add_action( 'wpas_submission_form_inside_before_subject', 'inside_before_test');

function inside_before_test() {

echo 'This is test output' ;

}How To Remove The Close Checkbox From The Front-End
On rare occasions you might want to prevent end users from closing tickets. The easiest way to do that is to remove the checkbox that allows the user to close a ticket. You can use some CSS to do that (though, be warned, this might need adjustment if you have a custom or non-standard theme).
Place the following in your theme’s styles.css file:
div.checkbox label {
display: none;
}How to Limit the Number of Concurrently Open Tickets
If you wish to limit the number of tickets a user can have opened at the same time, you can hook into the submission process using the wpas_before_submit_new_ticket_checks filter.
Example
How to Add Custom Checks to the Ticket Submission Process
If you want to add custom checks to the ticket submission process, it can be done quite easily by hooking onto the wpas_before_submit_new_ticket_checks filter.
A ticket will only be submitted if the filtered variable returns true.
It is also possible to return an error message that will be displayed to the visitor by returning a WP_Error object.
Example
How to enable Select2 on select dropdowns?
Since version 3.3, it is now possible to turn any custom fields “select” into a Select2 Dropdown. This is particularly useful for dropdowns with lots of items.
Enable it for custom fields
It couldn’t be easier to enable Select2 for your custom fields. Simply add the argument select2 => true to any custom field (which type is select or taxonomy).
Enable it for “core” dropdowns (ie Products, Department)
To enable select2 for the products dropdown, we prepare a code snippet for you that uses the built-in filters:
How can I change/add/remove the status labels (open, close, etc.)?
Our Custom Status extension allows you to easily add and remove statuses. However, if you would like to write the code yourself read on!
Ticket “states” are filtered by the hook wpas_ticket_statuses. The hook passes an array of registered statuses where the key is the status ID and the value is the status label.
Adding Custom Status
add_filter( 'wpas_ticket_statuses', 'wpas_my_custom_status' );
function wpas_my_custom_status( $status ) {
	$status['my_custom_status'] = 'My Custom Status';
	return $status;
}
Removing Status
add_filter( 'wpas_ticket_statuses', 'wpas_my_custom_status' );
function wpas_my_custom_status( $status ) {
	unset( $status['id_of_status_to_remove'] );
	return $status;
}
Editing a Status
add_filter( 'wpas_ticket_statuses', 'wpas_my_custom_status' );
function wpas_my_custom_status( $status ) {
	$status['id_of_status_to_edit'] = 'My New Label';
	return $status;
}
You can add the above snippets in your theme’s functions.php.
Customizing the outgoing emails
Unless you’re a developer and you know what you’re doing, the best way to customize outgoing emails with WordPress is to use a plugin like https://wordpress.org/plugins/wp-better-emails/. It affects all emails sent by WordPress, not only the ones from Awesome Support.
How to change the tickets slug?
By default, all tickets will be accessed through a URL of the type domain.com/ticket/my-ticket-title.
If you wish to change the slug ticket to something else, let’s say help, so that your URLs look like domain.com/help/my-ticket-title, you need to add a constant in your theme’s functions.php file as follows:
define( 'WPAS_SLUG', 'my_new_slug' );
After you make this change you will need to reset the permalinks for WordPress – just go to SETTINGS->PERMALINKS and click the SAVE CHANGES button. This forces WordPress to update all items to use your new slug.
How to set the product field as mandatory?
If you have enabled multi-products support and want to make the “Product” field in the submission form mandatory, just add the following code snippet to your theme’s functions.php file: https://gist.github.com/julien731/a519956ce9c81542439c
How to disable agent auto-assignment?
If you need to disable the auto-assignment function and hence have all new tickets assigned to the default agent (set in the plugin general settings), you can add this constant in your theme’s functions.php file:
define( 'WPAS_DISABLE_AUTO_ASSIGN', true );Code Examples
How To Change The Description Of A Core Custom Field
You can change most attributes of a custom field with a filter – but not all attributes. For example, you cannot change the title of a custom field shown on the screen without using additional filters. But, most other custom field attributes can be changed. Below is an example of how to change the description of a custom field (the text shown under or next to a custom field other than its name).
add_filter( 'wpas_get_custom_fields', 'wpas_change_product_desc' );

function wpas_change_product_desc( $custom_fields ) {

	if ( isset( $custom_fields['product'] ) ) {
		$custom_fields['product']['args']['title'] = 'New Product Title';        //****This will NOT work consistently***
		$custom_fields['product']['args']['desc'] = 'New Product Title Desc';    // This will work
	}

	return $custom_fields;
}
How To Change The Label Of A Core Custom Field
Awesome Support implements a lot of its data using its own custom fields functionality. As such you can use many of the built in custom fields functions, actions and filters to control how these fields behave. Examples of fields that are implemented this way include Product and Department.
Additionally, in version 3.6 and later, fields such as Priority, Channel and a few other core fields were introduced. Along with these new fields, there is a filter that can now be used to change the labels attached to these fields. Here is an example function that uses this filter:
add_filter( 'wpas_cf_field_label', 'wpas_cf_change_label', 10, 2 );
function wpas_cf_change_label( $label, $field ) {

    switch ( $field[ 'name' ] ) {

        // Ticket Priority label
        case 'ticket_priority':

            return 'A New Ticket Priority Label';
            break;

        // Ticket Channel label
        case 'ticket_channel':

            return 'A New Ticket Channel Label';
            break;

        // Department Label
        case 'department':

            return 'A New Department Label';
            break;

        // Product Label
        case 'product':

            return 'A New Product Label';
            break;

        default:

            return $label = 'NEW TOO: ' . $label;

            break;

    }

}
Column Headers In The Ticket List
The above filter only applies to custom fields defined internally by Awesome Support. These fields will have the labels changed in the header of the ticket list. BUT, the ticket list has other fields that are not internal custom fields. For these, you would have to use a different filter:
add_filter('wpas_custom_column_title', 'wpas_custom_column_title', 10, 2);
function wpas_custom_column_title( $field_title, $field ) {

if( empty( $field ) ) {
 return 'Error';
}

switch ( $field['name'] ) {

 case 'product':

 return 'PROD ' . $field_title;
 break;

 case 'department':

 return 'DEPT ' . $field_title;
 break;

 case 'ticket_channel':

 return 'CHAN ' . $field_title;
 break;

 case 'ticket_priority':

 return 'PRIO ' . $field_title;
 break;

 case 'ticket-tag':

 return 'TAG ' . $field_title;
 break;

 case 'wpas-activity':

 return 'ACTV ' . $field_title;
 break;

 default:

 return $field_title;

}
}
Finally, there are even other columns that have to be handled differently. Here is an example of those:
add_action( 'manage_ticket_posts_columns', 'wpas_column_title', 20, 1 );
function wpas_column_title( $posts_columns ) {

$posts_columns[ 'date' ] = 'Last Modified';

$posts_columns[ 'id' ] = 'Ticket #';

$posts_columns[ 'title' ] = 'new title';

return $posts_columns;

}
Requires
All of these filters require Awesome Support 3.6.0 or later in order to work!
How To Add Content Before The Submit Button
Here is an example of how you can add some text before the submit of the ticket form. You can add this code to your theme’s FUNCTIONS.php file or to a custom plugin – a plugin is better since you wouldn’t lose changes when you switch themes.
add_action( 'wpas_submission_form_inside_before_submit', 'inside_before_test');

function inside_before_test() {

echo 'This is test output' ;

}How To Add Content BEFORE the Subject Line
Here is an example of how you can add some text before the subject line of the ticket form. You can add this code to your theme’s FUNCTIONS.php file or to a custom plugin – a plugin is better since you wouldn’t lose changes when you switch themes.
add_action( 'wpas_submission_form_inside_before_subject', 'inside_before_test');

function inside_before_test() {

echo 'This is test output' ;

}Make License Field Optional When Using The Easy Digital Downloads Extension
An example on how to do this is posted here: pastebin.com/0xx8HY0h
Account Issues
Clicking The Activate Button For Your License Results in The Message “Your license is valid but inactive. Click the button above to activate it”
This probably means that your license is already activated on another site and you do not have any additional sites available in your license level. You can manage the sites associated with your license by logging into your account on our site. Then, under the section titled YOUR PURCHASE HISTORY you will see a link for VIEW LICENSES. Click on that link and it will take you to your list of products with licenses. Click on the MANAGE SITES link – there you can remove an existing site. After that your activate button should work to enable your new site.
How To Change The Domain Associated With Your License
You can manage the sites associated with your license by logging into your account on our site. Then, under the section titled YOUR PURCHASE HISTORY you will see a link for VIEW LICENSES. Click on that link and it will take you to your list of products with licenses. Click on the MANAGE SITES link – there you can remove the existing site and add in the new site.
Issues With GDPR And Privacy Functions
Submitting A Request To “Delete My Data” Results in Undefined or Other Error Messages
When we submit the ticket to create the request to delete the data, it bypasses all pre-submission checks – including ones such as verifying licenses and order numbers. However, if you have custom code that does pre-submission checks of your own then the ticket will not be created and the user will see an error message. You should modify your code to not require these checks if the ticket is a data deletion request.
Zip File With Exported Tickets Is Corrupted
We’ve seen corrupted zip files when WP-ROCKET is installed. It is possible this can happen when other caching plugins are involved as well. This only happens when the customer downloads the file so you can still get the file to your customer directly from your server. Just go to the user’s profile and click the EXPORT button. This will create the file under your wp-content/uploads/awesome-support/[userid] folder. Just access the file via FTP and send to your customer via drop-box or other sharing services.
THREE EASY WAYS TO GET STARTED WITH AWESOME SUPPORT TODAY!
Purchase A Bundle
Download Free Plugin
Install From WordPress.org