Migrating from version 2 to version 3
Awesome Support used to be distributed through CodeCanyon. Up until version 2.1.4 it was the only option you had to purchase the plugin.
For several reasons, we have decided to distribute the plugin for free starting from version 3. However, if you purchased it from CodeCanyon before that, there was no way to update to the latest version and migrate your data. Until now.
A couple of days ago (June 20th 2015), we finally finished developing a first version of the migration script that will take all the core data from your database and convert it in a format that's compatible with Awesome Support version 3+.
In case you haven't heard, we will also exchange your old CodeCanyon license for the equivalent addons compatible with the latest version of the plugin. Simple go to this page and input your Envato/CodeCanyon purchase code: http://getawesomesupport.com/envato-license-migration/
It is important to note that, in version 3+, the following features are not bundled in the core but sold as extensions:
- Private Notes
- Canned Responses
- Envato Validation
- Filepicker upload
All 4 items are included for free in the license exchange program as long as you upgrade before July 31st 2016.
Migrating the Data
The migration is fairly easy, but there are a couple of things you need to do in order to safely migrate your database. Please be sure to follow these steps carefully.
Install the Script
The first thing you need to do it to download the migration script and upload it to your site. You can either upload the zip file from your dashboard, or use your FTP client to upload it to: wp-content/plugins.
Once the plugin is up on your site, you can activate it. You will now see a new sub-menu item called "AS Migration" under Tools.
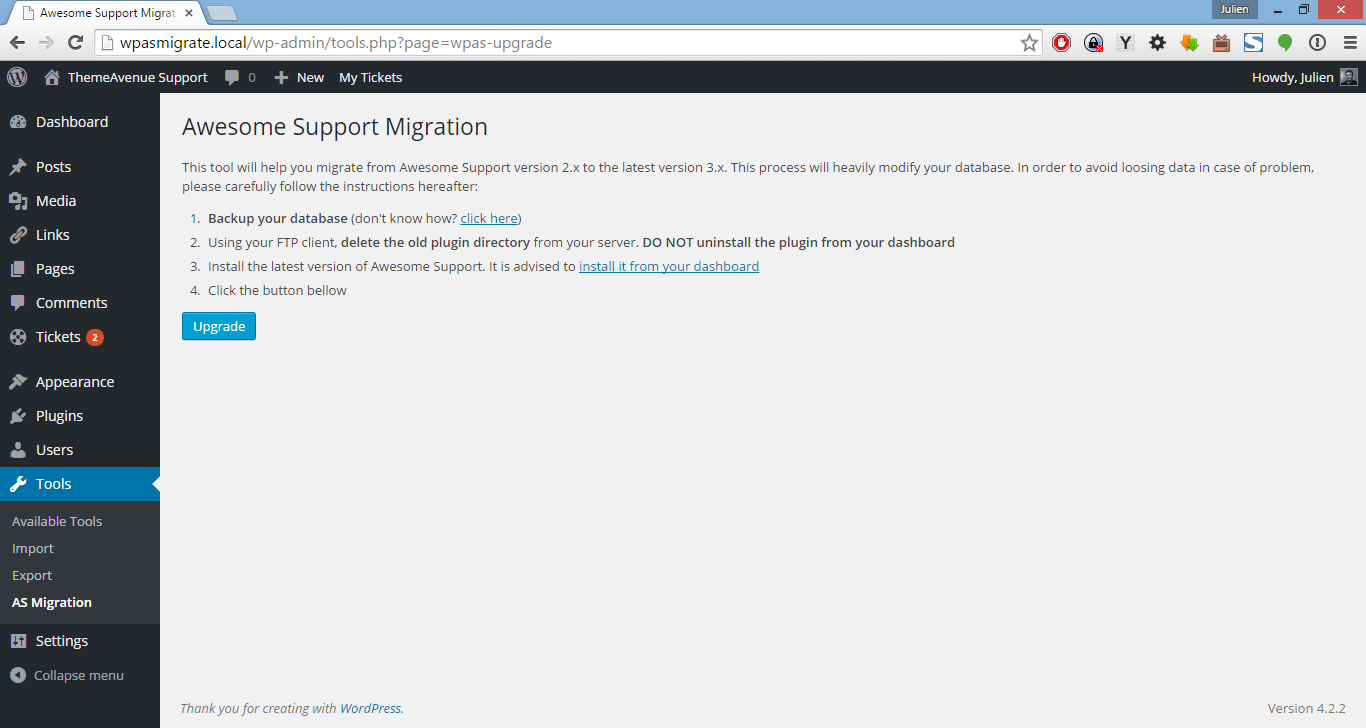
Awesome Support Migration Tool
Backup your Database
Before changing anything on your site, you need to backup your database. This is a crucial step as it is the only thing that prevents you from loosing data in case of problem.
If you don't know how to to that, WordPress has a very good tutorial on this topic: https://codex.wordpress.org/Backing_Up_Your_Database
Delete the plugin's files (Awesome Support 2.x)
This step is very important. Do not delete version 2 from directly your dashboard. This would delete all the tickets from your database. Instead, you need to browse to the wp-content/plugins directory using your FTP client and manually delete the plugin directory (it should be awesome-support).
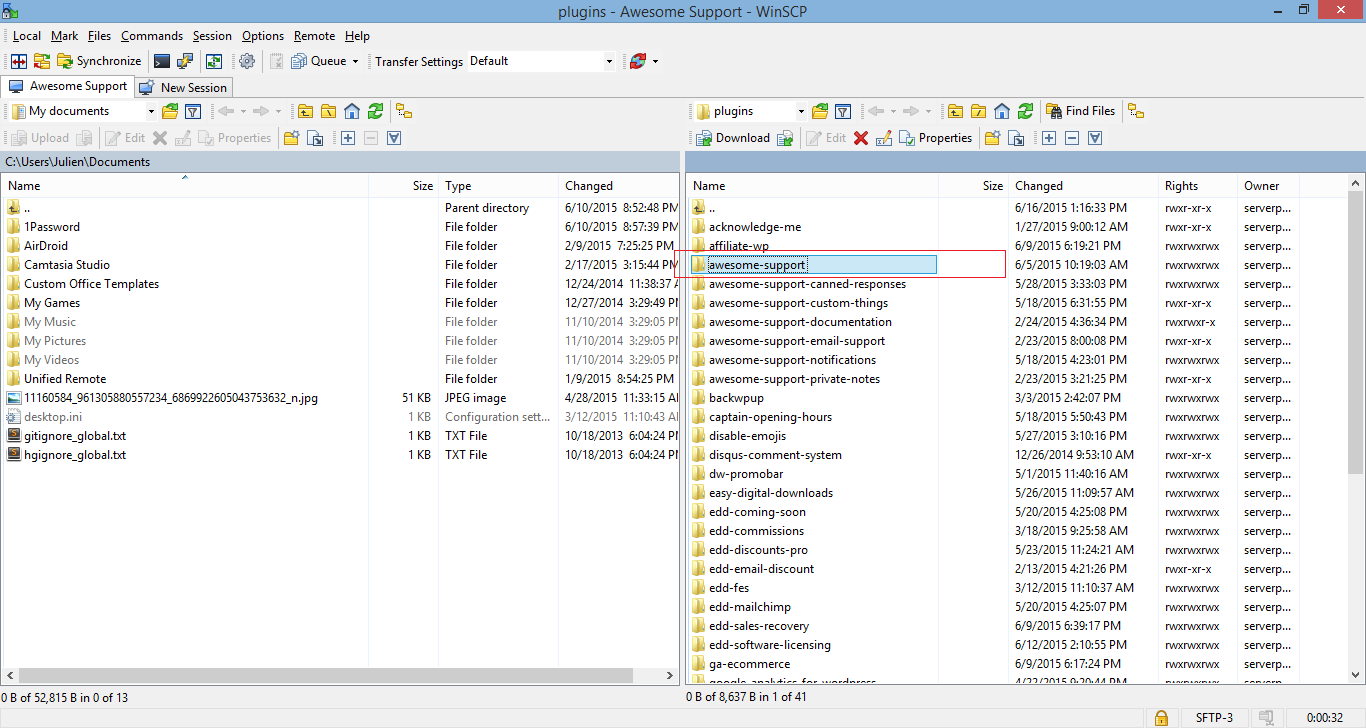
Manually Deleting Awesome Support
Install the Latest Version
Now that you have manually deleted the old version, you can go ahead and install the latest version of Awesome Support from WordPress.org. You can also install it directly from your dashboard by searching the term "Awesome Support" in the plugin installation screen.
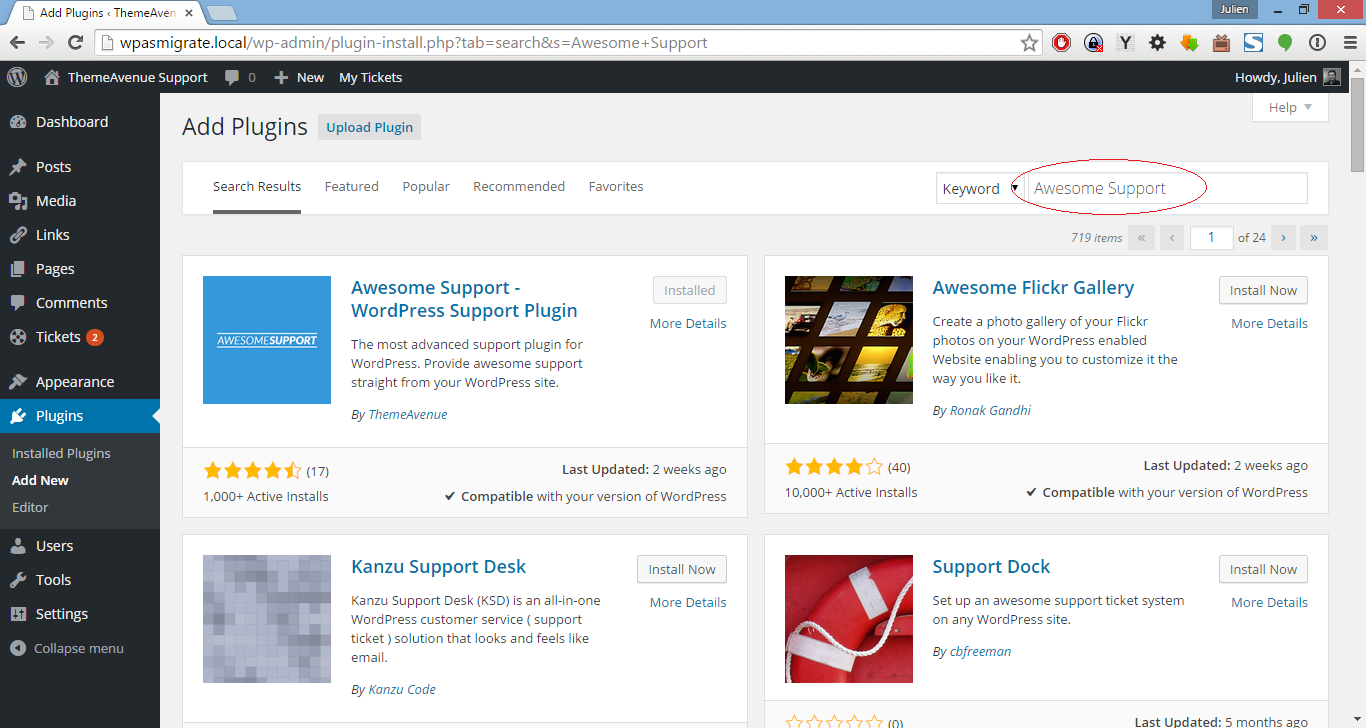
Installing Awesome Support
Convert Custom Fields
This step is only necessary if you use custom fields on your support site. The custom fields migration happens in two steps:
- Register the new fields in your site
- Migration of the fields values in the database
Step 2 is taken care of by the upgrade script so you don't need to do anything. For step 1 though, you will need to edit your theme's functions.php file and use the new functions for registering the custom fields.
The hard work is automatically done by the migration script. Just copy and paste the given code and you're good to go.
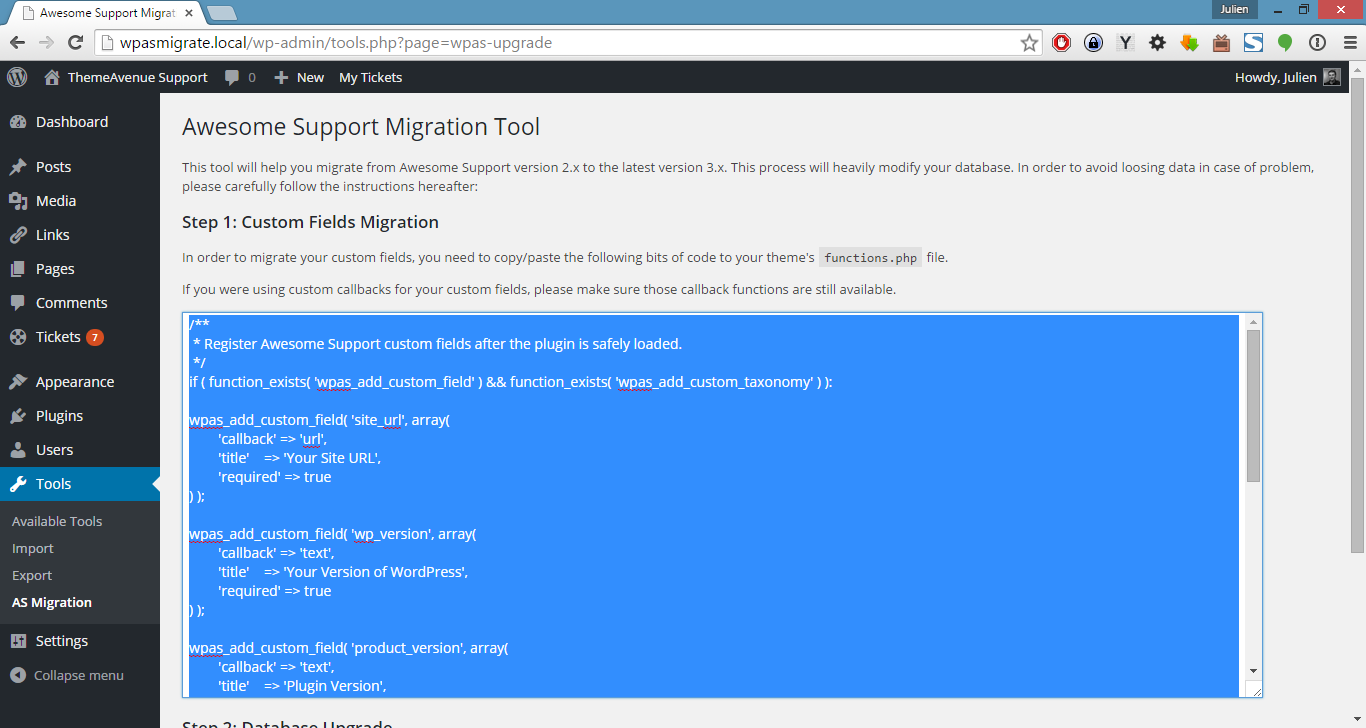
Migrate Custom Fields
Run the Script
Now that all the preliminary steps are done, we can run the migration script. But before that, you should know the basics of how it works.
In order to avoid timeout issues (when the site takes too long to load), we have broken down the migration process into multiple batch. Each batch will migrate 80 tickets. When a batch is done, a message will tell you the total number of tickets migrated and the page will reload automatically.
This cycle will loop for as long as needed. Even if you have thousands of tickets in your database, you should be able to migrate them all safely.
Troubleshooting
In case you experience timeout issues and the migration process can't be completed, you can reduce the number of tickets being processed per batch. This involves one line of code and it's not difficult at all.
- Using the FTP client, navigate to /wp-content/themes/yourtheme (don't forget to look for your current theme's name and not yourtheme ;)
- Open the file functions.php with a text editor
- At the end of this file, paste the following line of code:
add_filter( 'wpas_migration_script_processing_limit', 50 );
This will result in reducing the number of tickets migrated per batch to 50. If this is still too high, change 50 into something smaller.
Once the migration is completed, a message will tell you how many tickets were converted and how many errors occurred (hopefully 0 ;).
Support
That's it. There is nothing else to do. All your data should be up to date and you should see all your tickets in the new version.
However, for the period following the release of this script, we will keep a special support channel open. This channel will be dedicated to supporting migration issues.
To get support, you can e-mail us at migration@getawesomesupport.com. This address will be live until July 10th 2015. After this date, the e-mail will be deactivated and we will no longer receive e-mails sent to it.
If you have other questions, please use the WordPress.org support forums or the priority support on this site if you're a paying customer.
THREE EASY WAYS TO GET STARTED WITH AWESOME SUPPORT TODAY!
Purchase A Bundle
Download Free Plugin
Install From WordPress.org