5 Ways To Label Your Tickets
Applying labels to your tickets can be extremely valuable. Labels allow you to sort, categorize, filter and prioritize your tickets. Awesome Support includes multiple methods to apply meaningful labels to your tickets. And with those labels you can create more meaningful reports.
Here are five ways you can apply labels to your tickets in Awesome Support. You can use all these methods simultaneously - providing multiple options when creating custom reports.
Custom Status And Labels (Free add-on)
We offer a free add-on that is available to anyone that signs up for our email newsletter. You can sign up directly inside the free core Awesome Support plugin - just go to TICKETS->GET A FREE ADDON.
With this free add-on you can create an almost unlimited number of custom labels and then apply them to a ticket.
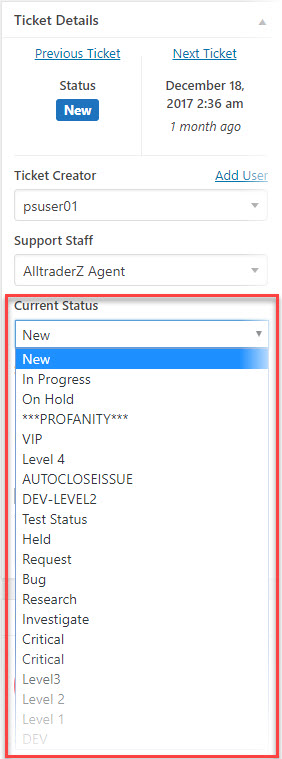
A ticket can have one and only one custom label. However, each label can be color-coded using a standard modern color picker.
Once the add-on is installed you can go to TICKETS->STATUS AND LABELS to create your own color-coded labels.

Labels can be applied to tickets in the ticket details metabox...
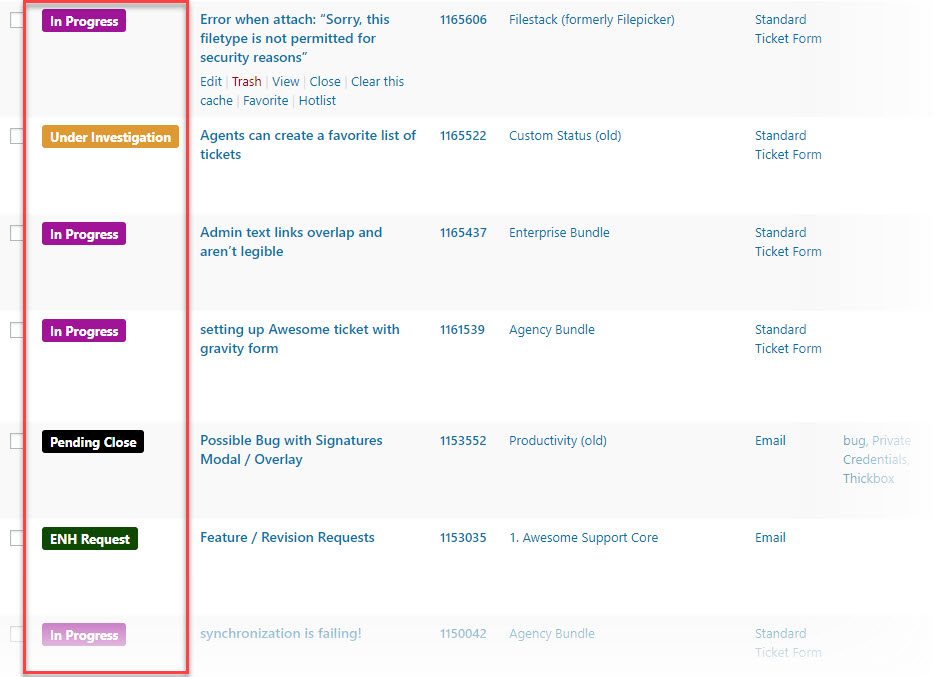
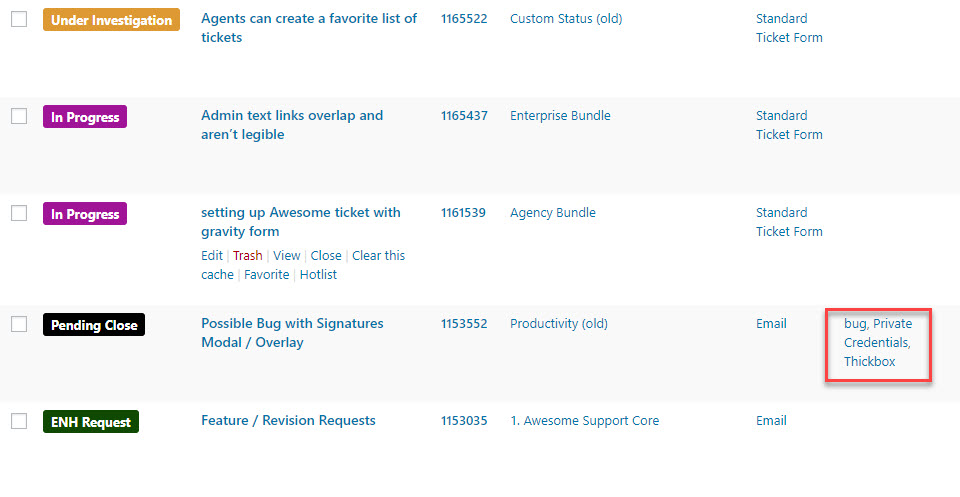
In your ticket list, the color coded status is in the first column:
Custom status and labels can be used to filter the ticket list as well...

Tags
Tags allow you to create multiple labels on the fly and attach them to tickets. In this way they are similar to the tags that are used in many other websites, articles and images across the internet.
To add a tag to a ticket simply start typing into the TAGS box on the right hand side of the ticket...
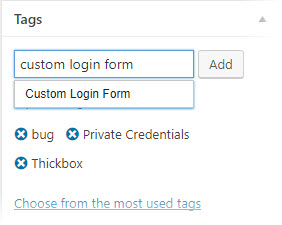
Tags added to a ticket will show up directly in the master ticket list:
Priorities
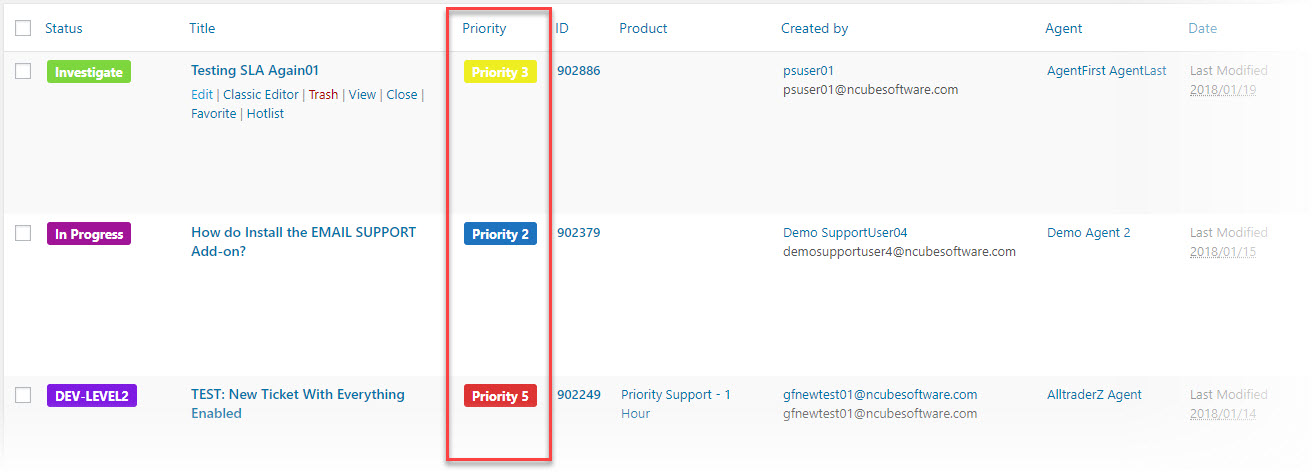
Setting a priority on a ticket is another way to categorize and classify a ticket and, of course, is one of the most popular methods for segregating tickets. Create custom priorities with unique color codes in TICKETS->PRIORITIES and then assign them to tickets. You can allow your customers to pick a priority on the front-end or you can restrict their use to just agents.
Your ticket list can be sorted and filtered by priority to help you focus on the most important tickets first.
Custom Fields
The title of this article implied that we would provide five options that you can use to label your tickets. With custom fields though, you can create hundreds of ways to label your tickets. For example, you can create a custom field for "Color" or "Region" or "Style". Then you can sort and filter your master ticket list on that custom field.
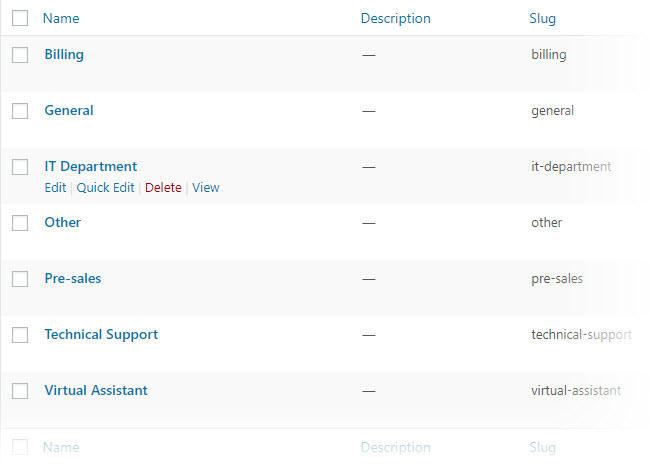
Departments
While not as common, it is possible to use the Department feature as another way to classify and categorize your tickets. As with Priorities, you can allow your end user to select a department thus giving them a small level of control over how their tickets are handled.
In order to use Departments you must first turn it on in the TICKETS->SETTINGS->GENERAL tab and then go to TICKETS->DEPARTMENTS to create your initial list.
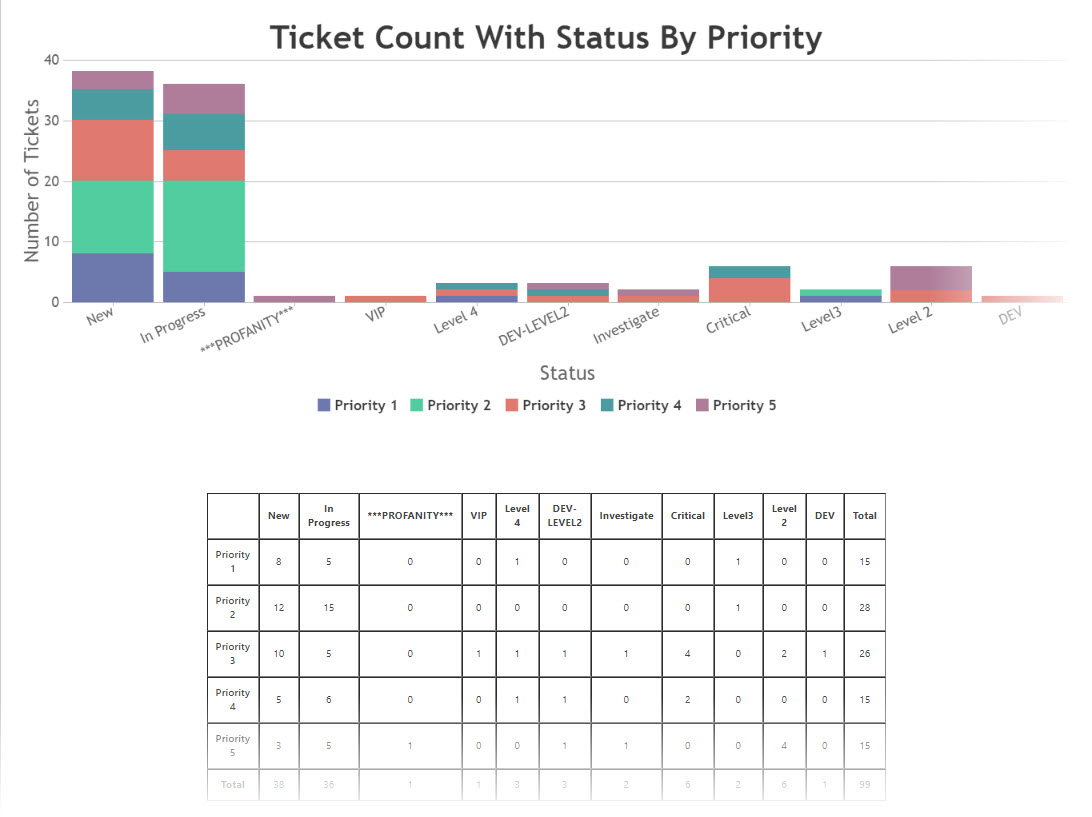
Using Your Labels To Create More Meaningful Reports
Once a label has been attached to a ticket, you can usually use it in custom reports to slice and dice your data. For example, here is a chart and a table showing the number of tickets currently open by priority and status.
THREE EASY WAYS TO GET STARTED WITH AWESOME SUPPORT TODAY!
Purchase A Bundle
Download Free Plugin
Install From WordPress.org